The TaylorMade R540 XD irons are a popular choice known for forgiveness and distance improvement. Featuring a cavity-back design that increases the moment of inertia (MOI), these irons are forgiving on off-center hits, making them ideal for golfers who may frequently miss the sweet spot. The shaft options, including steel and graphite, cater to diverse swing speeds and player preferences.
I’m a stickler for trying out new golf equipment. So, when a buddy at the club told me about his fantastic experience trying out the 22-year-old Taylormade R540 XD Irons, I was stunned and wanted to try it myself without passing on any premature judgment. Trying out the Taylormade R540 XD Irons was like entering a golfing wonderland. The first swing? It was like discovering a secret code for perfect hits. The sound it made and how the ball soared was the real deal! These golf clubs can make anyone feel like a pro.
In this article, I’ll walk you through the key features of the Taylormade R540 XD Irons, share its performance during my test try, and deduce the advantages and drawbacks of using it so you can make an informed decision of whether or not to get this old model or stick to the new ones.
TaylorMade R540 XD Irons Specifications
The TaylorMade R540 XD Irons are super cool golf clubs that are good at helping you hit the ball just right. They’re made with cutting-edge technology and precision engineering to ensure they work great for all golfers, whether you’re just starting or a pro.
3 Iron: 5.0 mm, 4 Iron: 4.5 mm, 5 Iron: 4.0 mm, 6 Iron: 3.5 mm, 7 Iron: 3.0 mm, 8 Iron: 2.5 mm, 9 Iron: 2.0 mm, Pitching Wedge: 1.5 mm
First Impression
Upon my first swing with the TaylorMade R540 XD irons, it was as if these clubs had an uncanny understanding of my game. Since being released back in 2002, they’ve earned their stripes for good reason. What struck me immediately was the forgiving nature of these irons—a real game-changer for someone like me who doesn’t always find the sweet spot. The cavity-back design seems like golf magic; even on those slightly off-center hits, the ball still took off with surprising accuracy.
But it’s the distance these irons offer that left me genuinely impressed. The low and deep center of gravity wasn’t just a spec; it was a noticeable boost to my shots. With each swing, the ball soared higher, and the added spin made me feel like I had an extra edge on the course. And let’s talk about that inverted cone technology—a fancy term, but in action, it meant more consistent distances, even when my swing wasn’t picture-perfect. The sweet spot seemed to have expanded its borders, giving me a confidence boost with every swing.
Having the option to choose between steel and graphite shafts felt like a personalized touch. I went with the graphite option for that extra clubhead speed, and it paid off. The lighter feel of the graphite allowed my swings to feel smoother, giving me the sense that these irons weren’t just tools but an extension of my playing style.
Appearance
The TaylorMade R540 XD irons are a no-nonsense blend of classic design and modern functionality. The polished finish gives them a clean and timeless appearance that won’t go unnoticed on the course. The cavity back design adds a touch of sophistication without being too flashy, and the slightly oversized clubhead inspires confidence without compromising the traditional blade-like look.
At the address, the irons maintain a straightforward and practical vibe. The well-defined top line and subtle offset give a feeling of control, and the red accents provide visual interest without being over the top. The alignment aid on the clubhead is a practical touch that adds to the overall usability of these irons.
Forgiveness
The forgiveness factor of the TaylorMade R540 XD irons was a standout feature during my rounds with these clubs. The cavity back design, a subtle yet effective characteristic, became apparent as I encountered a few off-center hits. The weight distribution around the perimeter of the clubhead, a result of this design, worked in my favor, providing a forgiving quality that helped maintain shot accuracy even when my ball contact wasn’t ideal.
For someone who occasionally struggles with hitting the sweet spot consistently, the oversized clubhead and enlarged sweet spot were a game-changer. Off-center hits didn’t result in the usual loss of distance or accuracy; instead, the irons demonstrated a remarkable ability to minimize the impact of my mishits.
Pricing Value
Since the release of the TaylorMade R540 XD Irons in 2002, they’ve gained a reputation for their consistency, distance, and forgiveness. You can find it in many golf shops and online stores if you want to purchase it.
The pricing for these irons varies depending on the condition. You can purchase used TaylorMade R540 XD Irons online for as low as $100 to as high as about $290.
Comparison with Other Alternatives
The R540 XDs pack a punch of distance, forgiveness, and a surprisingly good feel, making them the modern frontrunner for mid-handicappers looking for an upgrade. However, their price tag might be a barrier for some. The X-20s and G5s offer fantastic value for their performance, but their age shows in terms of distance potential and overall playability.
The Callaway X-20 Irons, introduced in 2006, have made a lasting impact in the golfing community, offering a combination of forgiveness, accuracy, and feel that appeals to a wide range of players. These irons have become popular with golfers seeking performance and reliability on the course. One notable feature of the X-20 irons is their traditional cavity-back design. This design incorporates a wide sole, a critical element that lowers the center of gravity. The lowered center of gravity, in turn, enhances the moment of inertia (MOI).
The Ping G5 Irons, released in 2005, have solidified their reputation as a set known for forgiveness, consistency, and feel. These irons have become a favorite among golfers seeking reliability and performance, making them a noteworthy choice in the golfing community. The G5 irons have a tremendous cavity-back design, incorporating a wide sole. This design choice serves a dual purpose by lowering the center of gravity and increasing the moment of inertia (MOI). The lowered center of gravity enhances the ease of launching the irons, making them particularly forgiving on off-center hits.
Here are some of the key features of these irons side by side so you’ll get an idea of what they have to offer:
3 Iron: 5.0 mm, 4 Iron: 4.5 mm, 5 Iron: 4.0 mm, 6 Iron: 3.5 mm, 7 Iron: 3.0 mm, 8 Iron: 2.5 mm, 9 Iron: 2.0 mm, Pitching Wedge: 1.5 mm
3 Iron: 5.0 mm, 4 Iron: 4.5 mm, 5 Iron: 4.0 mm, 6 Iron: 3.5 mm, 7 Iron: 3.0 mm, 8 Iron: 2.5 mm, 9 Iron: 2.0 mm, Pitching Wedge: 1.5 mm
3 Iron: 5.0 mm, 4 Iron: 4.5 mm, 5 Iron: 4.0 mm, 6 Iron: 3.5 mm, 7 Iron: 3.0 mm, 8 Iron: 2.5 mm, 9 Iron: 2.0 mm, Pitching Wedge: 1.5 mm
Price (for used)
As low as $100 to about $290, depending on the condition
As low as $100
As low as $150
Taylormade R540 XD Irons: Pros and Cons
If you’re a golf enthusiast looking for a forgiving, distance-enhancing iron with a large sweet spot and a low center of gravity, the TaylorMade R540 XD irons might be an excellent option for you. However, it would be best if you considered the advantages and disadvantages before purchasing.
What I liked
The irons are designed with a cavity back that distributes the weight around the clubhead’s perimeter, making them more forgiving on off-center hits.
The low and deep center of gravity helps to launch the ball higher and with more spin, resulting in longer shots that can help golfers reach the green with fewer strokes.
The Inverted Cone Technology (ICT) expands the sweet spot of the clubface, allowing for more consistent distance and accuracy, even on mishits.
The irons come with steel and graphite shaft options, allowing golfers to choose the option that best suits their swing speed and preferences.
What I Didn’t Like
Some golfers find the oversized clubhead of the R540 XD irons to be a bit unwieldy.
The irons may not be suitable for golfers who prefer a traditional blade-style iron.
The R540 XD irons were released in 2002, so they may not be as up-to-date as newer models.
It may be challenging to find these irons for purchase since they are no longer being produced.
Final Thoughts
The TaylorMade R540 XD irons have undoubtedly proven to be a remarkable choice for golfers of all skill levels since their introduction in 2002. These irons have stood the test of time, consistently delivering exceptional performance on the golf course.
The forgiving design, characterized by an oversized clubhead and an enlarged sweet spot, ensures maximum distance and accuracy, a feature particularly advantageous for those with higher handicaps. The low center of gravity contributes to higher launches and a more penetrating trajectory, resulting in increased distance and enhanced control, especially during approach shots.
The best golf cart back seat kit should feature robust frame construction for lasting durability, straightforward installation, plush and comfortable cushioned seats, and, of course, seamless compatibility with your golf cart. Affordability is also a plus to ensure you stay within your budget.
Over the last two years, my 2010 Yamaha G29 cart has been reliably functional. However, earlier this year, my boys started to join me on the course more often. The challenge of accommodating everyone in the cart became a hassle, taking the joy out of the comfortable rides I always enjoyed. To address this, I invested in a golf cart back seat kit. After testing various models, I’ve compiled a list of the top five that demonstrated outstanding performance during trials.
After thorough consideration and testing, I ultimately chose the Yamaha G29 Drive Rear Flip Seat Kit. The sturdiness of this golf cart back seat kit impressed me, and the installation process was surprisingly straightforward. The overall aesthetic enhancement it brought to my golf cart was noteworthy. The cushions, made of high-quality material, provided exceptional comfort. While the price was slightly higher than my initial budget, the kit’s functionality and quality more than justified the cost. It’s essential to note that the selection of a golf cart back seat kit should align with the specific model of your golf cart, as not all kits are universally compatible. I opted for this model because it was the most suitable for my golf cart’s specifications.
In the rest of this article, I will evaluate alternative options, delve into their functionalities, present a comprehensive assessment of their performance in testing, highlight their advantages, and outline any drawbacks that surfaced during the evaluation. Let’s go.
Specification comparison
These backseat kits for golf carts are constructed from highly durable materials to ensure longevity and incorporate features that enhance their functionality. The table below compares their distinctive features, providing a comprehensive overview to assist you in making a prompt and informed decision about which option best suits your needs.
Yamaha G29 (2007–2016) and Drive2 (2017 and newer) models of golf carts
EZGO RXV Model (2008–2015)
EZGO TXT and Medalist make and model golf carts for all years, including the newer 2014 and newer TXT Valor Carts.
Club Car DS 1982-2000.5 (Old Style) | Club Car DS 2000.5-2013 (New Style)
Yamaha G14/G16/G19/G22 Models
Seat cushion material
Upholstered with marine-grade vinyl
Marine-grade vinyl
Marine-grade vinyl and high-density plastic backer board
Upholstered with marine-grade vinyl
Upholstered with marine-grade vinyl
Seat Weight
120 lbs
120 lbs
120lbs
120 lbs
90 lbs
Carry Load-Rating
400 lbs
400 lbs
400 lbs
400 lbs
400 lbs
Cargo Bed Material
Aluminum diamond plated with an industrial-grade polished finish
Steel square tube, aluminum diamond plate
Durable powder-coated steel
Aluminum diamond plated with an industrial-grade polished finish
Aluminum diamond plated with an industrial-grade polished finish
Price
$369.95
$369.95
$334.00
$379.99
$369.99
Yamaha G29 Drive Rear Flip Seat Kit
This golf cart back seat kit offers exceptional durability and impressive quality. The cushions provide a level of comfort that is both superb and sturdy. The easy installation process is another standout feature. Thanks to the innovative Flof Golf feature, transforming your cart from a 2-passenger configuration to a 4-passenger setup is a breeze, adding further versatility to this kit.
Feature
I was impressed with this seat kit’s folding capability. Flipping and folding the bottom seat cushion effortlessly is a game-changer, turning my 4-passenger golf cart into a versatile cargo bed for easy load transportation.
The construction is top-notch, made from high-quality materials like steel (1″ square tubes), aluminum diamond plate cargo bed, and stainless steel hardware and fasteners. This rear flip seat kit is built tough and designed to handle challenging conditions.
The cushions are made with marine-grade vinyl for long-lasting comfort, style, durability, and UV protection. I appreciate the added safety measures, such as the protective rubber trim along the edges of the diamond plate, ensuring a smooth and secure seating experience.
The aluminum diamond-plated cargo bed with an industrial-grade polished finish provides exceptional strength and durability. I also love the use of black industrial-strength powder coating for all seat frames, guaranteeing long-lasting durability and maintaining the cart’s attractive appearance without rusting over time.
With a cargo bed weight rating of 400 lbs, I’m confident it can handle loads within and under this rating. The overall weight of the kit is around 120 lbs, adding to its sturdiness.
It’s worth noting that this kit is specifically designed for Yamaha G29 (2007–2016) and Drive2 (2017 and newer) model golf carts. Unfortunately, it won’t fit on the G2-G22 or other models.
Included in the package are all the necessary components, like
The detailed installation instructions with pictures make the setup process straightforward and user-friendly.
Performance
I recently added this back seat to my 2010 Yamaha G29 cart, and the installation process was pretty straightforward, taking roughly 3.5 hours. While mostly clear, the instructions had a couple of confusing points. For instance, the manual suggested removing the roof for access and then supporting it while removing the rear supports, which seemed contradictory. I opted to remove the roof without additional support. Additionally, I had to clean up the threads on two nuts and one bolt.
The quality is impressive. Despite being a large guy at 315 lbs, I can stand on the back platform without issues. The seats are well-made, and I highly recommend this product for your cart.
I did encounter a small issue with a saw cut and a 3/4″ burr on the seat frame that was powder-coated over and quite sharp, but the fitment to my cart was good.
One thing that stands out about this product is its craftsmanship. Beyond just the quality, the packaging and instructions are commendable. The hardware was well organized and labeled, matching the steps in the instructions. The instructions are printed in color on water-resistant paper with clear photos for each step, and they even specify the wrench size or tool needed for each step.
The seat is sturdy, and the one I received had a grip handle at the back without the little step behind the footrest, making it even better than pictured. I also added seat belts for safety, especially when carrying passengers in the back seat.
Overall, it fits my cart perfectly, and I recommend having a second set of hands to help with the installation, making the process much easier.
What I liked:
High-quality materials, including steel tubes, aluminum diamond plates, and stainless steel hardware.
Innovative design allows easy transformation from a 2-passenger to a 4-passenger setup.
Comfortable cushions for comfort, style, durability, and UV protection.
Seamless fits into Yamaha G29 (2007–2016) and Drive2 (2017 and newer) model golf carts.
The installation instructions had some confusing points.
EZGO RXV Rear Flip Seat Kit
The EZGO RXV Rear Flip Seat Kit distinguishes itself with its user-friendly installation process, and its fold-down feature adds high functionality. However, it falls short in terms of durability. This golf cart back seat kit is designed to fit the EZGO RXV model from 2005 to 2015.
Features
This golf cart back seat kit features a cushion crafted from high-quality marine-grade vinyl. Weighing in at around 90 pounds, it’s one of the lighter options available, making installation a breeze. The frame, created through a specialized tube-bending manufacturing process, gives the kit a robust form while ensuring it maintains strength.
One standout feature is the aluminum diamond-plated cargo bed with an industrial-grade polished finish, offering increased durability and longevity during performance. A cargo bed with a load weight rating of 400 lbs is designed to handle substantial loads without compromise.
I appreciate the thoughtful design, including a protective rubber trim along the edge of the diamond plate, which provides passenger protection and ensures a comfortable sitting experience. The comprehensive combo package usually includes
a rear flip seat with a bag holder kit,
footplate support, and installation hardware.
User-friendly installation instructions, complete with pictures, make the assembly process straightforward.
Performance
While the installation process was pretty straightforward, I felt the instructions could have been a bit more detailed, and clearer pictures would have been helpful. Despite this, the seat and fold-down storage shelf have proven excellent for accommodating extra passengers or transporting items. Getting the Bagwell bar to fit perfectly took a bit of maneuvering, but it eventually slid into place like a glove. I tackled the installation solo and, armed with the right tools, got it done in about 2.5 hours.
The final result closely resembled the provided picture, although there were some issues with bolt lengths, requiring the use of spacers. The footrest brackets were not as wide as depicted, prompting the need to drill new bolt holes. While this wasn’t a major setback, it did add some extra time to the installation process.
In terms of construction, the kit is well-built, but it’s important to note that the seat is somewhat narrow compared to fixed seats or other 2-in-1 options. It might be a bit cramped for two adults on an extended journey, but it works well for kids.
A couple of suggestions for improvement would be to paint the metal with a gloss finish to better match the EXGO color and address the hole pattern discrepancy between the seat and seat bracket.
Another hiccup was with the D-ring that opens the hatch for the cooler—it cracked due to thin plastic. Aside from that issue, the kit performs perfectly.
What I liked:
Fold-down feature for extra storage or passengers.
High-grade materials, including marine-grade vinyl and a strong frame.
It comes with the necessary hardware and accessories.
What I didn’t like:
Designed for EZGO RXV 2005–2015, it is unsuitable for other models.
Seats may be cramped for two adults on longer journeys.
Installation instructions could be better.
EZGO TXT Rear Seat Kit
This kit is compatible with all-year EZGO TXT makes and models, including the newer 2014-to-date TXT Valor cart. It can comfortably accommodate two adults or, if you prefer, use it to transport cargo. However, it’s important to note that it may not be the most durable option and doesn’t match the high quality of some other golf cart back seat kits that have been tested. It is, however, a more affordable option.
Features
I fitted these seats to an EZGO TXT, and they’re compatible with all makes and models, including the newer TXT Valor carts from 2014 onwards. The frame is meticulously crafted from durable, powder-coated steel, ensuring a lightweight yet robust, rust-resistant build.
The cushions are thoughtfully designed with a high-density plastic backer board instead of plywood, ensuring extended life and enhanced durability. I was pleased to find integrated seat belt mounting brackets for passengers facing the rear included in the kit.
The Easy Flip Seat feature makes it effortless to convert the seating area into a cargo bed when needed. I had the option to choose from tan, black, or white for the color of this golf cart’s back seat.
The flip seats feature a sturdy framework made of steel, complemented by a rigid aluminum step pan and stylish side rails crafted from 14-gauge steel. Stainless steel hardware is incorporated to prevent rust, ensuring a long-lasting and reliable product. It was a great upgrade for my EZGO, combining functionality and durability.
Performance.
I expected to make some small modifications to fit it onto my cart, and that part went as planned. While the instructions weren’t stellar, they weren’t terrible either.
The installation took about 3 hours, and it was a one-person job. I chose this kit over cheaper alternatives because of concerns about poor instructions, missing hardware, or the wrong size bolts. I highly recommend this kit, especially for a 1999 EZ-Go TXT Freedom.
I liked the design of the seat and flip bed, especially the rounded corners and the plastic cover on the footrest.
However, some aspects I didn’t like outweighed the positives. Quality control appears to be lacking. The seat foam is too firm, and the covers are not tightly wrapped, showing unsightly wrinkles and looseness.
I’ll have to redo the stapling to make it tighter. The assembly bolts have large heads protruding both physically and aesthetically. The use of black-finished carriage bolts could have looked much better. The flip part seems flimsy, and the metal angle part that bolts on to stiffen it feels like an afterthought. The seat doesn’t lay flat in either position, requiring disassembly and the pivot bolt holes elongating to resolve.
Additionally, the bed part has a small crack in a stress point that is likely to worsen. While I can probably make it serviceable, spending several hours fixing design and quality issues is disappointing. I do not consider this rear flip seat kit a well-made product. It was filled with flaws and didn’t provide enough value for the cost.
What I liked:
Fits all-year EZGO TXT models, including newer TXT Valor carts.
Comfortably seats two adults or folds down for cargo transport.
Uses a plastic backer board for extended life and durability.
Provides safety features for passengers facing the rear.
There are tan, black, or white color choices for the golf cart back seat, so you have a variety to choose from.
What I didn’t like:
It may not match the high quality of some other golf cart back seat kits I tested.
Installation instructions are not stellar but manageable.
The flip part feels flimsy, and the metal angle part seems like an afterthought.
Club Car DS Rear Flip Seat Kit
This golf cart back seat kit is exceptionally sturdy and specifically designed for Club Car DS 1982–2000.5 (Old Style) and Club Car DS 2000.5–2013. Despite its robust construction, the installation process is not the easiest. One notable drawback is that this kit does not fit all Club Car DS models, limiting its compatibility. It also costs a bit more than other golf cart back seat kits.
Features
I recently got my hands on this rear flip kit and am impressed with its design. The flip deck is incredibly sturdy, and the marine-grade vinyl on the cushions adds comfort, durability, style, and UV protection. The materials used, including steel square tubes, aluminum diamond plates, and high-quality hardware, make the Steeleng rear flip seat tough and built to withstand.
One feature that caught my attention is the diamond-plate-patterned composite plastic deck, which is a more durable option than alternatives. The strong frame design and grab strap make opening the flip deck easy. With a seat weight of 120 pounds, it feels robust and substantial.
Compatibility-wise, this golf cart seat is best suited for Club Car DS models from 1982–2000.5 (Old Style) and Club Car DS 2000.5–2013. This kit combines durability, unique features, and a good fit for Club Car golf carts, making it a compelling option for anyone looking to upgrade their rear seating.
Performance
I successfully installed this rear flip seat on a 2006 Club Car DS, and it fits seamlessly without any issues, completing the process in just 45 minutes. However, it was a different story with a 2008 Club Car; unfortunately, it didn’t fit.
The seat itself is notably heavy and impressively sturdy, providing a sense of durability.
I’m pleased with how sturdy it was, and the color almost perfectly matches the factory shade. I would recommend it to others.
Assembling the product was a positive experience. All the necessary parts were included, and the instructions were good, even though the bolt sizes were in millimeters. I improvised with terms like small, medium, and large for lengths.
While the final installation was excellent, the process demanded patience, time, and careful study. A helpful YouTube video provided additional guidance for a smoother installation.
One suggestion for improvement would be to include shorter bolts for the front seat. The original bolts, designed for a 1-inch square tube mounting bracket, may protrude into the foam of the front seat due to a design change. I opted for shorter bolts from my collection to avoid this issue.
Besides that, the product features thick metal and substantial bolts. I enhanced its functionality by adding seat belts, which provided a safety feature.
What I liked:
Built for durability in Club Car DS 1982–2000.5 (Old Style) and 2000.5–2013.
Handy grab strap for a hassle-free flip deck.
The color closely matches the original factory shade.
What I didn’t like:
It doesn’t fit every Club Car DS cart.
Bolt sizes are given in millimeters, requiring extra effort to understand.
Yamaha G14-G22 Rear Flip Seat Kit
One standout feature of this kit is its versatility, as it seamlessly fits into all Yamaha G14/G16/G19/G22 models. It delivers great quality for the price. However, it’s worth noting that the installation process may not be the easiest.
Features
The polished aluminum diamond-plated cargo bed with the grab bar attachment adds a touch of sophistication. What’s great is that it’s designed to be compatible with Yamaha G14, G16, and G19/G22 models.
The kit includes all the essentials, including:
A comfortable backseat for passengers
An easy-to-follow, all-color installation guide
A footplate with a grab bar
Armrest
High-strength fasteners
The backrest and bottom cushion
Main brackets
Rear roof supports
Aluminum diamond-plated cargo bed assembly
With a weight of 90 lbs, this kit is built with a special tube-bending manufacturing process, creating a sturdy frame while maintaining strength. The cargo bed, featuring an industrial-grade polished finish, impressively supports a load weight of up to 400 lbs. Passenger safety is a top priority, evident in the protective rubber trim installed on the edge of the diamond plate, ensuring a smooth and safe surface.
The kit doesn’t just stop at functionality; it also prioritizes comfort. The very strong flip deck and marine-grade vinyl on the cushions offer both durability and a comfortable ride. The diamond-plate-patterned composite plastic deck and a robust frame design guarantee exceptional durability.
One feature that stood out to me is the grab strap, which makes it easy to open the flip deck and convert seats to cargo beds effortlessly. It’s a well-rounded kit that combines style, durability, and practicality.
Performance
While the directions could have had clearer pictures, the packaging was secure, arriving in two separate boxes for the hardware and cushions. The step-up felt quite flimsy.
Unfortunately, it didn’t fit the 2004 Yamaha G22 as the mounting holes differed. I had to make modifications to get it to work.
An interesting note is that the roof uprights were said to be included for the G16E, but I found that the existing one-piece roof bolted right down on the new setup. I did cut some off the included uprights and bolted them on, adding extra strength without compromising the existing structure.
As a suggestion, adding some armrest cup holders would be a great enhancement to the kit.
Overall, it’s a decent product with an almost reasonable price. It looks good, too. Though lacking real photographs, the instructions could be improved to speed up the installation process.
To sum it up, the installation was not the easiest, and the product is not the most durable.
What I liked:
Fits Yamaha G14, G16, and G19/G22 models.
Budget-friendly compared to alternatives.
Sturdy frame via a special tube-bending process.
The Grab strap facilitates effortless seat-to-bed transformation.
What I liked:
Requires modifications and does not align with all models.
Missing armrest cup holders for added convenience.
Factors to consider when choosing the best golf cart back seat kit
Cart compatibility
This should always be your first consideration. You need to choose a back seat kit tailored to the make and model of your golf cart, ensuring seamless integration with its unique frame structure. Look for options that complement the existing design or allow for personalization, enhancing aesthetics and functionality. It’s essential to assess how the back seat kit aligns with your cart’s rear accessories, such as cargo beds. If your cart didn’t initially have a rear seat, explore conversion kits designed specifically for your model.
A sturdy frame not only enhances the safety of passengers but also ensures that the back seat withstands the wear and tear associated with regular use. Choosing a back seat kit with a well-engineered and sturdy frame adds to the reliability and longevity of your golf cart.
Always prioritize durability by opting for cart kits made from high-quality materials. Opting for a sturdy frame is like choosing the right club for a shot; it makes all the difference. Look for materials like steel or aluminum; they’re the heavy hitters in the frame game. These materials provide durability and ensure stability, especially when navigating the twists and turns of the golf course.
Seat material and cushioning:
The seat material and cushioning choice are crucial when selecting a golf cart back seat kit. Look for materials like marine-grade vinyl or UV-resistant fabrics for the seat upholstery. These materials not only withstand outdoor elements but also contribute to long-term durability.
Think about UV-resistant fabrics too, because, you know, the sun can be relentless out there. Now, about cushioning—it’s the comfort factor. You want that perfect combo of firm support and cushy goodness for those long rides on the course. So, dive into the details, find the right mix, and ensure your back seat isn’t just durable and the comfiest spot on your golf cart.
Installation ease:
Opt for a kit with clear and comprehensive instructions, facilitating a user-friendly setup. Consider whether the kit includes all the necessary hardware and mounting components. Additionally, check if professional installation services are available or recommended for a seamless and secure setup. Choosing a back seat kit with straightforward installation ensures that you can enjoy the added functionality without unnecessary complications.
Weight capacity:
Every golf cart back seat kit has its weight capacity. So, take a moment to assess the weight limit of the back seat kit—that’s the maximum load it can handle. Consider your usual crew and factor in any potential cargo. You wouldn’t want to exceed the specified limit, as it can affect the stability of your golf cart, and, frankly, nobody wants a bumpy ride on the course. So, check those weight ratings diligently to ensure your golf cart can smoothly carry you, your friends, and maybe a cooler of refreshments without a hitch.
Fold-down option:
Lastly, consider the fold-down option when selecting a golf cart back seat kit. This feature allows the seat to be easily folded, creating additional cargo space when needed. Assessing this functionality can enhance the versatility of your golf cart, providing practical solutions for transporting equipment and gear during your rounds.
Final thoughts
Each kit reviewed in this article has its unique features. Whatever one you decide to go for, you must always consider cart compatibility, frame structure, seat material, installation ease, weight capacity, and fold-down options to align with your specific needs and preferences. I hope you found this review helpful.
Disconnect the battery to remove the speed limiter on your electric golf cart. Afterward, locate the speed limiter and disconnect it; once disconnected, you can remove it. Then, you can reconnect the battery and test it to ensure it is properly connected.
I’ve had the opportunity to use various golf carts on the course, finding them incredibly practical, especially since I no longer have to carry my clubs on foot. Considering the convenience, I invested in my electric golf cart last year. It has proven highly functional, serving well on and off the course. I even use it during golf outings with my friends, like fishing.
However, I did notice one aspect that could use improvement—the speed. My cart had a top speed of 12 MPH, and I felt that a bit more speed would enhance the overall experience. After consulting with my neighborhood technician, he suggested removing the speed limiter. Following his advice, I successfully removed the limiter, resulting in a significant increase in speed. This modification has notably improved the performance of my electric golf cart.
In the rest of this article, I will guide you through removing the speed limiter on an electric golf cart. Additionally, I’ll delve into essential precautions to consider while undertaking the removal of the speed limiter.
A step-by-step guide to removing the speed limiter on your electric golf cart
When removing the speed limiter from your electric golf cart, having the right tools is essential to ensuring a smooth and safe process. You’ll need the following tools for this modification:
Screwdriver
Wire cutter
clamp
Zip ties
Safety glasses
gloves
1. Start by disconnecting the battery.
To achieve this, follow the steps below:
Begin by locating the black clip that secures the red wires. This clip serves as a fastening mechanism for the cables on the battery terminals.
Carefully remove the black clip from the red wires using an appropriate tool. This could be a clamp or fastener holding the cables in place. Gently detach it to free the red wires.
Remove the red wire from the battery terminal with the black clip removed. Use a wrench or screwdriver to loosen the nut securing the red wire to the battery’s positive terminal (+).
Once the red wire is detached, place it in a secure location where it won’t come into contact with any other metal pieces. This precaution is crucial to prevent accidental contact, reducing the risk of sparks or electrical discharge.
Use a cable tie or secure it in a designated area to ensure isolation.
During this process, exercise caution and prioritize safety. The goal is to disconnect the battery safely, preventing electrical hazards and protecting yourself and the golf cart’s components.
2. Find the speed limiter.
Your next step is to locate the speed limiter on your electric golf cart. The speed limiter is typically a small black box with two wires connected to it, and it is situated near the speed control system of the cart.
It could also be found near the left side of the motor housing, either under the seat or in the back of the cart in the battery area. Inspect these areas for the small black box, paying attention to its wiring.
If you encounter difficulties locating the speed limiter, consult the manufacturer’s documentation for your golf cart model. Alternatively, seek guidance from a professional technician familiar with your electric golf cart’s specific features and components.
3. Disconnect and remove the speed limiter.
After successfully locating the speed limiter on your electric golf cart, the next step is to disconnect it.
Press down on the tabs and carefully remove the wires from the speed limiter. Note which wire corresponds to each terminal to ensure proper reconnection later. Alternatively, you can use a wire cutter to make clean cuts on the wires. Wear gloves during this step to protect your hands from sharp edges or wire ends.
Once the wires are disconnected, set them aside in a safe location.
The next step involves removing the limiter from the motor housing. To accomplish this, gently insert the flathead screwdriver between the speed limiter and the motor housing, applying even pressure to release it.
Exercise caution during this step to avoid damaging any surrounding components. If any clips or fasteners are securing the limiter, ensure they are disengaged before attempting to remove it.
4. Reconnect the battery and test:
Once the speed limiter is successfully detached, you can discard it. This step marks the completion of removing the speed limiter from the electric golf cart. Remember to dispose of the speed limiter responsibly and under local regulations.
Now that the speed limiter has been successfully removed, proceed to the next step by reconnecting the battery. Ensure that you connect the red wire to the positive terminal and the black wire to the negative terminal. This step is crucial for restoring power to the electric golf cart.
You may notice that the lights don’t immediately come on. The lights will illuminate once you start the cart, signaling that power has been restored.
After securely reconnecting the battery, it’s time to test the electric golf cart. Turn the key or use the designated power switch to start the cart and observe its behavior. Take note of any changes in acceleration or speed, ensuring that the removal of the speed limiter has the desired effect.
Precautions to take when removing the speed limiter on your electric golf cart.
Thoroughly understand and comply with local laws and regulations related to golf cart modifications. Familiarize yourself with any restrictions or requirements to avoid legal consequences.
Prioritize safety gear:
Wear essential protective gear, including gloves and goggles, to shield yourself from potential hazards during modification. Safety should be a top priority.
Exercise Caution with the Battery:
When working with the battery, exercise caution to prevent accidental rolling. This precaution is vital for your safety and the integrity of the battery, reducing the risk of unexpected discharges.
Thorough testing before use:
Before using the modified golf cart, conduct thorough tests in a secure setting. Assess its handling performance and check for any potential issues resulting from the modification. This testing ensures that the changes made do not compromise safety.
Be aware that modifying the speed limiter could void warranties provided by the manufacturer. Understand the potential implications and proceed with awareness of any warranty-related consequences.
Consult with a professional technician:
If uncertainties arise or issues persist during the modification process, consider consulting with a professional technician who is familiar with the specifics of your golf cart model. Their expertise can provide valuable guidance.
Final thoughts
Removing the speed limiter is a great way to increase the speed of your electric golf cart. The process must be executed with care and attention to safety. You must exercise caution at every step, from disconnecting the battery and taking out the speed limiter to reconnecting the battery to your electric cart.
Understand and comply with your local laws, prioritize safety with protective gear, and always exercise caution. This will ensure you achieve improved golf cart speed while minimizing risks and maintaining reliability.
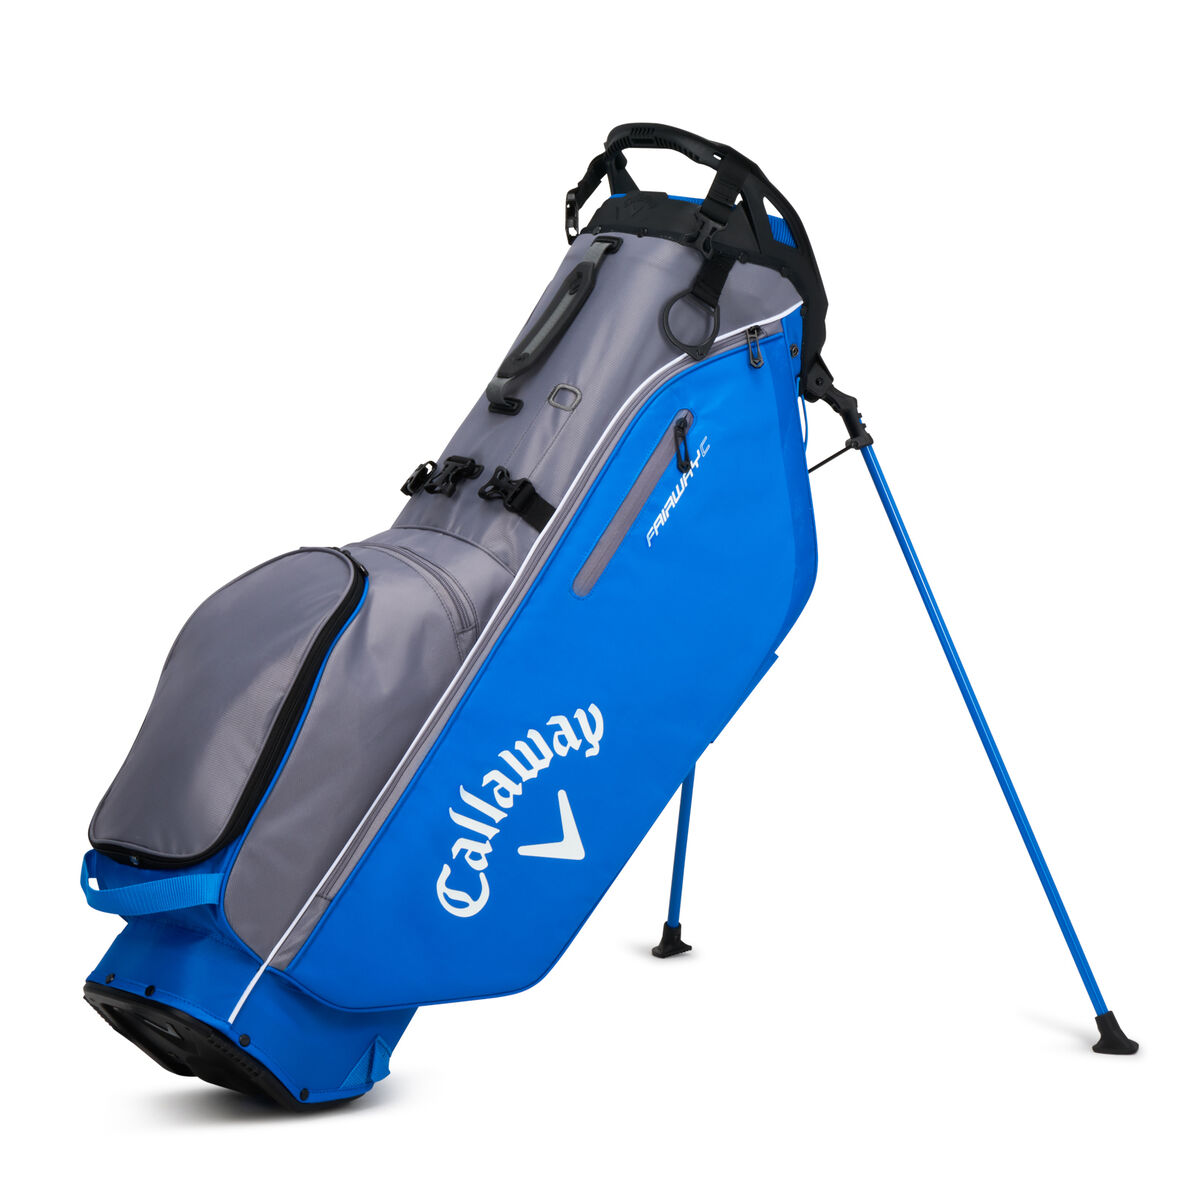
The best golf bag for push carts is the Sun Mountain C-130 2023. Featuring a classic design, this bag is easy to load and unload. It offers ample storage, a 14-way top for organized club placement, and accommodation for full-sized grips. However, it comes at a higher price point. Despite this drawback, its great features make it a valuable investment.
I am more of a Sunday golf bag golfer; I rarely carry a complete set of clubs to the course, so I rarely use my cart bag. I started visiting the system with a few more clubs sometime last month and needed more space.
I already had a golf bag for the pushcart, but when I brought it out, I noticed it was worn out, and some of the zippers snapped when I tried to use it. I decided that I needed to get a new one. I needed a functional bag that provided ample storage, sat well in the cart without coming loose, and offered the durability and high quality my previous bag lacked. I was willing to spend more to meet this requirement. After extensive research and testing, some golf bags outperformed the others as the best for push carts.
Ultimately, I decided on the Sun Mountain C-130 2023 Cart Bag because of its impressive, sturdy frame and simple strap system, which allows for easy access to all pockets while mounted on the cart. Despite its higher cost, I was willing to invest more to obtain the desired performance and the bag was delivered. For budget-conscious golfers, the Datrek Transit Cart Bag provides a more affordable option, although it may not match the durability of the Sun Mountain C-130 2023 Cart Bag.
In the rest of this article, we’ll review the features of each golf bag that make them suitable for push carts, share how they performed during testing, highlight their advantages, and discuss some areas that could be improved. Stick with me; let’s get started.
Specification comparison
These golf bags are crafted to provide ample storage for your clubs and other golfing essentials, such as a rangefinder and putter, and made with material to ensure durability while catering to a range of price points. The table below presents a concise summary of the key features, allowing for a quick comparison if you’re pressed for time and helping you decide on the bag that best suits your needs.
Golf Bags
Weight
Dividers
Pockets
Price
Sun Mountain C-130 2023 Cart Bag
6.5 lbs
14-way
13
$289.99
COBRA Ultralight Pro Cart Bag
5 lbs
14-way
11
$250
Mizuno BR-D4C Cart Bag
6.5 lbs
14-way
20
$279.99
Datrek Transit Cart Bag
7.4 lbs
14-way
8
$239.99
Titleist Cart 15 2023 Cart Bag
6.5 lbs
15 full-lent
11
$300
Best Overall: Sun Mountain C-130 2023 Cart Bag
The Sun Mountain C-130 2023 Cart Bag offers impressive storage capacity. Its secure smart strap system ensures stability during use and allows you to access all pockets easily. With a selection of 11 colors, you have a variety to choose from to suit your style. Although it is heavier at 7 lbs, this didn’t pose an issue since I intended to use it with a pushcart. The weight contributed to its stability and overall performance during use.
Features
This bag incorporates 14 individual club dividers, with a dedicated putter compartment running the full length to ensure optimal protection for each club. The Smart Strap System, equipped with two Velcro straps, securely attaches the bag to a riding cart. This design ensures stability on the cart and eliminates any interference with accessing the bag’s pocket caused by the riding cart’s straps.
This bag provides ample storage with 13 pockets, including two designed for apparel. Notably, it features a ventilated cooler pocket to keep your drinks cool while playing. Additionally, there are two velour-lined pockets for added luxury and a spacious, velour-lined rangefinder pocket with a convenient magnetic closure.
Moreover, the Smart Strap System has a matching waterproof hood, enhancing the bag’s versatility and functionality.
Performance
I really like this bag’s 14 individual club dividers, especially the dedicated putter compartment that runs the full length. It’s fantastic for protecting my clubs and preventing them from shifting around. Even though I’ve only had it for about three weeks, it’s exceptionally well-made and should last a long time. It seems highly durable.
Having 15 individual slots for each club is great for keeping things organized, and the numerous pockets with quality zippers add to the overall convenience. The bag fits perfectly on the cart, and I appreciate that the cart strap can slide through, allowing access to all pockets while it’s strapped in. The frame is solid and sturdy yet surprisingly lightweight, making it easy to carry. The padded carry strap adds to the comfort.
I also like the extra features, such as the side cooler-lined pocket, top grab handles, and a base grab handle, which make it easy to take in and out of my vehicle. The color match and design are aesthetically pleasing.
I appreciate the absence of full-length tubes, and the range finder compartment is perfect for quick retrieval. While the lack of a dedicated tee holder is a bit disappointing, the mesh holder does the job. The cooler compartment is smaller but not a major concern since I use a hard cooler on the cart.
This bag has met and exceeded my expectations regarding design, functionality, and quality of materials. However, there is a noticeable flaw—the metal ring at the top of the bag, where the strap goes through, creates an annoying squeaking sound when I walk with the clubs. I’m thinking of trying some silicon spray to see if that helps.
While this bag is pricier than others on the market, its superior cart-securing mechanism and the layout of individual club slots make it a worthwhile investment. I would recommend this bag.
What I liked:
This bag has plenty of room for all my golf gear.
The strap system keeps it secure on the cart, and I can easily reach all the pockets.
I love that it comes in 11 colors, so I can pick one that suits my style.
The fourteen dividers and dedicated putter compartment keep my clubs safe and organized.
The included waterproof hood adds extra protection during unpredictable weather.
What I didn’t like:
At 7 lbs, it’s a bit weighty, especially if you prefer lighter bags.
The metal ring at the top can be annoying as it produces a squeaking sound.
It’s on the pricier side compared to other options at $289.99.
COBRA Ultralight Pro Cart Bag
This cart bag stands out as one of the lighter options, weighing only 5 lbs, yet it provides substantial storage space for its weight. It comes at a more affordable price than other alternatives at $250 and includes impressive features such as a dedicated pocket for your range finder and a spacious cooler pouch capable of holding up to six beverage cans. However, a significant drawback is its lack of durability compared to competing alternatives. The polyester material used in the bag falls short in terms of quality.
Features
This bag features a 14-way top with three full-length dividers, ensuring easy access to your clubs. One standout aspect is its insulated cooler pocket, capable of keeping up to nine cans of your beverage cold. Additionally, it includes a built-in pass-thru for attaching to a cart without limiting access to the pockets. The material is polyester, which is good but may not provide the same level of durability as some other alternatives.
One feature that particularly impressed me is the slanted downward putter storage, which prevents it from banging around the club heads. This thoughtful design adds protection and convenience, enhancing the overall user experience.
Performance
The cooler pocket is a feature I appreciated. I could easily fit six cans with a slim ice pack to keep things cool. I can vouch for the magnet’s strength on the range finder pocket; there’s no concern about it accidentally opening.
The pass-through for the cart strap is a brilliant feature, allowing easy access to all the top pockets without any hassle. I appreciate having pass-throughs on both sides and the front, although it depends on the cart whether I can use all three or just one side and the front. Regardless, reaching the pockets is always convenient.
It accommodates my Cobra Woods and Ben Hogan irons with covers, a necessity due to the rough cart paths where I usually play.
It’s a lightweight, durable cart bag that looks nice and offers ample pocket space. I did, however, notice that the top side pockets can be a bit challenging to use when covered by the cart strap.
Also, the absence of the rain cover mentioned in the product information was disappointing. Living in Florida, where rain showers can pop up anytime, a rain cover would have been a valuable addition to keep my gear dry.
What I liked:
Weighing only 5 pounds, it’s easy to handle and transport.
It comes at a more budget-friendly price compared to other alternatives.
Includes specialized pockets for a range finder and a cooler pouch for up to six beverages.
The downward-slanted putter storage prevents damage to club heads.
What I didn’t like:
The polyester material may not be as durable as alternatives made with higher-quality materials.
Not fully waterproof.
The cart strap can hinder the positioning of the top side pockets.
Best Premium: Mizuno BR-D4C Cart Bag
This bag stands out as a premium option with an extensive storage capacity and about 20 pockets. Despite its weight of around 6.5 pounds, it feels surprisingly lightweight. The strap system is a thoughtful feature, ensuring secure attachment and preventing any damage even if the cart strap is tightened. However, a notable drawback is that while the bag offers 20 pockets, many of them, like the ball compartment, are too small and can be challenging to access. It’s also a more expensive golf bag.
Features
This bag stands out with its premium features. The 14-Way Top Cuff with an Integrated Large Putter Well is designed to ensure organized club storage.
I particularly value the rubberized grab handle integrated into the top cuff, which provides an additional grip when carrying or adjusting the bag. The Cart Strap Channel with Durable, Abrasion-Resistant Material is a valuable addition, offering long-term protection against the wear and tear caused by cart straps.
The Magnetic Closure Pocket with Fleece Lining is a standout feature, providing extra protection for items requiring special care. Additionally, the Extra Large Insulated Cooler Pocket with Drain Holes is noteworthy, offering convenient storage for extra beverages, especially on scorching hot days.
The Mission Control Organizer Panel is another standout feature, providing an all-in-one panel with multiple pockets for easy access to anything you might need during your round. In summary, these premium features collectively make this bag an excellent choice for golf enthusiasts seeking a high-quality and feature-rich option.
Performance
I’m pleased with the individual club holes and the large well for the putter featured in this book. It’s accommodating for larger grips, like my SuperStroke. Even with clubs and balls in it, the bag remains lightweight. The extra-large pouches on both sides, the medium-sized ones above them, and the spacious cooler pouch are definite highlights. The magnetic valuables pouch is a nice touch, and it seems quite durable after about 13 rounds of use.
However, I found some pockets oddly shaped and challenging to access. A notable issue for some is the tight compartments due to a large plastic compartment for the putter, hindering the full insertion of clubs and prompting a return for a few users.
While I appreciate the solid zippers, a significant concern emerged during heavy rain. The zippers, which I thought would be waterproof, leaked, which was quite disappointing. I would not recommend this bag if you play on a predominantly wet course.
What I liked:
Offers around 20 pockets for ample storage.
It features a 14-way top cuff with an integrated putter well.
Features a protective magnetic closure pocket that ensures extra protection for valuable items.
The Mission Control Organizer Panel provides easy access.
What I didn’t like:
Most of the pockets were too small and challenging to access.
Pricier than alternatives at $279.99.
Zippers are not fully waterproof, leading to leakage.
Best for walking: Datrek Transit Cart Bag
This bag is an excellent choice for senior golfers due to its convenient rolling feature, which provides ease of movement on the course. It’s notably more portable compared to other alternatives. However, it’s worth noting that the wheels may not be as functional as desired, as they tend to be quite loud during use.
Features
This bag is designed with a 14-way top featuring full-length individual dividers, providing excellent organization for your clubs. The retracting telescopic handle with push-button adjustment adds to its convenience.
A dedicated soft-grip putter well ensures that your putter is easily accessible and well-protected. The inclusion of wheels makes rolling and moving the bag around the course effortless.
In terms of storage, the bag offers 8 zippered pockets, catering to various needs. These include a fleece-lined valuables pocket, four full-length garment pockets, an oversized insulated cooler pocket, an accessory pocket, and a large ball pocket.
Additional features like the umbrella holder and matching rain hood with dual access enhance the bag’s functionality, ensuring you’re prepared for different weather conditions on the course.
Performance
The introduction of wheels was a game-changer, especially for someone like me who found lugging an 80-pound cart bag quite a workout. It’s important to note that these wheels aren’t a replacement for a push cart for walkers but work well on smooth surfaces with the narrow bag stance, as long as you exercise caution.
The eight zippered pockets are a standout feature, with three on each side and two in front, offering ample storage space.
My 75-year-old dad tried out this bag, and he was impressed with the bag’s ease of rolling and the practicality of the 14 dividers for organizing clubs. The multiple pockets were indeed useful, and I followed the suggestion to add extra-large carabiner-type hooks for added convenience.
However, not everything about the bag was perfect. I noticed its instability on uneven terrain, and the plastic wheels were surprisingly loud on cement. The design seemed more suited for use with a push cart, as attempting to walk with it on grassy areas posed the risk of tipping over.
The bag’s inability to stand up well and navigate a fairway without additional support was disappointing. Although it came with a rain cover, it didn’t make the bag waterproof, resulting in wet conditions despite covered clubs.
What I liked:
great for senior golfers, providing easy mobility.
14-way top with dividers for accessible and organized clubs.
Soft-grip well for easy putter access and protection.
What I didn’t like:
Some instability is observed on uneven terrain.
Plastic wheels are loud on cement, impacting the overall experience.
Rain cover doesn’t provide full waterproofing, leading to wet conditions.
Best Waterproof: Titleist Cart 15 2023 Cart Bag
This waterproof bag is a standout feature, providing reliable protection against the elements. Additionally, it is highly durable, offering excellent quality that ensures long-lasting performance. However, it’s worth noting that this bag comes with a higher price tag than most alternatives, at $300.
Features
This bag is thoughtfully designed with 15 full-length dividers, including a dedicated putter, enhancing organization and protection for your clubs. Weighing in at 6.5 lbs, it balances being lightweight with providing the necessary features.
The integrated cart strap adds extra stability and protection when secured to a golf cart. Its notable waterproof feature is achieved through waterproof fabric, tapered seams, and water-resistant zippers, ensuring that your gear stays dry even in inclement weather.
A soft-touch, multi-material top cuff with tour-inspired integrated handles adds a touch of luxury and convenience. The two velour-lined valuables pockets provide a secure and plush storage space for your items. This bag combines functionality, durability, and design elements to enhance the golfing experience.
Performance
The bag is built with exceptional quality—the zippers feel tight and well-sewn, providing a perfect fit for all 14 of my clubs, including the hybrids and the seemingly longer Maverick driver.
The price and value of this bag pleased me, and I’d happily recommend it to anyone in need of a cart bag. The smooth-working zippers and the two handles on top for easy maneuvering from the trunk to the cart add to its practicality. Despite carrying all my clubs and belongings, it feels as light as my carry bag.
The full-length dividers work well, and the cooler pocket is conveniently located, though it lacks a drain. I found a simple solution by using a freezer Ziplock bag for ice and water, making it work perfectly and even extending the life of the ice. The removable front cover is a fantastic touch for personalization.
I particularly appreciate the better separation for my clubs, thanks to the design of this model. The ample and well-designed pockets and the solid zippers assure me of its durability. The construction at the top, featuring two solid built-in handles, facilitates easy loading and unloading from the truck. The overall material of the bag is not only durable but also aesthetically pleasing.
While the zippers are robust, the bag faced a challenge during heavy rain—four holes in, and the zippers leaked like a cheap roof. This raises a concern about the bag’s waterproofing in extreme conditions.
However, the multitude of pockets and ease of picking up clubs without shifting during cart movement make it a reliable option. The handles on top and the size of certain pockets could use a bit of improvement.
I recommend this bag if you play on a predominantly wet course; you can fully utilize the waterproof feature. If not, I recommend going for less expensive alternatives that offer the same, even better level of performance.
What I liked:
Built with enduring materials for long-lasting performance.
Dedicated putter and organized club storage.
An integrated cart strap adds stability and protection to a golf cart when secured.
Luxurious design elements like a soft-touch top cuff with integrated handles for convenience.
What I didn’t like:
Zippers leaked during heavy rain, raising questions about extreme weather performance.
Comes with a higher price tag.
Factors to Consider When Buying the Best Golf Bag for a Push Cart
Compatibility with the push cart:
Go for a golf bag with features that enable use on a cart, such as a cart strap pass-through system. This allows you to secure the bag to the pushcart using cart straps without obstructing access to the pockets. The pass-through should be strategically positioned for stability.
Check the base of the golf bag to ensure it is designed to sit securely on a push cart. The base should be flat and wide enough to provide stability, preventing the bag from tipping over or swaying during movement.
Remember that various push carts may have distinct designs, so verify that the chosen bag aligns with your cart model. Consult with the bag and cart manufacturers if necessary for compatibility recommendations.
Size and weight:
Opt for a bag that strikes a balance between being lightweight and being the right size and offers enough storage space for your clubs and accessories. A lighter bag is not only easier to handle when lifting it on and off the pushcart but also contributes to reduced fatigue during extended periods on the golf course.
A lightweight golf bag also facilitates effortless transportation, whether you’re pushing it on a cart or carrying it between holes. This is particularly important when using a push cart, as a heavy bag can make maneuvering the cart more challenging and potentially lead to premature wear and tear on the cart itself.
Club organization:
When selecting the ideal golf bag for your push cart, paying close attention to dividers and club organization is paramount. Opt for a bag with a well-thought-out divider system, preferably full-length dividers.
A bag with full-length dividers keeps your clubs organized and offers protection by preventing them from coming into contact with each other. This is particularly important for those with graphite shafts, as it minimizes the risk of scratching or damaging the clubs on the pushcart during transport.
Consider the number of dividers as well; a bag with more dividers allows for a higher degree of organization, ensuring every club has a slot. Additionally, some bags feature specialized dividers for putters, accommodating their unique size and shape.
And here’s a pro tip from personal experience: always check if those dividers go down to the bottom of the bag. Full-length dividers reaching the base provide not just organization but extra stability. This prevents your clubs from touching the ground and adds a layer of protection.
Pockets:
Look for a bag with sufficient pockets to cater to various needs. Consider compartments for golf balls, tees, gloves, rangefinders, valuables, and even insulated beverage pockets. The key is to have dedicated spaces for different items, ensuring easy access and organization.
Check out the placement of pockets concerning the bag’s position on the pushcart. Ensure that essential pockets are easily accessible, even when the bag is secured to the cart. This accessibility minimizes the need to constantly remove the bag for access during your round.
Don’t forget a velour-lined pocket for your valuables—your phone, wallet, or watch. That soft lining isn’t just a fancy touch; it’s a practical move to prevent scratches and give your delicate items an extra layer of protection. And speaking of practicality, pay attention to the zippers and fasteners on those pockets. Opt for durable, easy-to-use zippers.
Material and durability:
Look for nylon, polyester, or lightweight alloys in the bag’s construction. Bags made from nylon or polyester are lightweight and offer durability. These materials often provide excellent water resistance, ensuring your bag withstands the elements. If you frequently play in varying weather conditions, opt for a golf bag with waterproof features. Choose bags with sturdy fasteners, zippers on pockets, and club dividers.
Budget:
If you are a casual golfer who hits the course occasionally, you may not need to invest in a high-end, feature-rich bag. A golf bag between $200 and $250 would suffice. On the other hand, if you are a regular golfer, it might be worth considering a higher-priced bag, around $280 to $350, with additional features and durability. Assess the features offered by golf bags within your budget range and consider what features are essential for your needs.
Final Thought
In conclusion, choosing the ideal golf bag depends on individual preferences and priorities. You should always seek durability, great storage, an effective carry strap, and your budget. The Sun Mountain C-130 2023 Cart Bag stands out for its impressive storage capacity, secure strap system, and organizational features, making it the best overall in my book.
The Mizuno BR-D4C Cart Bag is a more premium option, but despite its premium features, it is more expensive and lacks adequate waterproofing. The Datrek Transit Cart Bag, with its rolling convenience and ample storage, caters to senior golfers but has notable drawbacks in terms of stability and noise. Your personal preferences, budget considerations, and specific needs will ultimately guide your choice.
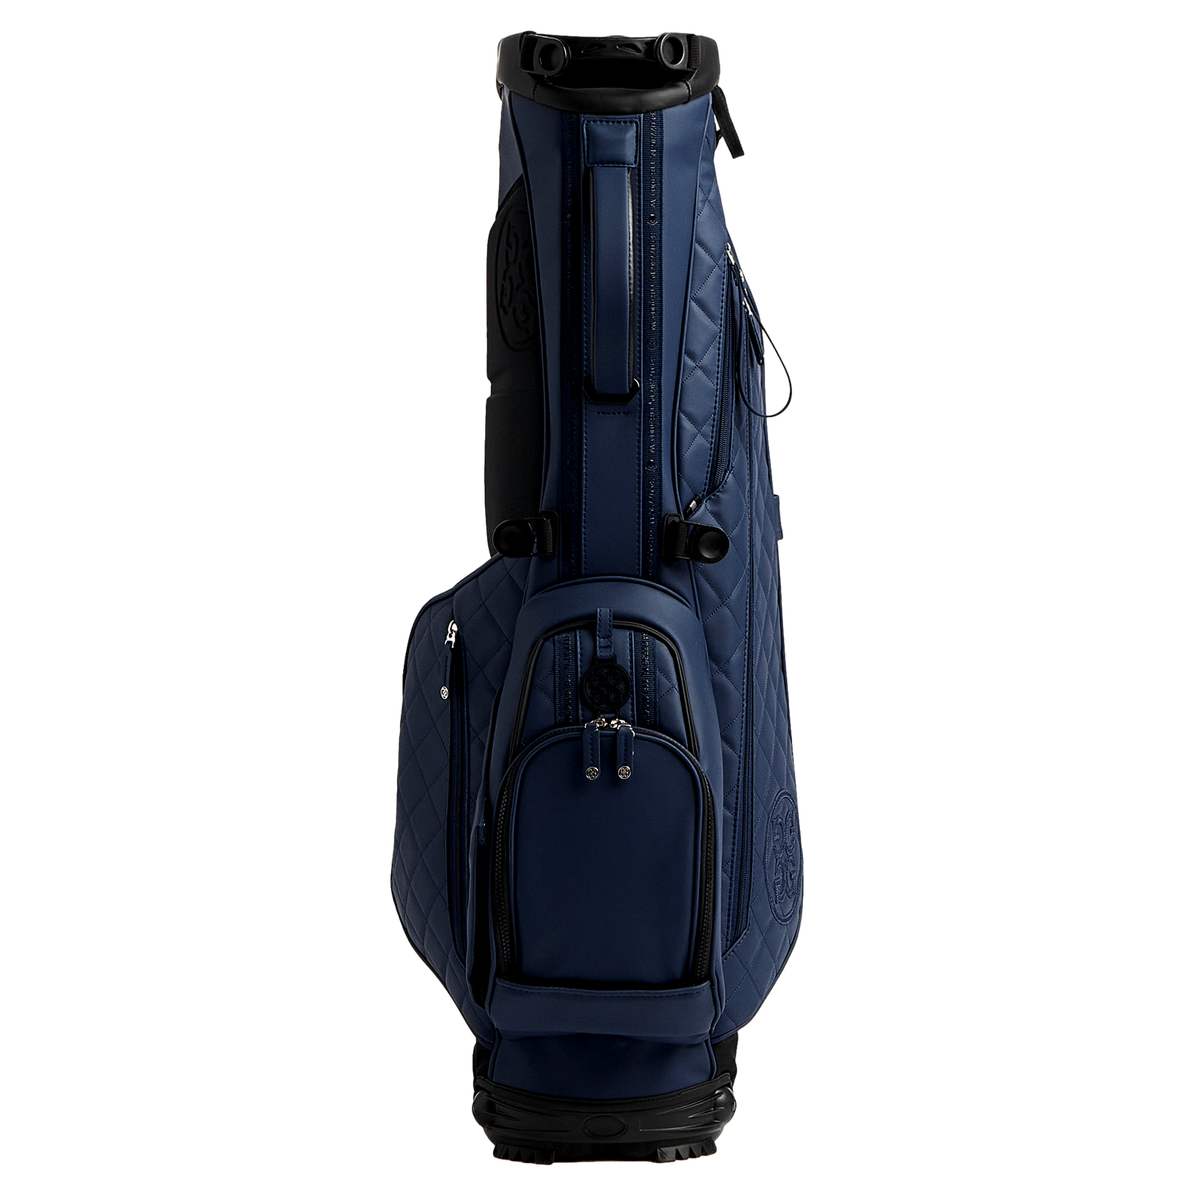
Carry golf bags are lightweight and compact bags that are very functional. These bags provide comfort and easy access, whether strolling on the fairway or heading out to the course for a quick round. I’ve tested a couple of carry-on golf bags and ranked the six that outperformed each other.
I’ve been hitting the local Par 3 golf course more frequently this year, which nudged me to pick up the Titleist Player 5 Stadry bag. It’s a real gem for its lightweight design and comfy shoulder straps, perfect for toting around my 8 go-to clubs and essentials like tees and a drink. It cost a bit more than my buddy’s Cobra Ultra Light Sunday bag, but the convenience and ease of accessing my clubs make it a standout choice.
Before settling on the Titleist Player 5 Stadry Bag, I tried a couple of others and thoroughly evaluated six that stood out to me. I will provide detailed reviews of my top recommendations in this article, sharing my experiences with each. This will help you decide which golf bag fits your preferences and needs.
Before delving into a comprehensive review, let’s take a moment to compare the features of these carry-on bags. This quick overview will give you a side-by-side glance at their specifications, making it convenient to assess their key attributes, especially if you’re in a hurry.
Carry golf bags.
Weight
Dividers
Waterproof
Stands
Price
Titleist Players: 5 Stadry Bags
3.71lbs
4-way
Yes
Yes
$295
Sunday Golf Loma Bag
2lbs
2-way
Just the Zippers
Yes
$129
Cobra Ultralight Sunday Golf Bag
3.8lbs
3-way
No
Yes
$129
G/Fore Daytona Plus Carry Bag
4.65lbs
4-way
Yes
$375
Callaway 2023 Fairway C HD Stand Bag
4lbs
4-way
Just the pockets
Yes
$249.99
Ping Moonlite Carry Golf Bag
2.5lbs
4-way
Yes
No
$174.99
Best Carry Golf Bag Overall: Titleist Players 5 Stadry Bag
Titleist Players 5 Stadry Bag
$295
Waterproof Construction: The bag features StaDry™ waterproof technology with seam-sealed zippers, ensuring your gear stays dry in all weather conditions
Lightweight and Durable: It weighs just under four pounds and is designed for easy carry. It includes high-grade light aluminium legs and an advanced hinged bottom for best-in-class stability and durability.
Functional Design: Offers ample storage with a full-length apparel pocket and an easy-access horseshoe-style tee pocket. The bag is also fitted with high-quality YKK zippers for enhanced accessibility and reliability
My personal favourite: I like the aesthetics and feel of this bag on my shoulder. The premium double straps offer great comfort, seriously making it a breeze.
I never hit the course without a beverage, and I appreciate the added convenience of external insulated cooler pouches to keep my drink cold.
Introducing a new 4-way top divider that holds up to 10–14 clubs of mid-sized grip and a robust stand has been a game-changer, facilitating easy access to my clubs.
The waterproof material and seam-sealed zippers seal the deal for me. Regardless of the weather, I can rest assured that my beloved clubs will remain safe from any water damage, thanks to its waterproof material and seam-sealed zippers.
Since I began carrying this bag two months ago, it has remained pristine, supporting my 14-club set easily. Did I spend more than I had hoped on this bag? Yes, I did, but it’s been very functional, so I can’t complain.
What I liked:
Straps provide excellent comfort during carrying.
Offers generous storage space for golfing essentials.
Highly functional design, making it easy to access content.
What I didn’t like:
Occasionally, lifting the bag clip gets caught.
a tad more expensive than some other bags.
The Best Lightweight Carry Golf Bag: Sunday Golf Loma Bag
Sunday Golf Loma Bag
$129
Lightweight and Portable: Weighing in at about two pounds, the Loma Bag is exceptionally light and easy to carry, making it an ideal choice for golfers who prefer walking the course or need a bag for short rounds. Its portability also makes it a great option for travelling with clubs.
Stylish and Modern Design: The Loma Bag features a modern look with clean lines and updated colorways, providing a minimal yet aesthetically pleasing appearance. The material used is of high quality, contributing to its overall appeal.
Functional and Efficient: Despite its minimalist design, the bag includes functional features that are apparent at first glance, enhancing its practicality for various golfing needs.
Another excellent option is its remarkable lightweight design, weighing just about 2 lb. It is one of the lightest carry-on golf bags available. Despite being lightweight, it can comfortably accommodate six clubs, allowing for easy movement around the course.
Now for storage. It has two big side pockets that easily hold my phone and wallet, and there’s this nifty insulated cooler pouch for my refreshments. It keeps everything refreshingly cool.
However, it came with a single padded strap, whose comfort level did not match up to other carry-on golf bags I used. But it’s budget-friendly, making it a good carry-on golf bag without breaking the bank.
However, it lacks significant waterproofing, so it might not be the best choice for wet weather conditions. If your course tends to be wet, opting for a waterproof alternative could be more suitable.
Its lack of insulation in the refreshment pocket is another feature I was not happy with, so I would not be going for this bag. It may be a more affordable bag, but you’d give up a great feature.
What I liked:
extremely lightweight and easy to carry.
durable material, built to last.
What I didn’t like:
less storage compared to alternatives.
Not waterproof
The product lacks an insulated cooler pocket.
Best Budget-Friendly Carry Golf Bag: Cobra Ultralight Sunday Golf Bag
Cobra Ultralight Sunday Golf Bag
$129
Ultra-Lightweight and Compact: The bag stands out for its super lightweight design, weighing just 1.7kg, which makes it easy to transport and carry. Its slim profile enhances its portability, making it an ideal choice for golfers who prefer a light, compact bag.
Functional Design Features: It includes a long pocket on one side and a water bottle holder, offering practical storage solutions. The bag also features a strap to secure the legs when mounted on a trolley, adding to its convenience.
Multiple Handles and Club Storage: The bag has multiple handles, including a top grab handle, providing easy handling and transportation. Additionally, it has a three-way top divider for club storage, although it’s noted that clubs can get a little cluttered if carrying a full set.
I was very impressed with this carry bag, particularly because it is one of the more budget-friendly options. So, you don’t have to break the bank to get your hands on a lightweight bag.
It, however, provides less storage than most other Sunday golf bags; it holds just about seven clubs comfortably without clustering. This is why I wasn’t necessarily drawn to this bag because, most times, I’m on the course with at least nine clubs, and this bag would not serve me well.
On the bright side, the bag’s material is not just easy on the wallet but surprisingly tough, too, weighing about 3.8lb, so you do not have to worry about it giving way after a few months.
Accessing my clubs was easy with a 3-way top design, full-length club dividers, and a handy top grab handle. Plus, despite its compact size, it even comes with a stand. So, you can pop it down and grab your clubs between shots.
Another big turn-off for me was that it had just one strap, greatly reducing the comfort of using this bag.
I would only recommend this bag if you are very tight on budget, but if there’s a little bit of wiggle room in your budget, I would recommend a more comfortable option with dual straps.
What I liked:
The bag’s material stood out for its durability, promising longevity, and reliable performance.
It’s remarkably comfortable, making carrying a breeze.
It is budget-friendly without compromising on quality, making it a great value for the price.
What I didn’t like:
This might not be ideal if you’re searching for more storage space.
The single-strap design is less adjustable, which might be a drawback for some users.
Best Premium Carry Golf Bag: G/Fore Daytona Plus Carry Bag
G/Fore Daytona Plus Carry Bag
$375
Ease of Access and Club Protection: The bag boasts a four-way top design for easy access and safe storage of clubs, coupled with a rivet-less mesh construction that prevents scratching of club heads and shafts. A rotator stand system at the base provides excellent stability and ground adjustment.
Convertible Strap for Comfort: It features a self-adjusting convertible strap, offering balanced weight distribution when carrying. The strap includes a tailored neoprene back panel for added comfort and can be adjusted for either dual strap or single-shoulder use.
Ample Storage and Elegant Details: The bag is designed with grosgrain detailing and quilted panels, enhancing its aesthetic appeal. It includes a large clothing compartment, water-resistant pockets, a cooler-lined water bottle pocket, and an umbrella holder, ensuring generous storage capacity.
This premium carry bag hits the sweet spot between functionality and style. What I love most is how comfortable it is, thanks to the self-adjusting convertible strap and back panel.
The 4-way top that improves club organisation adds to the overall accessibility, making it a functional and stylish choice if you want to splurge a bit.
Equipped with a rain hood in a matching colour, an umbrella holder, and a waterproof pocket, your belongings remain safeguarded regardless of the weather conditions.
The ergonomic double strap adds a nice touch, easily converting to a single strap for a balanced carry over one or both shoulders, allowing for personalised adjustment.
But I’ll be honest: all these amazing features come with a price, a premium one, and I’m just not willing to spend that much on a carry-on golf bag. Not when I can find a more affordable and lightweight option equally functional in comfort and performance.
What I liked:
The design is a real standout—stylish and visually appealing.
The bag is lightweight and practical, making it easy to carry around.
Durability is a big win here. It is always a plus that the bag is built to last.
What I didn’t like:
The major hiccup for me was the price tag. It’s on the higher side, making it more expensive.
Best Carry Golf Bag For Storage: Callaway 2023 Fairway CHD Stand Bag
Callaway 2023 Fairway CHD Stand Bag
$279
Lightweight and Waterproof Design: Weighing in at just 4 lbs, the bag features a multi-layer waterproof construction with seam-sealed zippers, providing durability without adding significant weight and protecting belongings and clubs even in heavy downpours.
Quality and Functionality: The bag has metal zip pulls and a high-quality zipper system, contributing to its overall build quality. It also includes a quick-clip and opti-fit comfort strap, designed for easy adjustability and comfortable carrying.
Organized Club Storage: The bag boasts a lightweight 4-way divider and a full-length divider, facilitating efficient organization and secure placement of clubs, minimizing rattling or snagging during retrieval.
This bag offers impressive storage, holding up to 14 clubs and then some. The strap and hip pad system comforted my back and shoulders.
It is, however, not the lightest bag in this category, and if I’m going to be walking nine holes or more with my gear, I need a bag that’s as light as can be.
With five pockets, including a handy fleece-lined one, it’s a dream for organised storage. I particularly appreciate taking my phone away without worrying about scratching it.
However, the cooler pocket didn’t quite hit the mark for me. It was a bit too small and tight, making fitting in and retrieving my water bottle difficult.
An important feature of a carry-on golf bag is easy access, and having to struggle to get content out of my golf bag is not an option.
On the bright side, the waterproof material makes it a reliable choice for navigating wet courses without any concerns. Despite the weight, it’s a practical option for those prioritising ample storage and comfort.
What I liked:
The top storage design makes it easy to access my clubs.
The comfort level of the straps was a big win, making it enjoyable to carry.
The waterproof feature added a layer of reliability, especially in unpredictable weather.
What I didn’t like:
It’s not the lightest in the lineup, which could be a consideration for those prioritising weight.
The cooler pocket turned out to be a bit of a headache, proving more of a hassle than a convenience.
The Best Waterproof Carry Golf Bag: Ping Moonlite Carry Golf Bag
Ping Moonlite Carry Golf Bag
$174
Ultra-Lightweight and Versatile: Weighing only 2.5lbs, the PING Moonlite is noted for its super-light design, making it an ideal choice for golfers who prefer a light and easy-to-carry bag. It offers single or double-strap options for convenience and four stylish colour options.
Comfortable Carrying Experience: The bag’s strap is padded and substantial, providing a comfortable carrying experience. Reviewers have noted the surprising lightness and comfort of the bag, even when carrying a half set of clubs.
Ample Storage and Customizability: The Moonlite offers adequate space for essentials, including a valuables pocket, a large pocket for clothing, drinks, balls, and tees, and a water bottle pocket. Additionally, it features a removable second strap, catering to preferences for either single or dual straps, a thoughtful design consideration for different users.
The straps were one standout feature during my test of the Ping Moonlight Ultralight Sunday golf bag. The design is uncomfortable, and I found them a little awkward. The weight of my shoulders felt uneven, and no matter how many times I moved them around, I couldn’t find the right balance.
The water-resistant nature is another win, ensuring my clubs and belongings stay well-protected during early morning games.
Weighing in at a mere 2.5 lb., the bag’s lightweight yet durable material provides both comfort and longevity. The 4-way top allows easy club storage, accommodating up to 10 clubs with a standard grip.
The bag storage structure was a bit of a letdown. The bag storage structure was a letdown as my clubs often became entangled, making retrieval more challenging.
So if you prioritise the convenience of easy access to your clubs and a lot of comfort, this bag is not for you. You should go for an alternative.
What I liked:
The bag’s lightweight design adds to its overall convenience.
The water-resistant feature ensures protection for clubs and belongings during different weather conditions.
The compact layout makes reaching and grabbing clubs a hassle-free experience.
What I didn’t like:
The downside is the limited organisational features, which provide fewer options for keeping items in order.
not the most comfortable strap design,
Final verdict.
Finding the best golf bag to carry is about matching it with your unique preferences and needs.
Whether you prioritise comfort, style, versatility, or staying within a budget, each bag in the review presents a compelling option. It’s all about enhancing the enjoyment and ease of your time on the course. So which would you go for?
The Foresight GC-Hawk Launch Monitor is a state-of-the-art device that stands out among other Foresight launch monitors on the market. It is positioned as a game-changer, promising golfers of all skill levels real-time data with unparalleled precision and accuracy.
Think of it as a touch of luxury that transforms every golf game into a heavenly experience, where every shot is analyzed, and you can access iconic courses like Augusta National or St. Andrews, all from the comfort of your home. Its hands-off feature sets it apart, which puts it ahead of other launch monitors. Most online reviews have nothing but praise for this launch monitor. But does it live up to the hype? To find out, I decided to conduct a thorough test myself.
Upon concluding my investigation and review, the standout feature of the GCHawk became evident: the GC Hawk presents an impressive lineup of specifications, including its hands-off capability, all geared towards enhancing convenience and delivering unparalleled accuracy in shot analysis. An intuitive interface and lifelike graphics allow you to seamlessly transition from refining your swings on a local golf course to playing rounds on a world-class system.
In this piece, I will examine the standout features, assess its performance, evaluate its price value, and explore how this device has the potential to enhance your overall golfing experience.
I discovered some pros and cons after reviewing the GCHawk Launch Monitor.
What I liked:
Professional-Grade Accuracy: Utilizes high-speed cameras and infrared object tracking measurements for precise club and ball performance metrics.
Seamless Integration: Designed for residential and commercial environments, easily integrates with golf simulator enclosures or home theatres.
Hands-Off Experience: Overhead mounting provides a convenient, non-intrusive setup for players, with no repositioning needed for different players.
Comprehensive Software Compatibility: Works with Foresight Sports’ FSX software suite and various third-party solutions, offering extensive golf simulation and practice options.
What I Didnt Like
High Cost: It’s one of the most expensive options in Foresight Sports’ lineup, nearly $5000 more than the GCQuad while offering similar accuracy.
Limited Putting Analysis: Unlike the GCQuad, it doesn’t offer advanced putting analysis, although it reads putts effectively.
Complex Installation: Requires professional installation, which can be costly and time-consuming and is not covered by warranty in case of mistakes.
Lack of Portability: Its ceiling-mounted design limits its portability compared to other models like the GCQuad, restricting its use to fixed locations
Specification
The GCHawk’s unique multi-sport functionality is a distinguishing feature that sets it apart from other Foresight launch monitors. Its precise ball and club data measurement makes it a great choice for athletes and avid golfers. Additionally, its ability to provide unparalleled virtual realism in every swing enhances the overall immersive simulation experience.
club head speed, smash factor, club path, angle of attackface angle, closure rate, clubface impact location, lie & loft at impact
Appearance and setting up
Unboxing days are like Christmas mornings, and I’m usually excited. Unboxing the GChawk launch monitor made this excitement worth it.
As I opened the box, the first thing that caught my eye was its sleek design.
The device came with some added accessories, like:
2 Different Ceiling Mounts
Alignment Wand
2 Rubber Tees
After unboxing, I was ready to set up the launch monitor. This is where it can get tricky—you must ensure the monitor is mounted on the ceiling.
While the launch monitor does come with an instruction manual, I strongly recommend having a licensed contractor handle the installation.
Someone came in to mount the launch monitor in my garage to avoid potential damage to the device.
Once the mounting and power supply were connected to the launch monitor, I inserted the power cord and data lines into their respective ports and turned it on using the wireless remote.
Next, I had to ensure that it was properly calibrated. I connected it to my iPad through the internet and downloaded the GCHawk software on my iPad to complete the setup process.
And voila! The setup process was relatively straightforward. After the mounting, there were no glitches, and I could finish setting up on my own. On a scale of 1 to 10 for setup difficulty, I rate it a solid 7.
Build and technology
The GChawk impressed me with its durability and robust build, making it able to withstand regular use.
One feature that stood out to me was its compact footprint. I appreciated this because it didn’t require a lot of space and was perfect for my garage.
The camera system is a star player, capturing an impressive 10,000 shots per second and creating a detailed 3D model of the ball and club impact. It felt like having a personal coach, offering insights into ball speed, launch, and spin rate to improve each swing.
This launch monitor comes with a comprehensive software package that includes the Foresight Sports software suite, featuring FX2020, FSX Play, FSX Pro, Foresight Fairground, and compatibility with third-party software solutions like E6 Connect, GSpro, Creative Golf 3D, Swing Catalyst, and the Foresight app (similar to GC2 and GC3).
However, it also has a unique software solution, the skill drill, exclusive to the GCHawk.
Its high-tech algorithm and infrared lightwave feature provide one of the most realistic virtual golfing experiences, with various course simulations.
Performance
The requirement for the GCHawk to be securely overhead is a crucial design feature. This feature eliminates any potential disruptions to alignment and minimizes the risk of calibration errors. Additionally, this unique setup significantly enhances the overall reliability of the device.
I was excited to try out the precision and accuracy of the GCHawk and decided to compare it with the GCQuad Launch Monitor. The data obtained was similar, reinforcing my trust in its accuracy. However, the GCHawk offers fewer details than the GCQuad. Other than that, all other ball and club data obtained were identical.
Of course, I had to try out its advanced-tech simulation. It took virtual exercise to a whole new level. I could almost feel the wind as I took each shot. It was like being on my favourite course with a coach tracking my every shot and providing relevant insight to improve my swings, round after round. It was a 10/10 experience in simulation.
The interface was straightforward, and all the data was easy to view and review when needed.
Foresight Sports GCHawk Launch Monitor
$19,500
High Accuracy: Employs advanced technology for precise club and ball data measurement.
Seamless Integration: Ideal for residential or commercial setups, with easy switching for different players.
Higher Cost: Significantly more expensive compared to similar models like the GCQuad.
Installation & Portability: Complex installation requirements and limited portability due to its ceiling-mounted design
The GCHawk launch monitor is available for $19,500 from the indoor golf shop. This purchase includes the FSX 2020 software license, the FSX Play, and a skill drill license for soccer gameplay.
If you require additional club data to access information such as angle of attack, loft at impact, lie and face angle at impact, and location on the clubface, there is an option to purchase the club data add-on for $4,000.
Additionally, there are various third-party software integrations available.
However, other pricing models are available, each offering different packages.
Model 2: GCHawk, FSX Suite, Club Data at $23,500.
Model 3: GCHawk, FSX Suite, Club Data, E6 Connect at $26,000.
Model 4: GCHawk, FSX Suite, Creative Golf 3D at $20,700.
While the price tag is relatively high compared to competitors in the market, the GCHawk offers a wealth of features and precise data.
If you prioritize a casual golfing experience over detailed shot analysis, opting for a more affordable option with the necessary features might be a practical choice.
However, if you would rather go for the premium, all-inclusive, immersive experience, it would be a worthwhile investment in your golfing game.
Multi-sport capacity
The GCHawk is a versatile device that offers multi-sport features, allowing you to explore other sports on days when you are in the mood for something different. Currently, soccer simulation is the only sport available, but the good news is that you can also access your game performance data while playing soccer. This includes ball speed, carry distance, total spin, spin tilt axis, and horizontal/vertical launch angle.
Comparison with alternatives
The GCHawk distinguishes itself from other alternatives with its unique ceiling-mounted capability; however, its pricing presents a significant drawback. Fortunately, the Uneekor Eye XO Launch Monitor provides a similar ceiling-mounted feature at a more budget-friendly price point. Let’s compare these two monitors side by side.
Feature
Foresight Sport GCHawk
Uneekor EYE XO Launch Monitor
Data Captured
Ball speed, Launch angle, Side angle | Total spin, Backspin, Spin axis / Side spin, Club head speed, smash factor, club path, angle of attack
Ball Speed, Clubhead Speed, Back Spin, Side Spin, Side Angle, Launch Angle, Angle of Descent, Flight distance to Apex, Carry Distance, Roll Distance, Total Distance, Dynamic Loft, Angle of Attack, Smash Factor, Club Path, face Angle, Club Face to Path, Club Lie Angle, Club Loft AngleImpact Point Vertical, Impact Point Horizontal
The GChawk stands out as a revolutionary launch monitor, enhancing the indoor golfing experience with unparalleled precision and data analysis accuracy. The added convenience of its hands-free mounting option adds to its appeal.
However, the steep price tag makes it a launch monitor I wasn’t inclined towards. Other commendable alternatives on the market offer similar accuracy and reliability at a more affordable cost. I would likely opt for a more budget-friendly option.
But what are your thoughts? Would you prefer this, despite its premium pricing?
The Foresight GCQuad is a premium golf launch monitor known for its detailed feedback on ball and club performance metrics. It provides real-time shot analysis, which is beneficial for swing improvement. The unit is recognized for its robust build and longevity. Despite its advanced features, the cost is significantly higher than its predecessors, the GC3 and GC2, which may be a consideration for potential buyers.
I use the Bushnell Launch Pro because it provides all the data I need for my casual golfing needs and is a more affordable option. Recently, my golf buddy asked for my opinion on getting a new launch monitor. He had been using Skytrak, which only provided ball data. As he recently became a golfing coach, he wanted access to more comprehensive data and more advanced features, and he was willing to spend a little more on this.
To help him, I researched and tested some high-end golf launch monitors. After careful consideration, I settled on the GCQuad. Its precision and accuracy in providing ball and club data analysis and a top display for easy access during play appealed to me. The real-time data presentation was swift, offering immediate insights after each shot. However, it is quite expensive, with a price tag of $14,000. Unless you are a serious golfer or coach, I recommend exploring more affordable alternatives.
Foresight GCQuad Review
$14,500
Professional-Grade Accuracy: Known as the “workhorse” of launch monitors, the GCQuad is acclaimed for its unmatched precision and is used by professional golfers like Tiger Woods and Jordan Spieth for its reliable feedback on ball and club metrics
Advanced Features: It includes auto-leveling and auto-aligning capabilities, a large data display screen, a built-in barometer for altitude measurement, weather resistance, and a large hitting zone (14″x18″). It’s also equipped with a removable battery that lasts about 12 hours and offers wireless and ethernet connectivity.
Golf Simulation: The GCQuad pairs with high-quality graphics software for a realistic virtual golfing experience, enhancing its appeal for both practice and entertainment
Versatility in Use: It operates with no loss in accuracy both indoors and outdoors, although care must be taken to avoid direct sunlight and reflective surfaces that could interfere with its readings
While that device offers exceptional accuracy and real-time data feedback, it is imperfect and has some drawbacks. Here are some of the pros and cons of this high-end launch monitor.
What I Liked:
Provides highly accurate data for precise analysis.
Portable and easy to handle with a compact structure.
Quick and straightforward setup process.
Includes valuable features for enhancing putting skills.
Offers immediate feedback on shot data.
Displays data in real-time during use.
What I Didn’t Like:
More expensive
It is slightly heavier than other alternatives
Specifications
Let’s look at key specifications that make this launch monitor stand out. Here’s a table outlining the compatibility, dimension, weight, and data captured by the Foresight GCQuad:
Club speed, Impact Point, Angle of attack, Club path, Delivered face angle, Delivered lie angle, Impact loft, Closure rate
First impression
I like that it came with a backpack, which offered additional protection and was also good for transportation because I planned to take it to the course to test.
It was compact and portable, although heavier than the GC3 I tried on the course. The top handle is a practical addition, simplifying carrying the launch monitor.
Setting up
The GCQuad proved incredibly straightforward; the instruction manual was clear and easy to follow. I placed the monitor 22 inches from the hitting area, ensuring the base was level with the hitting surfaces. After powering the device, it was ready to use. The only extra step involved placing club stickers on my clubs for tracking club data. Overall, the setup process was smooth and user-friendly. The launch monitor came with:
FSX Software (2020, Play, Pro)
25 Simulated Courses
USB-C Cable
Alignment Stick
Club marker dispenser
Technology and software
The GCQuad utilizes a quadrascopic system with high-speed cameras at each corner. These cameras capture thousands of images per second to construct a detailed 3D model of the club and ball at the moment of impact.
With the GCQuad, you can access the Foresight Suite core software, which includes FSX 2020, FSX Play, FSX Pro, Foresight Fairgrounds, and the Foresight app. Additionally, it allows for integration with third-party software such as E6 Connect, GSPro, Awesome Golf, Creative Golf 3D, and Swing Catalyst.
While FSX 2020 offers a range of impressive features and functionality, it is important to note that its graphics are not as advanced as those of FSX Play and FSX Pro. However, if you are willing to pay for the upgrade, you can enhance your experience with these superior graphics. It is worth mentioning that the upgrade comes with an additional cost, which some may consider overpriced.
Nevertheless, the upgrade may be worth the expense for serious golfers willing to invest $14,000 in this launch monitor. On the other hand, the free Foresight app has limited features compared to other software options.
Performance
Based on my experience with the GCQuad, here’s a data table that reflects the performance from my use of the GC Quad
Shot Type
Club
Total Shots
Within Target Range
Average Deviation (Yards)
Notes
Indoor
Various
20
20
<1
Discrepancies in face angle measurements due to curved faces.
Outdoor (Pitching Wedge)
Pitching Wedge
20
16
5
Occasional overreporting on low spin, high launch shots.
Outdoor (Driver)
Driver
10
7
–
Discrepancies in face angle measurements due to curved face.
Putting
Putter
15
15
<2
Accurate putting feedback, useful for lessons and fittings.
Outdoor (Various Clubs)
6-iron to Pitching Wedge
20
18
7
Consistent and reliable across different clubs.
Using the GCQuad has been an impressive experience, particularly regarding accuracy and quick data feedback. I conducted indoor tests alongside a Trackman launch monitor, and the results closely matched those of the Trackman. However, I noticed some differences when testing outdoors, where the Trackman seemed more reliable.
The GCQuad didn’t miss a single shot during indoor testing, showcasing its precision. Outdoors accurately read my pitching wedge, with 16 out of 20 shots falling within 5 yards of the actual range finder distance. However, there were occasional instances of overreported distance on shots with low spin and high launch.
The absence of calibration adds to its user-friendly nature. I opted for the version without add-on club data, but even so, full simulation and putting capabilities are unlocked when paired with FSX 2020. I found the putting feature valuable, and my buddy found it particularly useful for lessons and fittings.
I did notice some discrepancies in measuring face angles with drivers due to their curved faces. Additionally, sunlight can affect outdoor performance because the GCQuad is an optical measuring system.
Across different clubs, from a six-iron to a pitching wedge, the GCQuad consistently provided reliable feedback. It accurately tracked 18 out of 20 shots within 7 yards of the rangefinder’s measurement.
What I appreciate most about the GCQuad is its convenience. You can set it down and take your shot; it tracks everything, providing instant feedback. The GCQuad is designed to provide tour-level feedback and comprehensive data.
Foresight GCQuad Review
$14,500
The Foresight Sports GCQuad Launch Monitor is reputed for its precision, offering comprehensive ball and club data indoors and outdoors. It has features like auto-leveling, a built-in barometer, and a large hitting zone.
The device is noted for its professional-grade accuracy and is used widely among tour professionals. It offers golf simulation capabilities when paired with suitable software.
However, it is also one of the more expensive launch monitors on the market, positioned as a premium option for serious players and coaches seeking detailed swing analysis.
The launch monitor is priced at $14,500 at the indoor golf shop, including FSX 2020 and FSX Play. The Club Analysis add-on at $4,000 and the Essential Putting Analysis at $2,500 are also available.
The data provided by the FSX software is comprehensive enough for most users, making the Club Analysis add-on unnecessary. However, the Essential Putting Analysis could be a valuable investment for those looking to improve their putting skills and practice on a real-life putting green.
Although third-party software integration is possible at an additional cost, the functionality of the available FSX software is already robust. Therefore, opting for third-party integrations is not essential.
Comparison with Alternatives
While the GCQuad launch monitor delivers impressive performance, its high price tag makes it more suitable for coaches and dedicated golf enthusiasts. For those seeking a more budget-friendly yet effective option, the Foresight GC3 is a compelling choice.
On the other hand, the SkyTrak+, positioned as a more affordable alternative, is well-suited for casual golfers, offering reliable performance. Let’s compare their specifications side by side.
Feature
Foresight Sport GCQuad
Foresight Sport GC3
SkyTrak+
Data Captured
Ball speed, Ball launch angle, Internal horizontal angle, Total backspin rpm, Spin tilt axis, Club speed, Impact Point, Angle of attack, Club path, Delivered face angle, Delivered lie angle, Impact loft, Closure rate
Ball speed, Launch angle, Side angle | Total spin, Backspin, Spin axis / Side spin, Club head speed, smash factor, club path, angle of attack
Clubhead speed, ball speed, launch angle, spin rate, carry distance, total distance, smash factor, angle of attack, and club path
Price
$14,999
$6,999
$2,695
Simulation features
Yes
Yes
Yes
Portability
Moderate
moderate
High
Build Quality
Robust
Robust
High
Realtime feedback
Yes
Yes
Limited
Software compatibility
Yes
Yes
Yes
Final thoughts
The GCQuad is a state-of-the-art device with many amazing features that can greatly enhance your game; some may say too many features. Unless you’re a professional athlete or a golf coach, you might find some of these features unnecessary.
Considering the high price tag, exploring more affordable options with excellent performance might be a practical choice if you are a casual golfer.
One of the most common issues with the Bushnell Launch Pro is inaccurate readings. Factors such as improper calibration, incorrect settings, or wind interference can contribute to this problem. To resolve it, ensure that the device is properly calibrated and that you use the correct settings for your club and ball type. Additionally, avoid using the device in windy conditions or when there are many obstacles in the background.
Although the Bushnell Launch Pro is a popular launch monitor, it does have its fair share of problems. As a golfer with over 5 years of experience, I have used a variety of launch monitors, and the Bushnell Launch Pro is one of the most sought-after models on the market. However, I have also encountered some of the issues that other golfers have reported.
One of the most significant problems I have experienced with the Bushnell Launch Pro is its accuracy. I have discovered that the device can be inaccurate, particularly in windy conditions or when there are numerous obstacles in the background. Additionally, I have found that the device can be challenging to use, and the controls can be confusing. Finally, the device lacks durability and can easily sustain damage if dropped or mishandled.
Despite these problems, the Bushnell Launch Pro remains a valuable tool for golfers. If you are aware of the potential issues and take steps to mitigate them, the device can provide you with valuable information about your swing and your game. In the remainder of this article, I will address 15 Bushnell Launch Pro problems and provide solutions to fix them.
1. The device is not calibrated properly
Calibration is the process of adjusting a device to ensure that it is measuring or recording accurately. For launch monitors, calibration is essential for getting accurate readings on your swing speed, ball speed, launch angle, and spin rate.
Improper calibration of your Bushnell Launch Pro will prevent you from obtaining accurate swing readings. This can lead to frustration and confusion, as you will not be able to see how your swing is improving.
The Solution
If this launch monitor isn’t calibrated properly, all you need to do to resolve that is to calibrate it.
To calibrate your Bushnell Launch Pro, you will need to follow these steps:
Step 1: Place the launch monitor on a level surface. Check the levelness of the surface by using a level or by placing the launch monitor on a flat surface and ensuring it is not tilted in any direction.
Step 2: Make sure that the launch monitor is pointing directly at the target. You can use the alignment stick that came with the launch monitor to do this. Simply place the alignment stick in the hitting zone and align it to your target. Then, adjust the launch monitor so that it is pointing directly at the alignment stick.
Step 3: Hit a few balls with your driver. You should hit at least 10 balls, but more is better.
Step 4: Check the readings on the launch monitor to make sure that they are consistent. You are looking for the readings to be within a few yards of each other for the same swing.
Step 5: If the readings are not consistent, repeat steps 3 and 4. You may need to hit more balls or adjust the launch monitor slightly.
2. The device is not level
I have personally experienced problems with my Bushnell Launch Pro not being level. I noticed that my readings were inconsistent, and I was also having trouble tracking my progress over time.
The Solution
I tried levelling the Launch Pro using the built-in level indicator, but I was not able to get the readings to become consistent. I eventually had to use a level to level the Launch Pro.
Once the Launch Pro was level, my readings were much more consistent, and I was able to start tracking my progress over time.
3. The device’s microSD card is not formatted properly
If your device is displaying an error message that says “Device’s microSD card is not formatted properly,” it means that the file system on the card is corrupted or missing. This can happen for a number of reasons, such as improper removal of the card, power surges, or virus infection.
One can fix a microSD card that is not formatted properly in a few different ways. The simplest way is to format the card using your device. However, this will erase all of the data on the card. If you have important data on the card, you can try to recover it using a data recovery program.
If you are unable to format the card using your device or recover the data, you can try formatting the card using a computer.
The Solution
To format a microSD card, you can use your computer or your device.
To format a microSD card on your computer:
Step 1: Connect the microSD card to your computer using a microSD card reader.
Step 2: Open File Explorer.
Step 3: Right-click on the microSD card and select Format.
Step 4: Select the file system that you want to use to format the microSD card.
Step 5: Click Start.
To format a microSD card on your device:
Step 1: Open the Settings app.
Step 2: Tap on Storage.
Step 3: Tap on the microSD card.
Step 4: Tap on Format.
Step 5: Tap on Format SD card.
4. The device’s internal temperature sensor is not working properly
The device’s internal temperature sensor is an important component that helps to regulate the temperature of the device and prevent it from overheating. If the internal temperature sensor is not working properly, the device may overheat and become damaged.
There are a few things that you can do to try to fix a device’s internal temperature sensor:
The Solution
Restart the device
Restarting the device can sometimes fix minor software glitches that may be causing the temperature sensor to malfunction.
Update the device’s software
If the device’s software is out of date, it may contain bugs that are causing the temperature sensor to malfunction. Updating the device’s software to the latest version can often fix these bugs.
Clean the device
Dust and dirt can build up on the device’s temperature sensor and interfere with its ability to accurately measure the temperature. Cleaning the device with a soft cloth can help to remove dust and dirt from the temperature sensor.
Check the device’s ventilation
The device’s ventilation system helps to keep the device cool. Blocking the device’s ventilation can cause it to overheat. Make sure that the device’s ventilation system is clear and unobstructed.
Replace the device’s battery
If the device’s battery is old or damaged, it may not be able to provide the device with enough power to operate properly. Replacing the device’s battery with a new one can sometimes fix a device’s internal temperature sensor.
5. The device is not zoomed in enough to lock onto the ball
I’m a member of a community with other golfers, and someone mentioned that he had this particular problem with his golf rangefinder.
One of the pros in the group said that the reason for getting the error message “Device is not zoomed in enough to lock onto the ball”, is that the device cannot see the ball well enough to focus on it.
So, he tried a few of the fixes recommended, and funny enough, he only needed to clean the camera lens.
The Solution
Here are some things that you can do to fix this problem:
Move closer to the ball
This is the simplest solution, and it is often the most effective. Simply move your device closer to the ball until it is able to lock onto it.
Use a zoom lens
If you are using a device with a zoom lens, you can try zooming in on the ball. This will make the ball appear larger on the screen, making it easier for the device to track.
Calibrate your device
If you are still having problems tracking the ball, you may need to calibrate your device. This will help the device to learn the distance between itself and the ball, making it easier to track.
Update your device’s software
Bushnell regularly releases software updates for the Bushnell Launch Pro. These updates often include bug fixes and performance improvements. Check for and install any available software updates to see if this fixes the problem.
Clean the device’s camera lens
A dirty camera lens can interfere with the device’s ability to track the ball. Cleaning the lens with a soft cloth can often fix this problem.
6. Device is experiencing software glitches
Some golfers have reported that their Bushnell Launch Pro is experiencing software glitches. This can cause the rangefinder to malfunction, making it difficult or impossible to use. If you’re experiencing a software glitch, the device would freeze randomly, and sometimes it would crash altogether.
The Solution
If you’re experiencing software glitches, the first thing you should try is to update the firmware. Bushnell regularly releases firmware updates for the Bushnell Launch Pro. These updates often include bug fixes and performance improvements. To update the firmware, you can connect the device to your computer and download the latest firmware update from the Bushnell website.
When you update the firmware and you’re still experiencing glitches, then you need to reset the device. When resetting the Bushnell Launch Pro, press and hold the power button for 10 seconds. After the device resets, it should be able to power on and off normally.
If you have tried all of the above solutions and your Bushnell Launch Pro is still experiencing software glitches, you can try reinstalling the software. To do this, you will need to download the installation file from the Bushnell website. Once you have downloaded the installation file, you can connect the device to your computer and install the software.
7. Device is not tracking the ball correctly
Several golfers have reported that their Bushnell Launch Pro is not tracking the ball correctly. This can be a frustrating problem, as it can make it difficult to get accurate readings.
My golf buddy, John, recently had this problem with his Bushnell Launch Pro. He said that the rangefinder would often track the ball for a few seconds and then suddenly lose track of it. This made it difficult for him to get accurate readings, and he eventually had to stop using the rangefinder altogether.
When he shared his problem with us during a game, some fix suggestions were made. Now, his Bushnell Launch Pro is fully functional.
The Solution
Ensure the Bushnell Launch Pro is properly aligned
Press and hold the “Power” button for 5 seconds to enter alignment mode.
Aim the Bushnell Launch Pro at a distant object and press the “Fire” button.
The Bushnell Launch Pro will display a grid on the screen. Align the center of the grid with the distant object by using the arrow keys to move the grid.
Confirm the alignment by pressing the “Fire” button again once the grid is aligned.
Clean the lens
A dirty lens can interfere with the Bushnell Launch Pro’s ability to track the ball. Clean the lens with a soft cloth to remove any dirt or smudges.
Use the zoom feature
The Bushnell Launch Pro has a zoom feature that can help you to track the ball more easily. To use the Zoom feature, press and hold the “Zoom” button.
Update the software
Bushnell regularly releases software updates for the Bushnell Launch Pro. These updates often include bug fixes and performance improvements. Check for and install any available software updates to see if this fixes the problem.
8. The device is not displaying data accurately
I saw a comment on a forum where a user noticed that the distances that the rangefinder was giving her were not accurate. She used an instance where she would hit a shot that was obviously 150 yards, but the rangefinder would say that it was only 120 yards. I can tell it was a pretty annoying experience as it made it difficult for her to golf.
The Solution
If your Bushnell Launch Pro is not displaying data accurately, the first thing you should do is clean the lens. Use a soft cloth and a lens cleaner to clean the lens, being careful not to scratch it.
If cleaning the lens does not fix the problem, you can try aligning the device. You can use the built-in alignment system of the Bushnell Launch Pro to ensure correct alignment of the device. To align the device, follow the instructions that came with the device.
If aligning the device does not fix the problem, you can try updating the software. Bushnell regularly releases software updates for the Bushnell Launch Pro. These updates often include bug fixes and performance improvements. To update the software, you can connect the device to your computer and download the latest software update from the Bushnell website.
If updating the software does not fix the problem, you can try resetting the device. To reset the device, press and hold the power button for 10 seconds.
9. The device is not responding to button presses
There are a few possible reasons why your Bushnell Launch Pro may not be responding to button presses. One possibility is that the battery is low. Another possibility is that the buttons are dirty or stuck. Finally, it is also possible that there is a problem with the device’s software.
The Solution
If your Bushnell Launch Pro is not responding to button presses, check the battery first. Make sure it is fully charged; if not, charge it before using the device.
Clean the buttons if the fully charged battery does not resolve the unresponsiveness of the device. Use a soft cloth to clean them and make sure they are not dirty or stuck.
If cleaning the buttons does not fix the problem, reset the device. Press and hold the power button for 10 seconds to do this. Once the device resets, it should be able to respond to button presses again.
Once the device resets, try using the buttons again. If they are still not working, update the software. Bushnell regularly releases software updates that include bug fixes and performance improvements. To update the software, connect your device to a computer and download the latest update from the Bushnell website.
10. The device is not powering on or off properly
Bushnell Launch Pro not powering on or off properly is a common problem. You could be playing a round of golf with friends, and suddenly notice that the rangefinder would not turn on. I tried pressing the power button multiple times, but the rangefinder would not respond.
There are a few possible reasons why your Bushnell Launch Pro may not be powering on or off properly. One possibility is that the battery is low. The power button may be stuck or broken. Finally, it is also possible that there is a problem with the device’s firmware.
The Solution
If your Bushnell Launch Pro is not powering on or off properly, the first thing you should do is check the battery to make sure that it is fully charged. If the battery is low, charge the device using the included charging cable.
Next, try cleaning the power button with a soft cloth. This may help to remove any dirt or debris that is preventing the button from working properly.
If the power button is still not working, try resetting the device. To do this, press and hold the power button for 10 seconds. After the device resets, it should be able to power on and off normally.
If the device is still not working properly, try updating the firmware. Bushnell regularly releases firmware updates for the Bushnell Launch Pro that include bug fixes and performance improvements. To update the firmware, connect the device to your computer and download the latest firmware update from the Bushnell website.
11. The device is not charging properly
I’ve seen people complain on forums that they plugged the rangefinder into the charger, but the charging indicator light did not come on. Even after trying to use different charging cables and different power outlets, the rangefinder still would not charge.
The possible reasons why your Bushnell Launch Pro may not be charging properly are that the charging port is dirty or damaged, the charging cable is faulty, or there is a problem with the battery.
The Solution
The first thing to do when your device isn’t charging properly is to clean the charging port. You can use a soft cloth or a cotton swab to clean the charging port on your Bushnell Launch Pro. This will remove any dirt or debris that may be preventing the charging cable from making a good connection.
If this doesn’t resolve the issue, then you need to try a different charging cable because it is possible that the charging cable that you are using is faulty.
Once you have tried using a different charging cable and your Bushnell Launch Pro is still not charging, try plugging the charger into a different power outlet. It is possible that the power outlet that you are using is not working properly.
After trying out the other steps and your device still isn’t charging, then it is possible that the battery is dead. Here’s how you can replace the battery:
Turn off the Bushnell Launch Pro and disconnect it from any power source.
Locate the battery compartment on the back of the device.
Use the screwdriver or spudger to pry open the battery compartment door.
Remove the old battery and insert the new battery.
Ensure that the new battery is securely placed in the battery compartment.
Close the battery compartment door and secure it with the screwdriver or spudger.
12. Device is overheating
I remember that a golf buddy of mine, Steve, had a problem with his Bushnell Launch Pro overheating on a hot day. We were playing a round of golf in the middle of the summer, and the temperature was over 90 degrees Fahrenheit. After about an hour of playing, his rangefinder started to overheat. The screen started to flicker, and the rangefinder eventually shut down.
The Solution
Step 1: Check the temperature.
Make sure that you are not using the Bushnell Launch Pro in extreme temperatures. The Bushnell Launch Pro operates within a temperature range of 32 degrees Fahrenheit to 122 degrees Fahrenheit. If you are using the rangefinder in extreme temperatures, it is more likely to overheat.
Step 2: Check the ventilation vents.
Ensure that nothing is blocking the ventilation vents on the back of the Bushnell Launch Pro. Dust and dirt can build up on the rangefinder, which can block the ventilation vents and cause the rangefinder to overheat. Use a soft cloth to clean the ventilation vents regularly.
Step 3: Clean the rangefinder.
Use a soft cloth to clean the entire Bushnell Launch Pro. This will help to remove any dust or dirt that may be blocking the ventilation vents or causing the rangefinder to overheat.
Step 4: Update the firmware.
Bushnell regularly releases firmware updates for the Bushnell Launch Pro. These updates often include bug fixes and performance improvements. To update the firmware, you can connect the device to your computer and download the latest firmware update from the Bushnell website.
13. The device is not focused properly
One common problem with the Bushnell Launch Pro is that it does not focus properly. This can make it difficult to get accurate readings, as the rangefinder may not be able to lock onto the ball.
The Solution
The solution for your Bushnell Launch Pro not focusing properly is similar to what you’ll do if it’s not zooming enough to the ball.
If, after trying those fixes, it doesn’t resolve the issue, contact Bushnell customer support. They are usually very helpful and will be able to give you a quick diagnosis of the problem. From other golfers’ experience, what they do is send you a replacement unit for the rangefinder.
But before Beshell sends the replacement unit, they will determine whether you are eligible for a replacement unit. If you are eligible for a replacement unit, they will send you a new device. You will need to return your defective device to Bushnell. Bushnell will typically cover the shipping costs for both the new device and the return shipment.
14. The device’s gyroscope is not working properly
The possible causes of your Bushnell Launch Pro gyroscope not working properly is that the gyroscope is simply not calibrated correctly, a problem with the gyroscope itself, or a problem with the rangefinder’s internal components.
The Solution
Step 1: Calibrate the gyroscope.
The Bushnell Launch Pro has a built-in gyroscope calibration function. To calibrate the gyroscope, follow the instructions in the Bushnell Launch Pro manual.
If calibrating the gyroscope does not fix the problem, try the next step.
Step 2: Check the gyroscope sensor.
The gyroscope sensor is located on the underside of the rangefinder. To check the gyroscope sensor, carefully remove the rangefinder from its case and look for any damage to the sensor. If the gyroscope sensor is damaged, the rangefinder cannot accurately measure the distance to the ball. In this case, the only way to fix the problem is to replace the rangefinder.
Once you’ve gotten a replacement rangefinder, you can follow these steps to replace your old rangefinder:
Remove the old rangefinder from its case.
Carefully remove the gyroscope sensor from the old rangefinder.
Insert the gyroscope sensor into the replacement rangefinder.
Snap the replacement rangefinder back into its case.
Your replacement Bushnell Launch Pro rangefinder should now be ready to use.
15. Device not compatible with user’s smartphone or tablet
Users can pair the Bushnell Launch Pro, a popular golf rangefinder, with a smartphone or tablet to access additional features and functionality. However, some users have reported that their Bushnell Launch Pro is not compatible with their smartphone or tablet. This can be a frustrating problem, as it can prevent users from taking advantage of all that the Bushnell Launch Pro has to offer.
The Solution
Step 1: Make sure that the smartphone or tablet is running the required operating system version. The Bushnell Launch Pro requires a smartphone or tablet to be running iOS 11.0 or later or Android 6.0 or later.
Ensure that the smartphone or tablet has the required Bluetooth hardware. The Bushnell Launch Pro requires a smartphone or tablet with Bluetooth 4.0 or later.
Step 3: Try restarting the smartphone or tablet and the Bushnell Launch Pro. Sometimes a simple restart can fix compatibility problems.
Step 4: Update the firmware on the Bushnell Launch Pro. Bushnell regularly releases firmware updates for the Bushnell Launch Pro. These updates often include bug fixes and compatibility improvements. To update the firmware, you can connect the Bushnell Launch Pro to your computer and download the latest firmware update from the Bushnell website.
Conclusion
The Bushnell Launch Pro is a popular golf rangefinder with a variety of features and functionality. However, like any other electronic device, the Bushnell Launch Pro can sometimes have problems.
In this article, I have discussed some of the most common problems that users have reported with the Bushnell Launch Pro. I have also provided solutions for fixing these problems. If you are experiencing problems with your Bushnell Launch Pro, try out the solutions that I have provided in this article. If you are still unable to fix the problem, please contact Bushnell customer support for assistance.
The Bushnell Launch Pro (BLP) and SkyTrak+ are among the best options for launch monitors under $5,000. For this price range, you can expect them to have their respective pros and cons, making it a tricky pick on the best option.
Fortunately, I’ve owned both the Bushnell Launch Pro and SkyTrak launch monitors and have created this review to compare both devices side-by-side, so you have a clearer picture of what both options offer and which is worth your money.
SkyTrak shines by providing weather settings, portability, side-angle readings, wireless setup, and photometric readings. But Bushnell Launch Pro gains more love because it’s easy to set up, includes one free year of the basic software package, provides in-depth shot and club data, houses up to 10 simulated courses, and is enabled by wireless internet.
Both devices are great, honestly. If you’re a recreational golfer, the differences between these devices may not be a deal-breaker. But again, the last thing you want is to make a careless purchase and later realize that one would have better served you than the other.
So, in the rest of this article, I’ll walk you through the features, specifications, performance, accuracy, design, and overall performance of both Bushnell Launch Pro and SkyTrak launch monitors.
Bushnell Launch Pro vs. SkyTrak Comparison Chart
Before we dive into the head-to-head review, here’s a rundown of how both devices measure up across relevant factors. It will help you make quicker decisions on which is better for you if you’re in a hurry.
Factors
Bushnell Launch Pro
SkyTrak+
Data Metrics
Ball Data (Carry Distance) Ball Speed, Vertical Launch Angle, Horizontal Launch Angle, Spin Axis, Backspin, and Sidespin) as well as Club Data (Club Speed, Club Path, Angle of Attack, and Smash Factor)
Ball Data (Ball Speed, Launch Angle (vertical), Descent Angle, Backspin, Sidespin, Side Angle (horizontal launch angle), Max Height, and Carry Distance) as well as Club Data (Club Speed, Club Path, Face to Path, Face to Target, and Smash Factor)
Both devices give you ball and club data. I figured this is the area where most people are interested. So, instead of listing off everything that both devices offer, we will focus on what they don’t provide.
For example, the Skytrak+ has the ball and club data you’d expect from a typical launch monitor, but it’s missing the angle of attack.
I’ve tried to think of why this is so, but the closest conclusion I came to was that it probably has to do with the angle of the radiator that measures it.
On the other hand, Bushnell Launch Pro has the angle of attack metric but lacks face angle data such as face-to-target or face-to-club path.
Hitting Area
The Bushnell Launch Pro has a hitting area of 7” by 10”, which is pretty much right in the middle of most hitting strips you will use in a golf simulator.
The device uses the display on the screen to show you the shape of the hitting area. When you drop a golf ball, it shows you where it is on the screen. So, you can adjust if you’re a bit far forward with the ball.
It has an edge over SkyTrak because it makes the BLP fast, efficient, and easy to use.
On the part of SkyTrak, the hitting area is not an area. It’s just a red dot on the ground where you’re supposed to place the golf ball that works just like the original Skytrak, but the Skytrak+ is 40cm larger in area.
Shot Delays
While using both launch monitors, I noticed a little delay between when I hit the shot and when it appeared on screen for the SkyTrak. This is a unique feature of the Skytrak that’s not present on the Bushnell Launch Pro.
Indoor and outdoor performance
Skytrak+ does work indoors and outdoors, which gives it an edge over the original Skytrak, but you still need a map when using the device outdoors, so you cannot take it to a golf course. If you’re at a grass-driving range, it won’t work either.
On the other hand, the Bushnell Launch Pro works great indoors as a golf simulator or outdoors at the driving range or golf course.
Since it has a built-in display, it can be used as a standalone device if you don’t want to use any apps or other devices.
Software for the Driving Range
The Bushnell Launch Pro software has three main pieces from Foresight. Each one has a driving range.
The FSX Pro is Bushnell’s PC or iPad app. It gives you all the necessary data, but not necessarily as a simulation would. It can serve as your driving range, especially if you’re not using a PC.
The FSX 2020: This subscription was dedicated to the Launch Pro device. It is identical to the regular Foresight FSX 2020 but just made to verify the subscription with the Launch Pro. Apart from having all the basic features, you can integrate swing cameras, which is awesome.
The FSX Play: This is Bushnell’s newest simulation software. It has a driving range similar to the FSX 2020 but has fewer features. There are no swing cameras and fewer settings or customization options.
NOTE: Depending on subscriptions, some of these features may be locked for you in FSX Pro.
For the SkyTrak software, you get the SkyTrak app with its driving range. I also like that it allows for many settings and customization options, such as how far the ball flies and creating targets of different sizes and distances.
The software has a cool feature called a randomizer that picks a different yardage for you and mixes it up so you’re not just hitting the same target repeatedly.
On the software, you can click on each data point for an elaborate explanation of what the metric means and pop a video of what the data means. So, SkyTrak is so cool for game improvement.
Price and value
The Skytrak costs $2,995 while the Bushnell Launch Pro costs $3,499, but one thing to mention is that the Bushnell Launch Pro goes on sale frequently throughout the year and around holidays; it can usually go on sale for $500 off, so that would make them the same price as the Skytrak.
Also, you can pick up a used or refurbished Bushnell Launch Pro from eBay for around $3000.
Pros and cons
Indeed, there are no perfect launch monitors out there. There are always two sides to the coin. To further help you decide which of these launch monitors is best for you, consider the pros and cons of each:
Bushnell Launch Pro
PROS
CONS
It comes with an alignment stick and is very easy to set up.
The software packages are pricey compared to SkyTrak’s.
Connects wirelessly to your internet.
Only ten simulated courses were offered, despite the high price.
The accuracy for indoors and outdoors is reliable.
An extra fee is charged to access advanced shot/ball metrics like side spin, backspin, spin tilt axis, club path, and angle of attack.
The graphs make it easier to understand my swings and other insights.
SkyTrak’s battery life is better than the Bushnell Launch Pro’s.
For the price, the accuracy even challenges launch monitors that cost more.
It can take between 5 and 7 seconds to pull up shout metrics.
Reliable wireless connection.
It doesn’t provide as many shot metrics as the Bushnell Launch Pro.
The simulated renderings of famous courses look cool.
Ability to archive and review shot data later on.
The device itself is relatively affordable compared to the Bushnell Lauch Pro.
Verdict summary
All the time I used both launch monitors, Bushnell seems to be the more accurate (slightly) but the limitations of significant membership prices and only ten base courses are tough to swallow.
On the other hand, even if you don’t know much about SkyTrak, their reviews always look good from real users. So that’s a good side.
That being said, here’s my final rating based on the experiences I had with both devices:
Rating
Bushnell Launch Pro
SkyTrak Launch Monitor
Metrics captured
9
8
Accuracy
10
8.5
Performance
8
7
Ease of Use
10
8
Looks
9
8.5
TOTAL (50 points):
46 Points
40 Points
Overall, despite the fact that it costs a little more, I will pick the Bushnell Launch Pro over the SkyTrak anytime, any day.
I love its 3-camera system, reliable Foresight technology, which PGA Tour Pros also use, similar accuracy to the Foresight GCQuad, indoor and outdoor reliability, and even the unit display.
However, this doesn’t mean it’s the best choice for you.
You can’t go wrong with SkyTrak if you’re on a tight budget. It’s even a smarter option if you want to use it indoors with an iPad only and you live outside the U.S. (At the time of writing, Launch Pro is only sold and can only be used within the U.S.)
You can figure out the best cold-weather golf pants on your own once you pay attention to the size of the pants, the inseam, and the price range. However, not all golf pants advertised as ‘cold weather’ will give you warmth and protection from the elements.
The best pants to pick must combine waterproof or repellent slacks with rain or wind pants. With extensive research, testing, and combing through reviews of fellow golfers, these five golf pants rank as the best for the cold season:
Living in New Hampshire, playing deep into the fall is challenging. Still, I get to do it when possible, as long as I have the right golf gear. This is when cold-weather golf pants come in.
I’ll be slightly biased to highly recommend the Under Armour ColdGear Infrared Pants as the best for cold weather because they have worked for me so far. However, players’ preferences vary, as do weather conditions. That is why I deemed it fit to review a few other products that also work great.
Meanwhile, I have seen some golf buddies use heavier work pants and some fleece-lined jeans, but they don’t look great on the course because they get so much lower/body torso movement when swinging, so such a thermal base layer won’t work.
Before we dive fully into the review of these top recommendations, here’s a table I’ve prepared to compare them across relevant factors to help you make a quick decision in case you’re in a hurry:
Pants
Sizes
Colors
Waterproof/water-resistant
Price*
Under Armour ColdGear Infrared Pants
30, 32
Black, Navy
Repellant
$75
Nike Storm-FIT ADV Men’s Rain Pants
XL, XXL
Black
Waterproof
$155
Adidas Men’s Frostguard Insulated Pant
–
Black
Repellant
$65-$100
FootJoy DryJoys Tour L.T.S. Rain Pants
S, M, L, XL, XXL
Black
Waterproof
$215
Addidas Provisional Rain Pants
XXL
Black
repellant
$52
*at the time of publishing
As you read on to see what makes these golf pants stand out for cold weather conditions, you’ll realize why they are top recommendations. During my search and testing, I prioritized insulated, moisture-wicking, and wind-resistant options.
Materials like fleece-lined or thermal fabric are common in high-quality golf pants for cold weather, with a snug fit to retain warmth. Some even feature zippered pockets and adjustable waistbands for extra comfort and functionality.
Here’s my full review of the top options to help you decide the best fit.
1. Under Armour ColdGear Infrared Pants
Under Armour ColdGear Infrared Pants
$75
Designed to provide warmth in sub-40-degree temperatures
Water-repellent and breathable
The stretch fabric allows for easy movement and flexibility, crucial for a golf swing
Suitable for golfers facing temperatures between 40 and 60 degrees
The ColdGear Infrared technology works like a charm, trapping body heat while staying lightweight. Plus, they repel water without sacrificing breathability, making them versatile. I compared this with my bulky fleece pants for sub-40 temps, and they keep me warm without the added weight.
Excellent golf pants for chilly weather between 40 and 60 degrees. The moisture-wicking material will keep you dry, and the 4-way stretch allows easy movement.
The comfy waistband is a bonus. They’re perfect for workouts in the cold!
What I like about this golf pant
The stretch waistband helps create the perfect fit.
Keep you warm in chilly weather, but not too hot when the temperature rises.
Not bulky
Very warm, but you won’t sweat.
What I don’t like about this golf pant
It’s pricey compared to many other options, but it’s worth it!
2. Nike Storm-FIT ADV Men’s Rain Pants
Nike Storm-FIT ADV Men’s Rain Pants
$155
These pants are designed to provide protection against wind and rain
The added stretch allows for unrestricted movement during golf swings and while walking on the course
Nike’s technology combines windproof and waterproof materials
Nike Storm-FIT ADV Men’s Rain Pants may be a turnoff for buyers under the $100 budget, but they’re a great pair of pants for cold weather.
These pants have covered you, whether it’s early tee times or unexpected rain. The added stretch is a real plus, allowing unrestricted movement during swings and walks on the green.
I like how Nike uses their Storm-FIT ADV technology in this one to combine windproof and waterproof materials with smart engineering to ensure comfort in harsh weather.
The fabric is slightly stretchy and fully seam-sealed, providing freedom of movement while keeping you dry.
They come in a standard fit for that relaxed feel, with convenient hand pockets and water-repellent zippers.
These machine-washable trousers feature ankle zips and a tapered fit, ensuring my golf game remains unaffected by water and grass stains.
If you’re a newcomer to winter golf attire, these pants are an ideal starting point. They offer a snug fit, high-quality fabric, and exceptional performance, keeping you warm and helping you perform at your best.
These winter golf trousers excel in fit, material, and functionality, making them perfect for chilly rounds. Plus, the PFC-free water repellent finish provides decent windproofing.
What I like about this golf pant
Like others on the list, these pants are machine washable.
Front and back pockets for great utility
Moderately priced
What I don’t like about this golf pant
It is just a black option, which is sad for those who like to rock Addidas in other colors.
It is not as thick as other options in its class.
4. FootJoy DryJoys Tour L.T.S. Rain Pants
FootJoy DryJoys Tour L.T.S. Rain Pants
$215
ThermoLite technology and DWR finish for warmth and protection in mist or light rain.
Gripper elastic waistband ensures a snug, slip-free fit.
100% waterproof guarantee for two years, backed by a 3.5-hour round.
Multiple pockets for storing gloves, scorecards, tee/ball markers, and more.
Firstly, the ThermoLite technology and DWR finish of these FootJoy DryJoys Tour L.T.S. Rain Pants keep you warm and dry, even in mist or light rain. The side pockets add convenience, and the gripper elastic waistband ensures a snug, slip-free fit.
What truly amazed me was the 100% waterproof guarantee for two years, which they lived up to during my 3.5-hour round. They’re comfortable, easy to put on and take off, and offer adjustability.
Though they come at a price, I believe these rainpants are worth every penny. I can’t wait to add the matching jacket to my golf gear collection.
The fabric of the Addidas Provisional Rain Pants not only blocks wind and water effectively, ensuring comfort all day, but it also allows for natural movement as you tackle the course.
The elastic waist with a draw cord provides a secure fit. Made of 73% polyester and 27% recycled polyester poplin, they are both environmentally friendly and functional, featuring wind-resistant and water-repellent WIND.RDY technology.
The front and back pockets make them convenient to carry in case of rain without being bulky. They offer excellent rain protection and represent great value.
I suggest going for your regular size if you plan to wear them as pants but consider a lighter underlayer to prevent sticking when sweating. Sizing up would be a good choice if you intend to wear them over shorts or pants.
What I like about this golf pant
Fit great.
Easy on/off.
Pack down to a small size.
Super affordable
It still looks good when you pull them out for use.
They look much more expensive than they are.
What I don’t like about this golf pant
None so far.
Final Thoughts: Golf Pants vs. Layering for Cold Weather
Many golfers have the opinion that layering is best in cold weather, instead of buying a golf pant that preaches waterproofing. I have tried wearing my regular golf pants with warm compression pants underneath, and I can tell you that it keeps you away from weather issues.
However, it’s not as good as having the ColdGear line on you. Even if you don’t justify spending close to $200 for a new set of golf pants, you can get some compression tights, a pair of thermal long johns, and a $12 pair of pants from Walmart.
This can keep you warm and flexible enough for your golf activity instead of being “swollen” from tiring layering.
The problem with layering is that you would still need to remove the underlayer if you spent some time in the clubhouse after the round.
So, you still need a good pair of waterproof golf trousers that you can wear the whole time, rather than ones you would pull over the trousers you already wear.
I hope this article has helped you decide on your best choice.
The best golf ball for mid-handicappers is the Srixon Soft Feel. Known for its exceptional balance of distance, control, and feel, this ball is designed to help mid-handicap players improve their game. With a soft cover and low-compression core, it offers superb greenside control and increased distance off the tee. Elevate your golf experience with the Srixon Soft Feel golf ball today.
It hurts when you reflect on how much money you are losing each time you nail one ball into the water, out into the bushes, and every other out-of-reach place. As a mid-handicap player, you stand on the tee with tension, not wanting to lose one of your new golf balls. This can even affect your game in the wrong way.
However, with the right golf ball for your skill level, you can enjoy your time on the tee with absolute peace of mind. I’m a mid-handicap golfer myself. A mid-handicap golfer shoots between 80 and 89 on a par 72 course.
I currently use the Srixon Soft Feel golf ball because of its low compression, soft feel, and reasonable price. However, I look for a few key things in a golf ball as a mid-handicapper, mainly because I’m intent on taking my game to the next level.
The perfect golf ball for mid-handicappers should have reasonable distance, respectable forgiveness, and a touch of greenside spin. If I can find a ball that checks all those boxes, it’s a winner. But the search isn’t always that easy. Hence, this review.
Overview of the Best Mid-Handicapper Golf Balls
I have researched and tested five of the best golf balls that have been proven to help mid-handicappers improve their game, and I will share my experience with them to help you decide which is worth buying in the end.
In case you’re in a hurry, here’s an overview of the top golf balls we will review in this buying guide:
Image
Product
Detail
Price
Srixon Soft Feel
Best overall. It offers unmatched ball flight to stop on the green, a soft-feel Fusablend cover, and a low spin-off driver face for straighter shots.
We must also establish that we all shop for golf balls for different reasons. In my case, I eventually settled for the Srixon Soft Ball because I wasn’t concerned with distance. I needed something that would minimize the damage of misshits more than anything else.
Maybe for you, you prefer a softer ball when putting, and you’re on a tight budget. Even if you’re willing to splurge, you may need some spin on your new set of balls. Whatever your preferences are, these reviews of the best golf balls for mid-handicappers will meet your needs.
1. Srixon Soft Feel
Srixon Soft Feel
$29
Best overall. It offers unmatched ball flight to stop on the green, a soft-feel Fusablend cover, and a low spin-off driver face for straighter shots.
Affordable: At just $29 for a dozen, it is an economical choice compared to more expensive golf balls.
Wedge Spin: It provides a respectable wedge spin, aiding in control and precision during short shots.
Suitable for Slower Swing Speeds: With a compression of around 60, it is ideal for players with slower swing speeds, helping them achieve better distance.
My Remark: It’s the best golf ball for mid-handicappers who want softer balls. It’s also cheap and offers a respectable wedge spin. But it’s not the best for fast-swing players.
The Srixon Soft Feel is a particular favorite of mine. It helps to have peace of mind that you won’t lose $4 balls; instead, you kick $1.50 balls smoothly. The Srixon Soft Feel is a popular recommendation for mid-handicappers, and for good reason.
It will best suit players who want a softer golf ball. The two-piece ball has a compression of around 60, which grants distance to golfers with slower swing speeds.
As a mid-handicapper, the Srixon soft feel is one of the best balls I’ve hit and has helped me improve my game.
What I like about this golf ball
The ball flight is impressively high on the green.
The soft-feeling fusal-blend cover is appealing.
Affordable
Good reputation among many mid-handicap golfers in online communities.
What I don’t like about this golf ball
Not a great option for players with faster swings.
Suitable for slower swinging, the urethane cover makes for an impressive spin.
High Visibility: The ball offers excellent visibility, making it easier for golfers to track it during play, which can be especially beneficial for mid-handicappers.
Suitable for Near Single-Digit Handicaps: This golf ball is recommended for mid-handicappers who are on the cusp of achieving a single-digit handicap, as it offers a High Energy Speed Core for increased ball speed and distance off the tee.
Three-Piece Construction: With its three-piece design and urethane cover, it delivers enhanced spin and overall performance, particularly in short game situations.
My Remark: The best golf ball is for slightly more advanced golfers whose handicap leans towards the lower end of mid-handicap, nearing a single-digit index. Excellent visibility for tracking the ball.
I’m inclined to conclude that the Vice Pro Soft golf ball works like the Volvik Vivid ST. I’ve had experience hitting the latter, so it gave me an idea of how the Vice Pro would work in flight and feel off my clubs.
This is an ideal option for mid-handicappers close to clinching the single-digit index because the High Energy Speed Core offers a higher ball speed and more carry off the tee.
It’s a three-piece golf ball covered in urethane, which gives it extra spin and performance.
What I like about this golf ball
You can track the ball better on the green due to its high visibility.
The spin is impressive, thanks to the urethane cover.
Ideal for players close to breaking into single digits.
Familiarity with Pro V1: The Titleist AVX provides a sense of familiarity for golfers accustomed to the renowned Pro V1, making it easier to transition to this ball.
Responsive Short Shots: The AVX golf ball is known for its impressively responsive performance on short shots, helping mid-handicap players improve their short game.
Front-to-Back Dispersion: It offers fantastic front-to-back dispersion, aiding in accuracy and consistency when striking the ball.
Impressive Feel: Golfers appreciate the feel of the Titleist AVX, both off the clubface and on putts and chips, contributing to improved touch and control.
My Remark: For what it’s worth, the familiarity of the famous Pro V1 helps to utilize the Titleist AVX golf ball. The AVX has impressively responsive short shots and fantastic front-to-back dispersion.
During my research and testing, I soon realized that the Pro V1 from Titleist was among the standard recommendations in golf online communities for mid-handicap players. However, sometimes the gold is where you’re not looking.
The Titleist resembles the famous Pro V1, which, for some reason, makes it more comfortable to use. I particularly love the feel of this ball, and it translates on the putts as well.
What I like about this golf ball
The premium look is appealing.
You can achieve long and tight dispersion with irons.
Taylormade Loyalty: This ball is ideal for mid-handicap players who are loyal to Taylormade and prefer its products.
Decent Spin: It offers decent spin, particularly on chip shots, which can help improve short game performance.
Wedge Spin: The Taylormade Tour Response provides more wedge spin than other golf balls, enhancing control and precision around the greens.
Affordable: It is noted for its affordability, making it an attractive option for mid-handicappers looking for value without compromising on performance.
My Remark: If you’re a Taylormade loyalist as a mid-handicap player, this is your ball. It has decent spins but not as high a ball flight as Srixon Soft Feel.
The Taylormade Tour Response replaces the loveable Project (a) ball from a few seasons ago. It resembles the Wilson Duo Professional but delivers more wedge spin.
Not many people like this particular model from Taylormade, but that doesn’t stop it from being a decent option for mid-handicappers, especially if you want proper distance, straight shots, and spin.
What I like about this golf ball
The spin on chip shots is impressive.
For performance, it’s an incredibly affordable golf ball.
The urethane cover grants this ball a Tour feel.
What I don’t like about this golf ball
Not a good option for players with slower swing speeds.
It didn’t take time for the urethane to start scuffing.
Greenside Spin: The Wilson Triad excels in providing greenside spin, making it an excellent choice for mid-handicap players seeking better control around the greens.
Scoring Potential: It is recommended for golfers looking to break 80, suggesting that it can contribute to lower scores and improved performance.
Consistent Quality: Despite being less popular than some other brands, Wilson consistently produces impressive golf balls, and the Triad is no exception.
Moderate Swing Speeds: With a compression rating of around 85, it is well-suited for players with moderate swing speeds, helping them achieve better performance.
My Remark: Wilson Triad may not be as popular as a few golf balls I tested, but it’s among the best for mid-handicappers, especially those desiring greenside spin.
I’ve been keeping an eye on the Wilson Triad since it rolled out in the wake of 2022. If you wish to break 80, this is the ball for you. I recommend it for players who hit the ball reasonably straight but need more greenside spin.
I must mention that not too many players hype balls from Wilson as much as other name brands. But Wison has consistently shown up with impressive golf balls.
This particular one is excellent for a greenside spin, even though the distance isn’t as impressive as other balls I tested. With a compression rating of around 85, the Wilson Triad will benefit players with moderate swing speeds.
So far, we’ve explored five of the best golf balls you can consider as a mid-handicap player. While there are still many options, these are the models I’ve tested as someone who’s still breaking 90, and they have helped tremendously.
Also, in my experience, I’ve learned that it’s better to find a ball that’s within your budget and stick with it. It’s easier to lower your scores when you know how a ball will behave around the green and off the putter face.
Of course, your swing mechanics have to be repeatable and reliable to some degree for a ball to do anything consistently. But knowing how a ball will behave when it hits the green surface will help you get closer to the pin, leading to shorter putts.
I gain improved distance control when I know how quickly a ball comes off the face of my putter. So if you eventually go with the Srixon Soft Feel or Taylormade Tour Response, stick with it. Playing with one ball may not improve your score by many strokes, but it will likely enhance your average putt stat.
I hope you found this buying guide helpful.
FAQs
Can mid-handicappers use Pro V1?
The Pro V1 golf ball was initially designed for low handicappers seeking advanced performance, but mid-handicappers can also benefit from its consistent flight and greenside control. However, considering your swing speed and budget, you might also explore options that balance performance and cost-effectiveness.
What is the mid-handicap range?
A mid-handicap range is the stage of a golfer’s skill where they still shoot between 80 and 94. This golfer falls within the middle range of golfers, with a handicap index between 9 and 18. If you’re a mid-handicapper, it means you have more experience than beginners, but you still need improvement to reach the level of lower handicappers.
How do I know what golf ball is right for me?
To find the right golf ball, consider your skill level, swing speed, and preferences. As a beginner, it’s best to stick with a two-piece ball for distance and durability. Mid-handicappers benefit from a softer ball for control. Low-handicappers need precise sp, so multilayer balls will be better.
What is the difference between Srixon Soft Feel and AD333?
Srixon Soft Feel golf balls prioritize a soft cover for enhanced greenside control and feel. AD333 balls, on the other hand, focus on balanced performance with a mid-compression core for distance and a urethane cover for spin.
If you want a mix of distance and control, AD333 is the way to go. The soft-feel golf ball will appeal more to those who prioritize a softer touch.
Icon is among the new options in the golf cart industry, but many reviews from owners have associated them with durability. There are reservations about the cart’s long-term value; still, it is packed with amazing features for an improved driving experience around the golf course.
It has a wide range of trims to select from, and all are offered at reasonable prices that give other top brands a run for their money.
Maybe you’re looking to buy an electric golf cart and have gone to a dealer for options. It is easy to find models from Yamaha, Club Car, and even EZGO because these brands are at the top. Icon of is a manufacturer of EV golf carts and has only been since 2017, but their models are fast becoming one of the more popular cart brands on the market due to the quality and looks of the product.
ICON produces a long line of golf carts. In this article, I will walk you through all the options, how they perform, the pros and cons to expect, and other relevant information about the Icon Golf carts to help you decide e whether this brand is worth your consideration.
Comparing Icon Golf Cart Models
One particular thing I love about the Icon company is that they have produced a series of golf carts that will suit every need in the market. Because of the different needs of each customer, Icon has created four different model-series golf carts with varying availability of trim options.
These include the
ICON i20
ICON i40
ICON i60
ICON i80.
Each of these models has its different trims and is different primarily based on the seating capacity.
No matter the model you buy from Icon carts, the following features are standard and come with all versions:
10″ Aluminum Wheels
Digital gauges
Horns
Two-tone seats
RearFlip-Downn Seat High-speed rear ends
Painted rooftops
On-board charger
Charger indicator
Extended Canopy Suntop with Grab Handles
Toyota 350 AMPFour-wheel disc brakes
Complete set of lights (Headlights, Taillights, Signal lights, and Brake lights)
USB Charging Port
Forward / Reverse Switch
Side Mirrors
Powder-coated steel chassis
Front and rear bumper
Dash Components:
Forward/Neutral/Reverse Switch
USB and 12V Plugs
Cubby Storage
Multiple Cup Holders
Key Switch
Instrumentation Cluster
Icon Golf Carts Design and Appearance
We can review the appearance of Icon carts from different angles, depending on the model. There’s much detail to discuss, from the base trim carrying two passengers to the long stretches accommodating eight passengers.
But a factor that runs through all models is the sturdy and compact design. Icon purposefully put a stylish touch to the appearance of their cart that makes it look premium, which is even true with the i20.
The typical Icon golf cart from the front view has a foldable acrylic (or optional DOT acrylic) windshield and an extensive air-deflecting roof design with a full, high-strength aluminium frame.
The floor of the Icon golf cart is made of high-density polyethene molded for extra strength and toughness with a rubber floor mat.
There are turn signals and mirrors, a reversing camera, a horn, 3-point seat belts for all seats, and hydraulic 4-wheel disc brakes for safety. Depending on the model and trim, you have 10-inch aluminum wheels with a superior traction system for excellent performance under various operating conditions.
I also like the color variant availability of Icon golf carts. They offer all their models in White, Black, Sangria, Orange, Purple, Torch Red, and Champagne.
You can also find Icon carts in Yellow, Lime Green, Forest Green, Caribbean Blue, Silver, and Indigo Blue.
Performance of the Icon Golf Carts
Icon Electric Carts run with a 48V Toyota AC motor and advanced battery technology. Many users often report smooth and efficient rides on forums. According to the manufacturer, their models can last up to 50 miles on a single charge.
I particularly like the i60 model’s transaxle and aluminum wheels that offer superior traction and handling under various driving conditions.
With a braking distance of only 7 feet, the cart design helps with its performance for optimal driving experience.
However, many issues reported about Icon carts have to do with defective battery and brake performance. But there’s a silver lining since their carts are sealed under a 2-year warranty.
The bottom line is that Icon carts have decent performance, but we can’t compare them with the top brands leading the cart industry since they are relatively new.
Icon Golf Cart Speed
The speed of the average golf cart is a maximum of 19 MPH. So, this gives you a ballpark on determining how fast a particular brand is. Regardless of the model, you can expect any o.f When tested for this Icon golf cart review, these Icon golf carts went up to a top speed of 27 MPH.
However, the i80 model can go as high as 32 miles per hour due to 8-passenger capacity and higher max forward speed.
Charging And Battery
Icon golf carts use US Lead Acid with NexGen Advanced Lithium (NexGen AGM) battery with the lowest internal resistance, providing 25-50 miles of driving before needing a charge. Their models come with an Onboard charger for convenient and easy charging.
Icon Golf Carts Pros and Cons
If you’re considering a golf cart by the Icon brand, keep the following pros and cons in mind:
What I Like about these carts
They all have a premium appearance. The outward design is appealing
They are street-legal
A budget-friendly option compared to the popular names
The report from owners about battery troubleshooting help raises concern
Brake issues are common
The bigger size of models like the i80 poses a parking challenge
No gas option
Are Icon Golf Carts Made In China?
Icon Golf Carts aren’t primarily made in China, although they used to be. Currently, Icon makes its carts in Tampa, Florida. Still, many of the components originate in China and other Asian countries due to the affordability of obtaining these components.
Should I Buy New or Secondhand Icon Golf Carts?
Secondhand icon golf carts are a little cheaper than new ones. But expect to take care of some wear and tear and be ready for issues that must have accumulated over extensive usage.
I recommend you buy a new icon golf cart. If you have decided to buy a used cart, sticking with popular brands like Club Car and Yamaha would be ideal because it’s easier to find their parts and aftermarket support.
You can buy used ICON carts on websites like eBay, ATV Trader, and Golf Cart Resource,e where different ICON carts are for sale. But you can find a dealer on the Icon website to purchase a new golf cart from the brand.
Concluding Thoughts
I have owned an i20 for almost years with no issues. But when I read reviews from my fellow golf buddies about this brand, it’s always about the location of manufacture and how it influences the carts’ quality.
ICONss is manufactured in Tampa, Florida. They use a combination of American and Asian parts, just like most products sold in the United States.
I have realized that different people look out for other things when buying carts. In my case, I am easily satisfied with a cart that does 29 mph and rides great on the street, not only on the golf course. With some models like the i60 L, the ride tends to be rougher,h while the tires make a reasonably loud noise. However, the ride is smooth and quiet with models such as the ICON i40 L.
I have over 4,000 miles on the odometer of my i20, and 90 percent of the miles are on the golf course. I will admit it’s a little stiff on our very rough cart paths at my practice. But it’s a decent performance so far.
So, I can encourage you to pull the trigger on an Icon golf cart. But if you plan to purchase a used product, you’d be better off with a popular model, or the BIG3, as we call it. This is because getting support for parts or replacement parts on Icon carts when the warranty period is over may be a problem.
Ruff And Tuff golf carts are old models. Since the manufacturer left the business in 2018, people can only purchase these carts via auction or resale. Ruff N’ Tuff electric carts are sturdy and have durable batteries that may eventually need replacement. But before buying this old cart, be ready to struggle for replacement parts or spend a lot on repairs.
Not too many people know about Ruff N’ Tuff EVs. About 15 years ago, when asked to recommend a durable and reliable golf cart, the brand was the name on many dealers’ lips.
I recently found what I believed to be a pretty good deal on a used Ruff N’ Tuff 2007 Limo Model. I primarily bought it for the wife and kids to run around the neighborhood and take to the summer campground at the beach. Eventually, I realized it could be a backup for my Axis ACE NV golf cart, and it wouldn’t hurt to have six golf buddies riding on the same golf cart.
The reviews about ruff n’ tuff have been mixed, so I tested the cart with a biased mind. However, I decided to write this review to benefit those considering buying any Ruff N’ Tuff model to inform you about the product and what you can expect of its performance.
The first important thing to note is that Ruff N’ Tuff is out of business, which explains why more and more people are having trouble sourcing spare parts for their Ruff & Tuff EVs today. According to the grapevine, the manufacturer mishandled purchases, and the company nosedived.
Who Makes Ruff And Tuff Golf Carts?
According to Bloomberg, Ruff & Tuff Golf Carts L.L.C. was founded in 2008. Due to the archaicness of the brand, it isn’t easy to pinpoint what drove them away from the market. However, the word on the street is that they eventually sold their parts to a South California company after folding up.
Other sources from research trace Ruff N’ Tuff to GEM, a leading provider of electric vehicles for more than 20 years that is now a part of Polaris Industries, one of the top manufacturers of outdoor recreational vehicles.
Ruff And Tuff Golf Cart Models
The Ruff and Tuff carts are produced in six different lineups; some are ideal for moving around the fairways, while others were built explicitly with hunters in mind. Here’s a list of all Ruff And Tuff models and the purpose for which they are designed to work:
Each Ruff N Tuff cart model looks different. For example, the Hunter version is equipped with a stand-up gun rack, while other models have a two-passenger seat at the rear,r which doubles as a foldable bed for a truck-like appearance.
All models are equipped with rearview mirrors and matching tops. They are available in Blue, Green, White, Red, Yellow, black, K, and some in camouflage colors. This article will focus on the Ruf N Tuff Golf cart model.
The Golf model has a brush guard, a removable gate on the rear, parking brakes that work, and working blinkers.
Key Features
Ruff and Tuff deploys a 14 HP Motor and 48 Volt system. Most models will have 150 AH Gel Batteries and a 650 amp controller. No, these components are expected to serve you a great driving experience. But in most of the review videos I’ve watched, owners have had to replace or fix some of this component, especially in cases where it was purchased from an auction.
The Ruff and Tuff cart is designed with a push button forward and reverse switch integrated into the dashboard, making driving very easy.
It also features a heavy-lifted suspension.
Unlike the Golf model, the Ruff and Tuff R/T Cruiser has 10” Aluminum rims,s which is the same length as the R/THunterr model, only that it comes with black steel rims.
The R/T Mud mode, ideal for rough terrain and driving within the woods, measures 22x11x10 R/T.
All models have horns, seatbelts, head, tail,l, brake lights, and turn signals. When you flip the driver’s seat, you see the battery, an attached charge meter, and a 12-power outlet.
The unit has a 48-volt charger and a locking Glove Box connected to the dashboard area.
Accessories
These days, it’s hard to find who sells new accessories for Ruff And Tuff car seats. If you’re lucky enough to find one, you can integrate a Cargo Rack in the front of the center for a hunting trip.
There’s also a fitting for a utility box for tailgating. Other accessories like sporting clay baskets, trailer hitches, and mesh utility baskets can be installed on any Ruff or TUff model.
Ruff and Tuff Golf Cart Prices
It’s nearly impossible to see Ruff and Tuff’s golf carts listed on EV and coach retail websites. However, dealers like Texas Golf Cars & Service lists used Ruff and Tuff golf carts for sale, along with accessories.
Ruff and Tuff golf carts can experience various problems over time like any other vehicle. One of the most common problems with these electric golf carts is battery-related issues, such as a dead battery, weak battery performance, or a battery that won’t hold a charge.
If you bought a Ruff and Tuff and notice this defect, check the battery connections for corrosion and ensure they are clean and secure. Also, test the battery voltage using a voltmeter. If the voltage is significantly lower than its rated voltage, it may need replacement.
Charge the battery fully and maintain a regular charging schedule. If the battery is old or damaged, consider replacing it with a new one.
Many owners have reported issues with the light accessory, so there might also be issues. I love how Motorsports, in a YouTube video, addressed the dynamics of this common Ruff and Tuff cart issue:
Sometimes, owners face electrical issues such as malfunctioning lights, horns, or accessories. When I purchased the 2017 limo, I had to check the fuses and relays for any blown fuses or damaged components. While there was no need for replacement in my case,
I still recommend any new owner inspect the wiring for loose connections, frayed wires, or damage. Look at how an owner battles with problems relating to fuses on his 2006 Ruff And Tuff cart that make the unit not move:
What Are Golfers Saying About The Ruff And Tuff Carts Today?
After combing the internet and seeking opinions from my favorite online golf players’ forums, I realized this brand has mixed reviews. While some blatantly advise people to steer clear of Ruff and Tuff, others encourage the purchase, provided interested buyers are ready to spend on maintenance.
The reality is that people are still interested in this old brand, mainly due to its ruggedness. But I noticed the locals are more hunters than golfers. So the Hunter 4×4 model has more favorites than the Cruiser 2P, 4, P, or even the Limo 6 passenger.
There’s a vast community,y such as the Electric Forum, where the usage of Ruff and Tuff golf carts is discussed,d and those who have problems with this EV resolution get help from fellow users.
Conclusion
If you can purchase a Ruff and Tuff cart, don’t get your hopes too high for its ruggedness. It may look clean, and the batteries would still hold a charge with no apparent issues. In my case, the batteries are Ruff and Tuff-branded. I still can’t believe that 9-year-old storms will still do 12 miles. Still, it loses speed pretty badly when going uphill around the golf course but goes fine on the flats.
Of course, finding parts houses that carry bits for these specifically will be a problem. Of course, some mechanics have found a way to replace components of this old cart with those on the popular EZ-GO, which are plentiful. So, that’s a silver lining.
Advanced EV Golf Carts are relatively new to the market. Available in three main trims, they have a simplistic design and contain the basic cart features for a satisfactory drive around the golf course. Being an average EV golf cart, it doesn’t feature as much advanced tech as most other options in the market, but the price sits well within the affordability range.
The carts designed by Advanced are relatively new to the market, even though the EV manufacturer, GOof Car Dealers, has been in the industry for over 35 years. I can recall that sometime last year, a couple of guys at my club traded their old carts for one of these, and I have noticed that some others are thinking about it.
Out of curiosity, 18 months ago, I purchased a unit from Acme Tools in Minot, North Dakota. It cost me around $10,000. The word on the street is that all the trims from Advanced Carts look pretty good and have some good features.
It is safe to call the Advanced carts vehicles” because not all are suited for the golf course. Some are designed with low speeds for neighborhood driving, while others have the potential for industrial applications. Here are the three trims of Advanced EVs:
Potential for industrial application or rugged terrain
$8,299 to $10,699
If you’re looking for a new cart and don’t want to stick within the confines of the BIG 3 (Yamaha, Club Car, and EZGO), this brand may be worth your attention. In the rest of this post, I will walk you through the specifications, performance levels, benefits, and disadvantages of having these golf carts. Let’s start with its key features:
1. The roof is well-made with an Aluminum Alloy Frame.
2. Equipped with 4kW AC Motor drive mechanism
3. It works with a 350-A Toyota controller that powers the system.
4. The AC drive enhances torque, climbing capabilities, and acceleration. This lets you traverse various challenging terrains with peace of mind.
5. An average speed of 25 miles per hour
6. Stylish but simplistic design.
7. A buzzer that goes off in case you’re backing up.
Design And Appearance
The Advanced EV 48V electric 2+2 passenger lifted golf cart looks like a typical Axis ACE NV cart, especially when you glance at it from the front. The design is not super special, as it preaches more minimalism.
Of course, it has only two cup holders for the front passengers. The cart provides USB Ports and a beautiful screen display on the dash area. Other relevant details of the Advancance golf cart design and appearance include:
The Advance vehicles, across all models, will go from 19 to 25 miles per hour and are very easy to modify if legal in your area.
Battery And Charging
The golf cart comes with a standard 4 KW electric AC motor, but you can upgrade to a 5 KW motor, and the controller for this cart is made by Toyota. You can also upgrade the low-speed design by opting for lithium-ion batteries.
The charger plugs right into the base section of the driver’s seat, so you don’t have to flip the chair over for a comfortable charging process.
The EV1 model sits on the ground and is smaller, but it’s very suited for those with bad knees since they won’t have to lift their legs up
The less aggressive tires of the EV1 model make it ideal for driving on the golf course, so they don’t damage the lawn.
Satisfactory sitting legroom
Amazing lightning and fancy design on the headlights
Affordable option
The phone holders in the dash area are a huge plus.
Super extensive roof coverage
What I don’t like about this cart
There’s nothing particularly unique about this golf cart, so I struggle to identify why it gets the hype
There are only two cup holders for front passengers, whereas many other competing products feature four at the front and one each for rear passengers.
Price
The Advanced EV golf carts are offered at locations nationwide, but you won’t find the exact pricing for the coaches on the website. Base-level models with few upgrades (in the 2-seater option) would sell for around $7000–$9000. This, of course, includes traditional lead acid batteries. When you go to LIthium batteries, the price is considerably higher.
I particularly like the base model Advent carts. The style of the coaches may be boring, but the interesting appearances come from the Advent trim. The Evolution Advent 2 costs $7,325, and the Advent 4L model costs $10,599.
Warranty
The Ev1 and Advent models come with a full five-year warranty. The Advanced HD has a two-year contract.
My Final Take
It’s been 18 months and 750 miles into using the Advance golf carts, and there have been zero mechanical issues. While much credit has to go into my maintenance routine, I confess it’s a durable cart.
At a glance, the cart has pretty good specifications and looks nice. I am impressed that it holds the same value upon close inspection and time-bound testing.
I’ve always liked Clubcar, but I’m intrigued by this because of the price versus-feature ratio. But if you’re currently in the market for a brand new golf cart, I will recommend you stick with the big three.
And if something like Advance piques your interest more, I strongly recommend EZGO because the aftermarket parts market is solid for the big three compared to Advance EV.
Renegade Golf carts may not be among the famous names in the market, but their coaches are impressive. The Renegade 1.0 model has fewer features than the 2.0 and Renegade Plus. However, the cart generally holds up and outperforms much of its competition in features and durability, and it sells for around $10,000 at Lowe’s.
The first impression of many golf cart enthusiasts towards the Renegade golf cart is that it looks like a Club Car clone. It’s tricky to determine if this idea is a compliment or otherwise. But if you’re shopping for a new cart, you may come across the Renengade at a local dealer.
Unfortunately, there aren’t many reviews about this model, and I would understand since many people prefer to err on the side of caution and buy from the Big 3 (Yamaha, Club Car, and EZGO).
At first glance, my recently purchased 48V Renegade Electric Golf cart shares many similarities with the Club Car Precedent, from the alloy frame to the Club Car-like shape. But it’s blessed with other unique features, including 4-wheel disk brakes, coil double a-arm suspension, and lithium batteries.
In the rest of this article, I will walk you through the specifications, features, benefits, and driving performance of the Renegade Plus 2.0 golf cart. I will also share my reservations about this golf cart and what to consider before throwing money on it.
Renegade Golf Cart Specifications
Below are the specifications of the Renegade golf cart:
Engine Type
AC Electric Motor
Rated Power
5,000 watts
Battery
48V / 6 of 8V Deep Cycle
Charging Port
120V
Drive
RWD
Top Speed
25 MPH
Cooling
Air
Charging Time
120V: 6.5 Hours
Overall Length
120 in.
Overall Height
80 in.
Overall Width
53 in.
Seat Height
32 in.
Ground Clearance
7.8 in.
Front and Rear Tire
23 x 10.5-14
Wheelbase
65.7 in.
Dry Weight
1,455 lbs
Colors
Blue, Red, Silver, White
Aluminum Wheels
Yes
Warranty
12 Months Limited Warranty
Renegade Golf Cart
$13,599
Charger is in the battery bay for easy charging access.
You can transfer accessories between the two golf carts, such as the Fender Flares, to minimize dirt pick-up and seat covers.
Starting from the front view, the Renegade Plus 2.0 has an ample rectangular LED light that beams brightly and casts on the ground for better vision. It also has lights on the side with integrated side signals.
The tires are 14-inch rims ruggedly designed for off-road use, allowing you to drive it both on the golf course and off-road.
The cart has a lovely spacious front basket, bowl guard, and two hitches in the front for load haulage, which makes it more versatile than a golf cart.
Meanwhile, I like the extended roof that covers all passengers. As you’d expect, the rear seat flips over like a regular golf cart into a utility bed, and underneath the middle, there’s a cooler for storing drinks and all.
The unique thing about the rear design of the Renegade Plus 2.0 golf cart is the bag holder. So you’re not going to sacrifice golfing for the four seats even though the component comes off easily if you don’t prefer to install it.
Design
On the golf cart’s control area, the horn level doubles as the switch for turn signals. It features a slot for USB and Type C cable. It also has a port for plugging Walkman or Discman. The dash screen is touch-enabled and allows you to connect via Bluetooth. The cart is designed with a locking optional dash.
The neutral, drive, and reverse are controlled by buttons on the dash, the same with the low beam and flashers. It has a rearview camera, which you can adjust on the dash screen.
The steering wheel is designed with carbon fiber, and there’s a nice sticker on the steering wheel detailing the golfing instructions,
Performance
According to Renegade, the golf cart will cruise up to 25 miles per hour, which is pretty impressive compared to competitors like Coleman or Candy, which only go 12 to 14 mph.
While driving, the 5000-watt Renegade goes much quicker and easier to navigate. I like the simplicity of the design.
Comfort
The comfort of the Renegrade cart is decent. There is nothing special about the details that account for convenience on this vehicle, but I like that it features over-the-shoulder seat belt holders (not lap belts), which apply to front and rear passengers.
There are also four cup holders for front passengers and two for each rear passenger, which is wide enough to accommodate modern bottle shape and size.
Charging
The Renegade Golf cart comes with a standard onboard charger – a 110 outlet wall outlet that plugs right into the cart so you don’t have to flip the driver’s seat over for a charge. The charging time is 6.5 hours to get 120V.
The cart has friendly sealed lead acid batteries with no maintenance needed. However, specific dealers offer options for upgrades to lithium batteries.
There’s no perfect cart out there. Renegade has many features that make it appealing, and it was hard for me to pinpoint a single flaw in its design. But if you’re looking to purchase this cart, any model, look at for these pros and cons:
What I like about this golf cart
Unlike most other golf carts, the charger is in the battery bay for easy charging access.
It shares many similar design features with the Club Car, so there is no learning curve, and you can transfer accessories between the two golf carts, such as the Fender Flares, to minimize dirt pick-up and seat covers.
Affordable
The Renegade 2.0 has a golf bag holder add-on, so you don’t sacrifice this for a utility bed at the rear.
Advanced tech and controls
What I don’t like about this golf cart
The engine brake was too aggressive for my driving style. This may not be the experience of everyone who has driven the Renegade, but it’s worth paying attention to.
You will likely pay over the price of a used Club Car when buying the Renegade Golf Cart, but the price is worth it, considering all the features that come with it.
Renegade Golf Cart Operation Guide
You can operate the Renegade Golf cart as you would with any other general golf cart. I love how SaferWholesale, a provider of recreational products, demonstrated the use of this cart in the video below:
The Renegade golf cart also comes with an owner’s manual to guide you on its operation guidelines and troubleshooting tips if you encounter any issues.
My Final Take
For me, purchasing a Renegade Golf Cart is synonymous with pulling the trigger because it’s a relatively novel and unpopular brand, so you can’t be sure what to expect. To my surprise, I’ve had it for about a month, and it has performed decently.
Performance-wise, the speedo in the dash shows maximum speeds of 20 to 22mph, depending on terrain. But from my driving experience, it is faster than my older Club Car Precedent.
I love how the cart fantastically holds speed going up pretty steep hills. It dramatically benefits me because I live in a hilly neighborhood.
Renegade Golf carts come with sealed AGM batteries, a lift kit, brush guard, horn, tow hitch, Ice cooler, rearview mirrors, turn signals, Bluetooth speakers, hazard signals, and a speed governing switch.
These are unique features that will make your golf cart driving experience wholesome. The suspension will also impress you when you notice how smooth it is on gravel roads at full speed.
I have been keeping up with the rear drums of my Club Car, but seeing the 4-wheel hydraulic disc brakes in Renegade is like an answered prayer because I can now cruise at max speed and stop on time.
Overall, the Renegade Golf Cart is worth the investment – no caveat. Do you have a different view? I’d love to hear your thoughts in the comment section about this model.
Steering problems in EZ-GO golf carts can be due to worn-out tie rod ends, loose steering components, and misaligned wheels. To fix this problem, inspect and replace damaged parts, tighten loose connections, and ensure proper wheel alignment.
Above all, regular maintenance and lubrication will help prevent steering problems from occurring again.
Even though your golf cart is still in top condition, it can experience steering problems, especially when you drive it often on uneven or rugged terrain. This happened to my recently purchased 2013 EZGO RXV electric golf cart. I got it with a drop spindle lift kit and custom tires, and the steering was extremely loose.
Being mechanically inclined, I tried replacing the steering gearbox and the steering. Still, the steering remained a little loose. Upon researching other golf cart owners who have experienced similar issues, I discovered this is a widespread problem, particularly with people using EZGO.
I had a productive chat with the local technician in the area and did further mechanical practice to figure out the most common causes of steering problems, how to trace them, and their perfect quick fixes.
Generally, a steering wheel that makes the cart turn too little, too much, or not at all is already a problem. No matter the cause, the fixing process takes patience because it concerns the steering.
It all comes down to knowing what to look for and how to tackle the particular issue.
1. The Steering Is Misaligned
Misalignment of the steering is one of the common problems diagnosed with defective EZGO Golf Carts. The primary cause of this misalignment is when the wheel is turned excessively to either left or right with the steering.
The Solution
In such a situation, all you need is a tweak in the alignment system—a steering adjustment—to get the steering more responsive. The following steps can guide you on how to go about the process:
Step 1: Use an adjustable wrench to loosen the central shank nut attached to it.
TIP: If you remove the nut, the steering wheel may pop out, so be conservative.
Step 2: Tap the wheel with a rubber mallet on both sides and pull it upward. I recommend using a rubber mallet instead of the metal punch many technicians use because it helps prevent damage while loosening it.
Step 3: Once the steering wheel comes off, put it back on and make the threads on either side of the steering rack even.
Step 4: Check and ensure the shaft twists aren’t interacting with the jam nuts in the rack. You can make this happen by adjusting or tightening the routing wheel with a wrench.
Step 5: Rotate the wheel to the center and align it to your preferred adjustment. Bring it back to the default position and repeat on the opposite side.
After doing this, you are probably dealing with loose steering and still find your EZGO golf cart giving you problems.
2. The Steering Is Loose
When fixing loose steering problems in golf carts, an area of focus is the tie rod. Adjusting the tie rod of your EZGO cart will fix loose steering. But in rare cases, the problem is traced to bushings, pinion and rack arrangements, or even the steering box.
I will not dwell on the possibility of a steering box, pinion, or rack arrangement because the critical solution usually replaces those parts due to worn-out problems. You can contact a technician for such a task.
However, if the loose steering is traced to the tie rod adjustment, it needs tightening. Here’s how to fix it:
The Solution
Before you proceed with the steps, I recommend you get a small floor jack to lift the cart due to the limited ground clearance of these vehicles. You also need to attach wheel chocks to the back wheels. Now follow these steps:
Step 1: Use the wheel to turn the rack to one side.
Step 2: Locate the bottom adjustment nut and loosen it with a wrench. Remember to use a flat screwdriver if what controls the middle adjustment is a screw. If it’s a nut, then the Allen wrench will work perfectly.
Step 3: Rotate the middle adjustment clockwise to attach to the rack. Again, turn counter-clockwise by a 22.5- to 45-degree angle. Repeat this step to assess the binding.
Step 4: Lift the cart to remove the jack, then remove the chocks once they are firm on the ground.
Step 5: The connection between the steering and wheels must be tight and synchronized with the entire machinery.
TIP: If the steering wheel is not binding well when rotating the middle adjustment clockwise to attach to the rack, the tie rods may be faulty and need replacement.
3. The steering is hard
I have read and seen many technicians talk about fixing EZGO golf cart steering problems on forums, but only a few people address the issue of stiff steering in these carts.
At one time, the 2013 EZGO RXV Electric had a complex steering problem. The wheels move in direct proportion to the steering wheel. But when making a turn, it feels like there is an immediate resistance to the turn, followed by breaking through that resistance for less than a quarter turn. It will often occur in both directions.
If this situation sounds familiar, you shouldn’t hesitate to change parts without knowing the problem.
In most situations, stiff steering on EZGO golf carts is traced to a faulty steering box. However, the culprits can be the ball joints and the steering wheel.
The Solution
Before calling the attention of a dealer technician, I had pulled the steering wheel, but all looked normal at that end. I replaced the left front A-Arm because the bolt was severely worn and off-center, but that didn’t make a difference.
Upon the inspection of the dealer technician, the steering box was the culprit. More precisely, the steering column had to be replaced because it got bent at the joint where the yoke goes into the steering box.
So, if your EZGO golf cart develops stiff steering, the steering box is a significant area to look at above everything else.
Still No Dice?
If you’ve tried all the above fixes and your EZGO golf cart isn’t as responsive as it used to be, then there’s possibly more than meets the eye (especially if you’re running on older models like 1989 EZGO RXV and 1996 EZGO TXT model)
In such a situation, you need the help of a technician to take a professional look at the problem. But remember that no matter the model you use, new or old, steering problems can surface anytime.
Golf courses are uneven or rugged terrain, and the steering wheel can get off-centered or loose when dealing with it.
So, above all, inspect the steering wheel periodically and adjust it whenever necessary, using the right tools. Most routine front suspension and steering maintenance consists of periodic inspections for loose, worn, or damaged components, alignment checks, and lubrication of ball joints and wheel bearings.
EZGO manufacturer has guided you through their models’ maintenance, repair, and service procedures.
The main reason why the EZGO Gas golf cart hesitates when accelerating is that it has a dirty carburetor. However, in some cases, the culprits could be a problem with the throttle sensor or wiring, a low battery, and a fault in the motor or controller.
To solve this issue, check the rubber boot and clean it if you spot any dirt. If that doesn’t fix it, troubleshoot for throttle, battery, motor, and controller defects.
Problems with accelerators are common in golf carts. Numerous users on various online communities have mentioned that the Ezgo Gas model has acceleration issues. I realized this when it happened with my EZGO TXT gas golf cart recently.
You are probably familiar with fixing accelerator issues in an average car. Still, I eventually realized that the methods and solutions differ from those you can apply to carts.
The Gas Club Car is typically expected to start immediately when pressing the gas pedal. But several times during the round, the pedal is pushed, and there is a hesitation.
In my situation, I even had to push the pedal to the floor before the starter engaged and the engine started. Being mechanically inclined, I tried a bunch of troubleshooting, which failed until I could fix it with the help of the technical support personnel.
After doing a lot of guesswork, I still had problems with my Club Car hesitating while starting. For context, I had ticked the following solutions:
Purchased the highest Cold Cranking Amp battery
I Checked the pedal linkage – from pedal to governor (controller) and from that top to the carburetor.
I checked the starter generator belt, and it’s tight.
I checked the voltage of the battery, and it is 12.83 volts.
Removed and cleaned all the connections.
I installed a new ground wire from the battery to the starter/generator.
After all these measures, the hesitation was still happening. However, some of these steps have worked for many. But mine was different. Recently, I even had a problem where the starter would continue to run even though the cart was turned off, and the spark plug wire was pulled.
I realized that I had to seek more professional help. The diagnosis at the workshop revealed that the cart’s voltage regulator was terrible. I also had to replace the solenoid. Upon putting a battery analyzer on the battery, it showed less than 200 CCA.
I had to replace the battery with a new one (800 CCA), and now it started and ran like a new cart. The hesitation when accelerating my Ezgo gas club cart disappeared after I replaced the voltage regulator, changed the solenoid, and got a better battery.
If you’re facing a similar situation, this can be a direction for you. But remember that yours may not be as severe as mine. You could only have a dirty carburetor and no further technical issues.
This is why I encourage you to identify the culprit before making any technical changes when your golf cart hesitates when accelerating. After a deep conversation with the technical personnel who attended to me and further research, I gathered the common causes that make particular Ezgo gas golf carts hesitate when you pedal the acceleration.
6 Most Common Possible Reasons Why Gas Golf Carts Hesitate When Accelerating
If your EZGO Gas golf cart hesitates while accelerating, the reason can be traced to any of these issues:
The carburetor is clogged with dirt and restricts fuel and gas flow to the engine.
The throttle cable isn’t in the correct position.
The battery is low or has a weak charge, which makes it unable to provide enough power for acceleration.
A fault in the motor or controller causes it not to provide the necessary energy for smooth acceleration.
A problem with the throttle sensor or wiring is blocking the proper signals to the motor for consistent acceleration.
Limited power output settings or programming limitations.
Some of these issues will require the intervention of a technical expert. But before you go through that hassle, here are the basic steps you can take that can most likely solve the issue and get your cart to work correctly:
How To Fix Gas Golf Cart Hesitate When Accelerating
Fixing the accelerator problems of a gas golf cart is easier once you can pinpoint the source of the problem. First of all, open the hood, identify the symptoms, then consider the following troubleshooting attempts:
Step 1: Thoroughly examine the cable connections and condition
The first step is to look at the cable connections. Are there loose connections or defective wires? This could be a significant reason. Replace the faulty cables. If you can’t identify any, reattach the wires tightly to the parts they belong to.
Poor cable connections are a commonly reported culprit for hesitation when accelerating Gas golf carts. But it may not solve the problem permanently. But it’s worth a try.
Step 2: Clean the carb
Detach the carburetor from the engine and other parts, then remove the piston and float assembly, for example, a piston, float chamber, throttle valve, and other factors.
You can spray this carburetor cleaning solution on all surfaces using a small plastic brush and thoroughly scrub all the parts and places.
After thorough cleaning, use a small cloth to remove residual solvent and reattach the component.
Step 3: Test the solenoid with a multimeter.
If there are no problems with the wire and the carb is clean, test the solenoid using a multimeter. Since this component is responsible for allowing the electrical current from your battery to provide power to the entire cart, it can cause hesitation during accelerating when it’s faulty.
First, detach the wires of the component and keep the terminals separated from each other to identify the resistance[ohms] of the solenoid on the multimeter. If it’s beyond 0.4 ohms, the solenoid is wrong, and you should replace it.
Step 4: Try changing the battery
A faulty battery is another common reason for hesitation when accelerating. The power supply from the battery weakens over an extended period of usage. It’s an easy but expensive solution. However, this may not be an issue if your cart is new.
Still No Dice?
After trying all these measures, and your Ezgo gas golf cart still stalls when accelerating, it means there’s more than meets the eye. It means the issue is coming from somewhere we’re not looking.
Consider the weight or cargo on the golf cart. Excess weight can affect acceleration, so remove unnecessary items and see if anything changes.
If that’s not the case, consider having a qualified mechanic or technician diagnose the problem. Occasionally, hesitation when accelerating stems from complex engine or drivetrain issues.
The Cost Of Fixing Gas Golf Cart Accelerator Problems
If you take your cart to a qualified technician to fix accelerator issues, they will most likely replace some components, as seen in my case. Of course, it can be cheaper if you only get the diagnosis and do it yourself.
But a professional will charge for replacement parts and work hours. For an Ezgo golf cart, new batteries can cost around $1,000, while a speed controller system costs as much as $280. Expect to pay about $30 for the carburetor and solenoids each, depending on the voltage and type.
R-Motion golf simulator and swing analyzer is a bang for a buck. Pricing under $300, the device is a valid option for a quick and fun way to enjoy golf when you can’t go into a golf course.
It measures ball speed, club speed, smash factor, swing path, distance, and the launch angle. However, R-Motion has been discontinued, so there’s no customer support. The simulator has a track record of giving Inconsistent readings for short chips and needs a hitting mat and impact net for better performance.
Even though Rapsodo, the manufacturer, doesn’t appear to sell this model any longer, several recommendations on various golfers’ online communities point to this R-Motion as one of the viable options for “accurate and affordable” performance.
The reviews on R-Motion are mixed. If you’re considering getting the R-Motion golf simulator, you need a compact, less complex, and affordable training device to help you improve your game.
The R-Motion golf simulator uses photometric technology, which measures swing and ball data and provides instant feedback on a range of clubhead and ball statistics. It measures clubhead and golf ball contact data with a high-speed camera while the device’s software calculates the ball trajectory and distance.
R-Motion Golf Simulator
$48
R-Motion includes club-attached sensors to capture swing data, such as club speed, path, face angle, and impact conditions, providing insights for improvement.
it delivers a lifelike virtual golf experience, allowing play on various courses from home.
Simple attachment of sensors to golf clubs, software installation on a computer or device, and optional projector/screen connection make it user-friendly.
When I went to a set-up shop for the off-season, I realized Rapsodo discontinued the whole program of the R-Motion and not just the device itself – software that I needed to update.
People still use the dongle and 14 clips, and I brought it to an indoor practice facility last week, along with a Foresight tracking system. The two systems track different data points, so it is difficult to tell whether R-Motion was accurate or not.
However, the R-Motion was close for the most part, and the flight path was comparable. There were shots that the two provided very different numbers.
In the rest of this article, you will learn all you need to know about the Rapsodo R-Motion Golf Simulator and Swing Analyzer to help you determine if it’s worth your investment.
Rapsodo R-Motion Golf Simulator Specifications
Here’s a tabular list of some relevant specifications for the R-Motion Golf Simulator:
Key features
The Rapsodo R Motion golf simulator is a sensor you clip to your golf clubs to detect swings. You then sync the sensor with your phone or PC to obtain important swing data. Here are the key features of this club:
1. Swing analysis: The R-Motion system includes sensors that attach to your golf club and capture data about your swing, including club speed, path, face angle, and impact conditions. This data is then used to provide insights into your swing mechanics and helps you identify areas for improvement.
2. Realistic simulation: The system works with The Golf Club simulation software to provide a virtual golfing experience. It tracks your club’s movement and translates it into a simulated golf shot on a screen. This allows you to play rounds of golf on various virtual courses without leaving your home.
3. Ease of setup: It’s an easy-to-use option since the sensors attach to your club without requiring significant modifications or adjustments. The software is typically installed on a computer or other compatible device, and you might need to connect to a projector or screen for the virtual course display.
4. Accuracy: The R-Motion isn’t as advanced as some high-end golf simulators, but it offers reasonable accuracy in capturing swing data and translating it into virtual shots. The number of attachments you use, the sensor calibration, and the club type will also influence the accuracy.
6. No golf mat or net: The Golf simulator does not come with an itstanglet or catch; you must purchase them separately. However, you can achieve a more immersive experience by hooking your laptop to a projector and ng into a net.
You should go with a short throw projector like this BenQ MW632ST WXGA short throw projector so that you can eliminate shadows.
You get one standard tracker or sensor when you purchase the R-Motion golf simulator. The package also comes with the following accessories:
Classic owner manual to put you through the setup steps
Four durable clips are available as standard. (You can supplement t the sensor by buying spinster clips, which cost close to $100 more, so you don’t have to remove and install them for every one of your clubs.)
You can access the app from your Google Play Store.
How To Use R-Motion Golf Simulator: Step-by-Step Guide
It’s super easy to work with the R-Motion, but most cases where it gives wrong data are traced to improper installation in the first place. Here’s a step-by-step guide to help you get started:
Step 1: Unboxing and Initial Setup
Unbox the R-Motion Golf Simulator package and identify the sensor, the clip, the charging cable, and the manual. Then, Charge the sensor using the provided charging cable. It has to be a fully charged sensor before using it.
Step 2: Installing the App
Now, you must install the compatible app on your device (smartphone, tablet, or computer). You can find the app on app stores or the R-Motion website. Download and install the app that corresponds to your device’s operating system.
Step 3: Mounting the Sensor
Attach the clip to your golf club (preferably the club you’ll be hitting the most shots with).
Slide the R-Motion sensor into the clip securely. Ensure it’s positioned so that the camera faces you as you hold the club, as this will determine the accuracy of your shots.
Step 4: Connecting the Sensor
Turn on your R-Motion sensor by pressing the power button. Open the installed app on your device and use the app’s instructions to establish a Bluetooth connection between the sensor and your device.
Step 5: Calibrating the System
Follow the app’s on-screen instructions to calibrate the sensor. You’ll need to set up a few parameters like club selection, lengths, and ball position.
Step 6: Starting a Session
Once calibrated, you’re ready to start a golf session. Choose a golf course or range to play on using the app. The app will display available options. Select the club you’ll use from the app’s menu for the shot.
Step 7: Taking Shots
Position the ball on a hitting mat and address the ball as you would on an actual golf course. Make your swing, aiming to hit the ball cleanly and squarely.
The sensor will track your swing and ball data, and the app will display the shot’s outcome, including distance and direction.
After each shot, the app will provide data about your image, including distance, ball speed, launch angle, and more. You can use shot analysis to identify areas for improvement in your swing and gameplay.
I particularly love how GolfAllYear demonstrated the setup process in the video below.
Pros And Cons
The R-Motion is a discontinued product, so there’s no support for it. However, if you’re lucky enough to get this on the market, here are a few pros and cons that I noticed while testing this simulator and swing analyzer that you should keep in mind:
What I like about the R-motion Golf simulator
Good graphics
Easy-to-use lightweight sensor clips
Gaming features such as 15 courses, a driving range, and a multiplayer option
Easy to put together
It’s not expensive. It has an auto rewind feature to monitor your ball flight closely.
Compatible with any golf club, including your own
What I like about the R-motion Golf simulator
There have been growing reviews on how connecting to the dongle is challenging.
It doesn’t come with a hitting mat and impact net
Inconsistent in reading short chips
No official product support
It doesn’t work with the Mac operating system
The Price
You won’t find the R-Motion kit listed or available on the official Rapsodo website because it’s discontinued. I have linked to it on Amazon a number of times here, but it’s hit and miss if it’s in stock.
However, the golf simulator retails for around $300 through Amazon, Walmart, and other online shopping platforms. You could even get a more affordable deal at Ebay.
However, the standard purchase comes with the sensor, four club attachments, and a “Lite” version of The Golf Club game with fifteen courses and a driving range.
You’ll spend an extra $90 to purchase ten more attachments, which you can use on your other golf clubs.
Wrapping up
With a single golf simulator kit, you can obtain club data, including club path, swing speed, and club face angle, and b, all data such as shot distance, side spin, back spin, ball speed, and launch angle. It’s a bang for a buck.
However, based on the entertainment factor, ease of use, and ability to improve the user’s game, I will choose a better alternative, like the eOptishot 2, over the R-Motion.
Indeed, Raposodo R Motion will give you robust shot data, but it reads inaccurately sometimes, and it’s a discontinued product.
If you must buy a Rapsodo compact and budget-friendly simulator, I recommend the brand’s latest Mobile LaunchMonitor instead, which uses more effective radar technology.
The Cube golf cart is super compact and sticks out from many other push trolleys I’ve tried regarding maneuverability. However, the negative reviews about its flimsy handle appear to be valid. I walk a lot, and the course isn’t too hilly. But after a couple of months, the handle won’t stay locked. The Cube golf cart design is cheap but not ideal for long-term intensive use.
After coming across the 9-hole study by Dr. Neil Wolkodoff of the Colorado Center of Health and Sports Science, I became more interested in push trolleys than two-seater golf carts after learning that players who used a push cart burned 718 calories during their game.
The redesigned Cube trolley has been Motocaddy’s best-selling push trolley for the last couple of years, especially given that it’s 40% smaller than typical push trolleys while still retaining a lot of functionality.
Its compact size, especially when folded down, ensures excellent portability, making it easy to fit in small car trunks.
Despite its simplicity, the cart provides storage spaces for a scorecard, drink, keys, wallet, rangefinder, and more, enhancing convenience on the course.
I have been using the Cube Cart 3 model cart for about five weeks now, and the most lovable thing about this product has to be how it collapses into a relatively small compact unit. The wheels are easy to put on and take off, and it is lightweight.
Suppose you’re planning to purchase the Cube Cart 3. In that case, this article will interest you because I have explained in detail, in the rest of this article, my experience using the Cube Cart 3, its vital specifications, benefits, and areas where this cart could have been better.
Cube Cart 3 Specifications
Below are the key specifications of the Cube Cart 3:
Weight
14.5 lbs
Compact folded size
21″ x 13″ x 17″
Folding system
Two-step folding system
Handle mechanism
Three height-adjustable positions
Tires
Friction-free oversized wheels with maintenance-free rubber tires
First of all, the back wheel base of this cart isn’t broad enough, and the coach is very lightweight. So it’s best used on flat golf courses.
If you are playing a hilly course, it is tough to balance walking on the side of a hill where one back wheel is lower than the other. But away from that, here are the key features of this push trolley that make it stand out.
Easy Set-Up and Fold-Down
CUBE boldly claims its push cart is the world’s fastest 2-step folded golf cart. Setting it up or breaking it down is seamless when you pull the cart from your car trunk or are ready to put it back into the trunk for transport.
To assemble the cart, you only have to:
Pull the locking lever upwards
This will release the folding lock
Use the locking lever to pull the frame upwards until fully extended.
Breaking down the unit also has a straightforward process:
Release the locking lever
Lower the handle
Push the upper bag support down towards the front wheel
Resecure the locking lever.
Compact Size
The compact size of the Cube Cart 3 is perhaps the most impressive feature of this push cart, especially when it’s folded down.
The last thing I want when using a push cart is less portability, especially when I don’t have a big trunk.
I like that the folded-down CUBE Push Cart fits into it with ease.
Spaces and Accessories
Being a simple construction, it’s pretty impressive that the manufacturers could still integrate standard storage spaces for a scorecard and a drink. There’s also an accessory compartment for keys, wallet, rangefinder, and what have you.
The blessing of this cart, as far as storage spaces go, is that I no longer need to dig through my bag to locate things like golf balls since I can toss them into the compartment.
The Performance
The first noticeable feature of the Cube golf cart that hints at its performance is the easy-run, friction-free, oversized wheels. The rubber tires are also maintenance-free.
Cube also uses a smarter-designed braking system that takes effect when you step on the small peddle. I prefer this system to struggle with push carts with the hand-operated brake system.
I have made many reservations about the quality of this push cart’s handle. Still, the silver lining is its adjustable height control, offering three different setting options.
Sometimes, the front wheel pulls to one side. When this happens, How do you adjust the front wheel on a Motocaddy Cube?
You can adjust the alignment by the tiny screws on each side of the front wheel. So if your cart is veering right, turn the left screw counterclockwise and the right screw clockwise (and vice versa)
Cube Golf Cart gets a lot of love because it’s lightweight, folds up nice and small, and fits into even a tiny car trunk. So, in terms of compatibility, it’s a perfect product. However, after testing this cart for about five weeks, I was able to identify the following pros and cons of this push cart:
It is not compatible with every golf bag type, especially ones that have kickstands with full-hinged systems, because the legs extend as the cart rolls along.
The cup holders will only accommodate narrow bottles (read: 20oz soda cans) and won’t sit in modern wine bottles.
It is not the most durable option in the market, especially compared to Sun Mountain Golf Speed Cart V1R.
My iPhone “plus” doesn’t fit with the enclosed tray. This may be nitpicking, but it’s essential to know that not all phone types will fit into this compartment.
My Final Take
After combing through dozens of reviews on this push golf cart, I noticed that many people consider it for its portability.
The Cube golf cart has a small footprint when folded, is relatively easy to open and close, and is lightweight for lifting into and out of the car trunk. The brake works efficiently, too, and it locks nicely. Now for the bad: The manual says the front wheel is adjustable for alignment.
Unfortunately, the product is somewhat flimsy due to its lightweight nature and will likely be unstable on hilly terrain. No matter how carefully I maneuvered the cart up or down hills, it always seemed to tip and once nearly tipped over.
The umbrella holder also has a flimsy feel. While it holds an umbrella securely, the holder and the upper structure are made from plastic, so the umbrella sways fore and aft as you walk.
Overall, I’ll call this a decent golf cart if you like to walk a lot. Some flaws may be nitpicky, but this is not a valid option if you want something extremely sturdy.
Let me know what you think about this Cube golf cart in the comments.
Ellewee golf cart storms the market uniquely. It answers the prayer of golfers and course managers looking for a compact, fast, eco-friendly, affordable cart to move around the fairway.
I particularly enjoy the engine brake for safe downhill riding and the gyroscope that saves the cart from tipping over. Selling for only $6,500, the Ellewee golf cart takes time to charge and doesn’t have a canopy or windshield to save you from sun, rain, and dust. So brace up!
It’s super interesting to see how technology in the golf industry has spread its tentacles from clubs and balls into on-course mobility. It gets more interesting when we consider models like the four-wheel single-rider vehicle produced by Ellewee.
According to the manufacturer, their golf carts, produced in two main lineups – Easy and X models – and powered by a lithium battery, hold a charge for up to four rounds a day or about 65 kilometers.
I decided to purchase the Ellewee Easy Golf cart buggy listed on PowerHouse. The initial goal was to test the machine, see how it lives up to the hype, and give an honest review. But gladly, at the moment, it has become the present replacement for my Axis NV ACE.
In the rest of this article, I will walk you through all you need to know about Ellewee carts for golf courses. The information you gain from this article should help you decide if this model is worth your investment.
Ellewee Golf Cart
$4,950
Single Rider Efficiency: Takes approximately 25% less time compared to ordinary two-seater and four-seater golf carts.
Low Turf Impact: Tires run at just 3.2 PSI, reducing damage to the golf course turf compared to the typical 5.7 PSI of other golf carts.
Electrified Power-Train: Powered by a cutting-edge power-train control system developed by Cabeco, a renowned automotive manufacturer.
Green and Affordable: Ellewee is the first green and affordable multi-purpose vehicle in its class.
Below are the specific and technical details of the Ellewee Easy Golf cart model I currently use:
Dry weight (with battery)
160kg (350lb)
Total weight (Dry weight + Max load)
320kg (705lb)
Max load front multi-holder
30kg (66lb)
Max load rear multi-holder
30kg (66lb)
Lithium Battery
48V 63Ah or 48V 100Ah
Recharge
15A/h
Factory speed setting
20 km/h (12mph) (there’s an optional maximum speed of 25 km/h)
Ground clearance
10 cm (4in)
Seating capacity
One occupant
Parking brake Electric (switch controlled)
Electric (controlled by switch). It has a mechanical drum brake on each side
Motor
1500 W, 3500 rpm
Tire size
16 x 7,50 – 8 (Turf)
Rim size
8 x 5,5 (Alluminuim)
Lights
Front light LED, 12V Rear Light LED, 12V
Motor controller
ASI USB outlet 2 x 5V 3.1A
Ellewee Golf Cart Key Features
What makes the Ellewee carts stand out from the crowd (which is already saturated by the Big 3 – Yamaha, Club Car, and EZ-GO) is that it’s a single rider that has been tested to take roughly 25% less time than when using ordinary two-seater and four-seater golf carts.
However, after using the Ellewee Easy for a few months, which shares a lot of similarity with the Ellewee X model, I could identify other unique features of this golf cart that underscores what the manufacturer claims on the website. For example:
The tires cause less damage to the turf because they run at just 3.2 PSI, almost half of the typical golf cart PSI of 5.7.
Ellewee offers gyro control, GPS, lane assist, and auto-breaking because it is powered by an electrified power-train control system developed by Cabeco, a world-renowned automotive manufacturer.
It is the first green, affordable, multi-purpose vehicle.
The Ellewee Easy and X golf cart models look a lot alike. But there’s a noticeable difference in utility, especially haulage. Easy Golf Cart lets you carry your golf bag at the front, while the X model puts the cargo holder at the rear.
Available in only super matt black, dental white, and deep blue metallic, Ellewee golf carts are designed with ATV in mind but move like a scooter.
The Performance
Ellewee golf carts need 4 AGM 12-volt batteries to run, and it has a simple charging system. However, telling when the battery will go out is always unpredictable. This applies to all electric golf carts.
On the performance side, the single-seater cart lessens its speed whenever the charge goes down. It has a charging time of 8 hours, which is a relatively slow charge compared to most other electric golf carts. Let’s not talk about when the batteries get older and perform less in holding heads.
This scooter-like golf cart may only be your best option if you can commit to a particular charging routine.
The Speed
The first bold claim that the Ellewee brand slams to our face is that the single riders make your rounds 25% faster than two-seaters.
After testing the Easy Buggy model, I am happy to see that this lives up to the hype. What is even more interesting is the comfortable feel during this fast ride.
I like the large and lightweight wheels. It takes 50% less air pressure than my Axis NV ACE cart. Even though the low air pressure will eventually make the tires wear down quickly, I can enjoy a smooth and comfortable ride.
The price
Ellewe golf carts sell for different prices depending on the dealer you shop from. However, the price for the two significant lines is between $4,950 and $7,500, depending on the year model.
Generally, Ellwee X comes at around $6.500. At the same time, Ellwee Easy Resort costs nearly $8,000.
This is a pretty affordable option for a golf cart, especially if you’re not looking for a group travel around the golf course and only need a single-seater transport vessel.
The Pros and Cons
I always say there’s no perfect golf cart out there. I almost challenged this idea when I tested the Yamaha Drive-2 EFI QuieTech. But for the Ellewee tech, there are some areas I believe the manufacturer can improve upon, even though it’s an excellent cart.
What I like about this golf cart
It has a stylish appearance that makes heads turn
The gyroscope saves the cart from tipping over.
It moves you faster than ordinary two-seater golf carts
You have peace of mind regarding turf damage risk
It’s an eco-friendly cart
Geo-fencing keeps you away from off-limit areas.
What I don’t like about this golf cart
No weather protection. Since it’s a scooter-like golf cart, it has no canopy or windshield for sun, rain, and dust.
The charging time can be shorter.
My Final Take
Most golf cart manufacturers focus on creating a sweet mix of incredible looks and excellent performance. That’s what sells in the cart industry. And in my opinion, and based on my experience driving the Ellewee Easy cart, this brand has done a pretty good job in that objective.
But as long as it carries all my golf clubs and all other needed golf accessories and takes me faster, I think it’s a bang for the buck.
Still, it’s somehow difficult to see the real value in this cart when you rent it because you won’t get as much rental fee as a gas golf cart or a 4-seater electric golf cart.