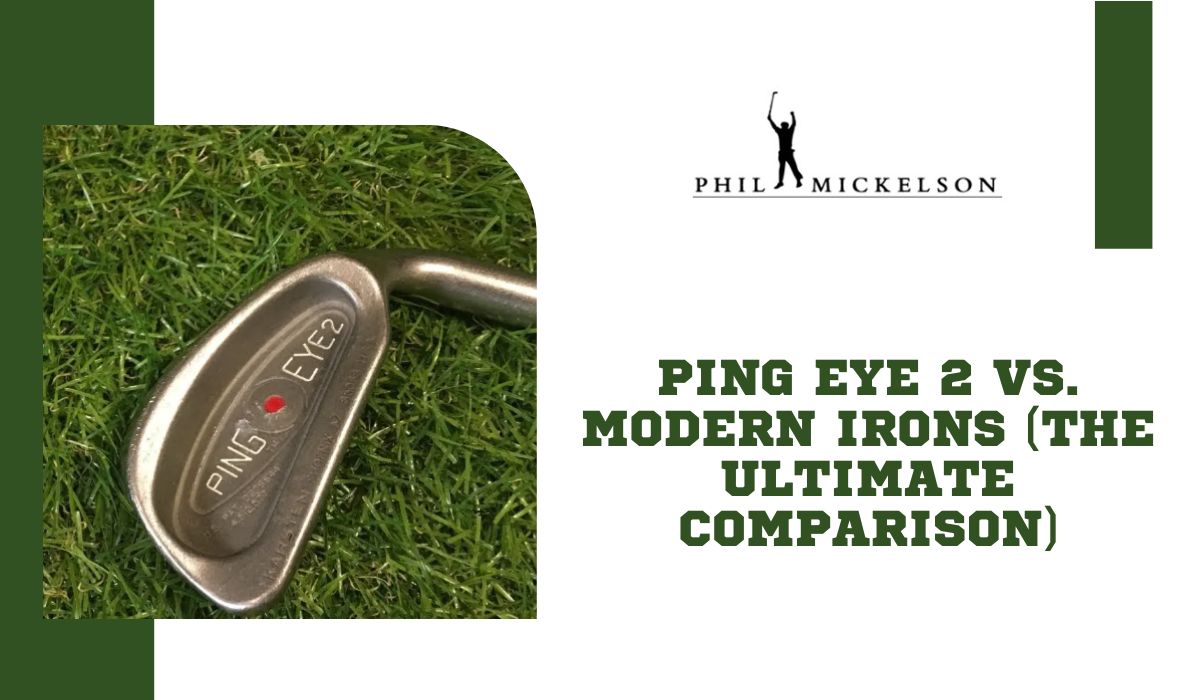
The main difference between the Ping Eye 2 and Eye 2+ irons is that the Eye2 iron was made from 1982 to 1984 and has a patent-pending design featuring “V” or the later “U” grooves. However, Eye2+ features a “scalloped” sole, a modified bounce and grind, a slightly thinner topline, a slight increase in clubhead size, a somewhat higher and more rounded toe, and slightly stronger lofts.
The increased groove width makes the Eye 2+ stand out from the entire Ping Eye 2 series. The Ping Eye irons were generally first introduced in the 1980s, which inarguably set the quality and performance standard for today’s cavity back irons.
If you’re torn between the Ping Eye 2 and the Eye 2+ and want to know what makes them different, this post is for you.
In the rest of this article, you will learn the key specifications, features, pros, and cons of each irons to help you further decide which is best for your game.
Clubs are tailored to your height and wrist-to-toe length, marked by colored dots.
Pick between lightweight and medium-weight shafts for flexible play and more powerful shots.
Get clubs from 2 to 9-iron, plus an attack wedge for precise close-up shots.
Easy-to-use cast iron clubs, professional-grade stainless steel irons, and beginner-friendly graphite options.
Focus on top-notch grip quality for better control and feel.
Smooth soles reduce turf drag, boosting speed and distance for each shot.
Ping Eye 2 vs. Eye 2+ (My Review)
I really appreciate the perfect balance in the perimeter weighting of the Eye 2+ irons, making shot control a breeze, which is the opposite experience for the original Eye 2.
However, when it comes to shaping shots in both directions, it can get tricky.
The offset feature of the Eye 2+ is a plus for hitting the ball right to the left, but even as an older player, I’ve managed to handle shot shaping quite nicely.
One standout feature for me is the consistent loft progression throughout the set. Unlike newer clubs that might mess with loft characteristics, each iron in the Eye 2+ set maintains its intended loft.
This is crucial, especially in long irons, where hybrids often fall short.
Sticking with the + PW, SW, and LW ensures a smooth progression, with every club looking and setting up the same way.
I particularly love the versatility of the wedges for various shots without causing excessive damage to the ball cover.
Now, there’s a downside worth mentioning regarding the original KT shafts. These are known for their thin walls and durability issues.
If you’re in the market for used sets, I’d strongly advise steering clear of KT-equipped irons unless the shafts are original and have that distinctive “white” Ping epoxy.
On the flip side, the JZ shaft in my BeCu Eye 2+ irons has proven to be more reliable. The ZZ65 shaft in stainless-eye 2+ irons is acknowledged as excellent, and I still regret letting go of a set with this configuration.
If you’re ordering new Eye 2+ irons directly from Ping, the significant part is that you get to choose your preferred shaft, adding a personalized touch to your clubs.
I’m a big fan of the Eye 2+ irons, and I recommend them over the Eye 2.
Despite other good options from Ping, there hasn’t been much improvement in the golf industry since the success of the Eye 2 and Eye 2+ lines from Karsten.
Pros and Cons of Ping Eye 2 Iron
The Ping Eye 2 allows you to outfit it with graphite shafts as well as the original steel shafts. However, I also observed that these irons have ridiculously weak lofts, which give them incredibly high launch angles.
Here are the pros and cons to keep in mind before using Ping Eye 2 irons.
PROS
CONS
They have a soft feel.
The Ping Eye 2’s are dated in terms of manufacturing and features.
Very durable construction
Narrow soles
They produce effortless and very high apex height.
Minimal distance
The dot-lie system
They are no longer in circulation and are slightly expensive.
They are perimeter-weighted.
Stainless steel construction
Pros and Cons of Ping Eye 2 Plus
Like the Eye 2’s, you can’t find the Eye 2 Plus easily, even on the Ping official website. They are old, old clubs. That’s a significant downside. But there are good sides to this club as well.
PROS
CONS
Various lie angles and heights for different players
It’s hard to find unused models.
Excellent for beginners
Not as attractive as the original Eye 2’s
Easy-to-use irons
Like the Eye 2’s, the Eye 2 Plus is no longer in circulation and is slightly expensive.
The gliding sole design reduces drag.
Stainless steel and graphite irons
Who Should Use the Ping Eye 2+ Iron?
Even though the Ping Eye 2+ is an older model compared to newer clubs from brands like Callaway and Titleist, it’s still a good choice for beginners.
If you’re on a budget, you can buy used Ping clubs for a much lower price than brand-new ones.
Brand-new sets can be expensive, reaching the upper three-digit price range.
Ping doesn’t sell them directly anymore, but you can find them through online resellers.
If you come across a well-maintained set of Ping Eye 2+ clubs, don’t miss the chance to buy them.
Pro Tip:
Before making a decision, visit a golf equipment store and ask the experts there to help you choose the right color for your set.
Ping has used a colored dot system for labeling their clubs for over 40 years, and getting the right color ensures that you get the best set for you.
Final Remark
I’ve used a variety of Ping golf irons over the years, starting with the Eye 2’s and progressing through different models like the +’s, Zings, Zing 2’s, ISI BeCu, BeNi, I3 Blades, and I3+ Blades.
Currently, I’ve been playing with the Eye 2+s for the past two seasons. And I can say it’s the best of the old Ping products I’ve tried.
However, I haven’t tried the newer Ping iron models like the G2, G5, S58, S59, I5, or I10.
But if you’re torn between the Eye 2 and Eye 2+’s, you should, by now, know what makes these two irons different.
While modern irons have a higher ball speed than the Ping Eye 2, they also offer more distance due to stronger lofts. In material construction, Ping Eye 2 used the same stainless steel that many club manufacturers use today; however, some modern clubs now have tungsten and titanium in the club head.
As the iconic Ping Eye 2 irons walk into their fourth decade of play, many players have tried to compare their equivalent with modern clubs. Indeed, there are a few tour pros who still use the Eye 2’s.
While enjoying a solo round of golf last week with my Ping Eye 2 Green dots, I teamed up with a group of three players. Some of them teased me for using “outdated” 20-year-old clubs, insisting I’d fare better with a $200 set from Canadian Tire than my current ones, which they deemed inferior to their flashy Callaway clubs.
I decided to do an extensive comparison of Ping Eye 2 and modern-day clubs to see what I could really be missing out on. In the rest of this article, I will walk you through my findings.
What You Should Know About the Ping Eye 2 Irons
The Ping Eye 2 irons were unique because they had a dot system that showed different launch angles.
These irons were made from substantial stainless steel, making them challenging and giving them a nice, soft feel.
They are perfect for forgiveness and accuracy. The way they’re designed, with weight around the edges and a special hosel, helps you hit the ball more accurately and make it go higher.
These irons also have a cavity-back design, which means the back of the clubhead has a hollow space.
This design makes the ball go faster and is more forgiving for players who might not hit the ball perfectly every time.
However, the initial production line had some legality controversy because they were designed with square grooves, which don’t conform with the United States Golf Association’s (USGA) and R&A rules.
What You Should Know About Modern Clubs
Unlike Ping Eye 2s, modern golf irons come packed with high-tech features to improve your game.
One standout is the use of multiple materials in their construction, which boosts the speed and trajectory of the ball.
For example, the Ping G425 iron is built with innovative features like cascading soles and stronger lofts. This makes the club lighter and more robust, improving your performance on the course.
But it’s not just about high-tech improvements.
Modern golf clubs also consider your comfort. Many now work seamlessly with golf gloves, protecting your hands from blisters and giving you better control.
With the swing analysis, you can choose the right clubs that match your playing style, ultimately making you a better golfer.
Comparing Ping Eye 2 vs. Modern Irons (Spec Difference Chart)
Indeed, there are some relevant differences between the specs of a Ping Eye 2 and modern irons such as Ping G425 irons.
Here are some of the significant areas of difference:
Factors
How Ping Eye 2 Compared With Modern Irons
Ball speed
The modern irons will have a higher ball speed than the Ping Eye 2.
Specifications
The modern version of many golf irons has customized and unique specifications, mainly on stronger lofts, which offer better distance than the Ping Eye 2.
Material features
Modern golf iron club heads now have tungsten and titanium incorporated into them. But Ping Eye 2 used the same stainless steel that many club manufacturers use today.
Pricing
Sticking with the older Ping Eye 2 irons may be the most affordable option if increased distance doesn’t matter much to you.
Appearance
There’s minimalism in the overall aesthetic design of the Ping Eye 2, which seems to be the objective of many manufacturers of modern clubs.
What is the modern equivalent of Ping Eye 2 irons?
The Ping GMax irons are the closest to the Eye 2 in terms of shape and forgiveness in Ping’s newer lineup.
Although the Eye 2 irons are iconic and a personal favorite, the technology from 1982 is outdated compared to today’s standards.
Despite their excellence in the past, the Eye 2 might struggle in today’s golf scene. It would be cool if Ping brought back the Eye 2 with some modern updates like new materials and lighting.
The Eye 2 irons changed how people see golf clubs, so trying them could be a unique experience for any golfer.
Overall, it’s about blending the classic design with modern features to create a set of irons that pays homage to the past but fits well in today’s golf world.
Which Should You Choose Between Ping Eye 2 and Modern Irons?
Ping Eye 2 is forgiving, helps with your shots, and has a good balance of height and weight.
If you want a good deal and don’t want to spend too much, go for Ping Eye 2 irons. But if you have more money to spare and want to improve your game, go for the newer irons. These newer ones are perfect for people who are not so great at golf yet.
If you prefer something easy to use, especially for recreational golf, choose Ping Eye 2.
But if you’re looking for irons that will make you better at the game or have a more precise design, go for the newer models.
Final Remarks
Ping Eye 2 irons are different from modern irons in so many ways, such that one will easily be able to discern that the latter is a better option for intentional game improvement.
In terms of shaft options, Ping Eye 2 only offers one option—Ping JZ series steel, Ping 350 Series graphite—while modern irons offer multiple options. In terms of ball speed, modern irons will be faster than the Eye 2’s.
Meanwhile, Ping Eye 2 is only known for its stainless steel material, but you can find various modern irons with various improved materials.
One unavoidable area of comparison is the lie/loft differences and which modern irons are stronger.
So, as far as this review goes, Modern Irons wins the belt against Ping Eye Irons. But if you base your argument on cost-friendliness and nostalgia for using old clubs, then Ping Eye 2 stands a chance.
Outside of those two exceptions, even a beginner is better off with a modern iron. What do you think? Please share your thoughts in the comments.
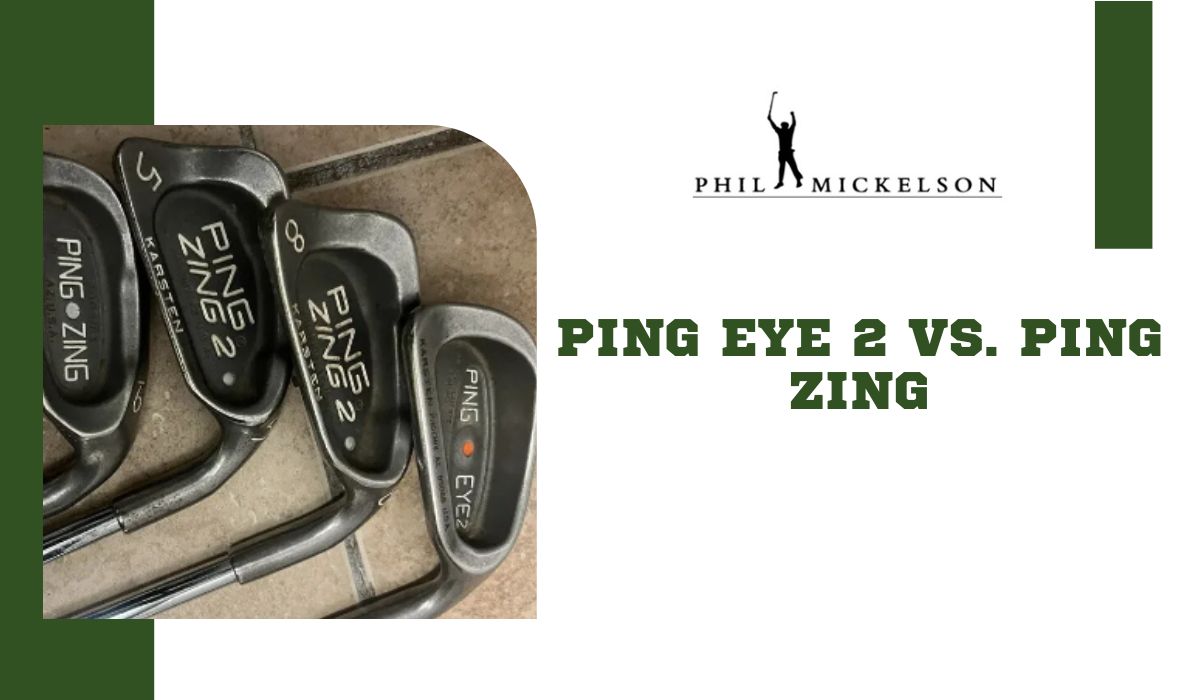
The major difference between the Ping Zing and Ping Eye 2 is their design and performance focus. Ping Zing, with its midsize design and high toe area, emphasizes forgiveness and ease of use, making it an ideal choice for beginners. Meanwhile, Ping Eye 2 boasts advanced features like a custom tuning port, catering to players seeking precise control, optimal launch, and distance mastery.
I recently tested the Ping Zing and Ping Eye 2 irons to refine my on-course experience. The Ping Zing pleasantly surprised me with its forgiveness, particularly around the toe region. Its smooth, rounded sole also proved handy in maintaining solid contact in challenging situations. Shifting to the Ping Eye 2, I encountered a more advanced set, where the cavity back design and custom tuning port significantly enhanced precision and allowed for optimal launch. Each iron brought distinct strengths, catering to different facets of my game and adapting to various playing scenarios.
In the rest of this article, I will explain the major differences between the Ping Eye 2 and Ping Zing to help you decide which to add to your collection.
Specification Comparison
When it comes to comparing the specifications of the Ping Eye 2 and Ping Zing, avid golfers often find themselves faced with a dilemma. So, to make things easier, let’s break down the key specifications of these two iconic golf clubs:
As I unboxed the Ping Zing irons, the first thing that caught my eye was the distinct deep-cavity back design. It exuded precision and performance. When I gripped the club and took my first swings, I was immediately struck by how effortlessly I could connect with the ball. The deep cavity back seemed more than just a visual feature; it played a crucial role in making these irons remarkably easy to hit.
What stood out for me was the impressive shot dispersion. The Ping Zing irons consistently delivered tight shot groupings when my swings were reasonably accurate. It felt like the club was working with me to maintain control and keep the ball on the intended line.
Switching to the Ping Eye 2 irons, the differences in design and performance were apparent. I wasn’t a fan of the classic design and distinctive orange dot. The standout feature of the Ping Eye 2 irons was the cavity back design, which was notably emphasized as a key element contributing to forgiveness and accuracy. The weight redistribution to the clubhead’s perimeter caught my eye visually and promised enhanced performance.
The larger sweet spot created by the cavity back design was evident in my shots, providing confidence even on off-center hits. The Ping Eye 2 irons prioritize consistency, and the forgiveness offered by this design element was notable.
Ease of Use
Using the Ping Eye 2 irons felt super easy. The way they’re designed with that hollow-back thing makes them really forgiving. Even when I didn’t hit dead center, the shots went straight and far. It’s like they’re forgiving your mistakes, which is awesome, especially if you’re not a pro golfer. The weight around the edges helps, too; it keeps the club steady, so even if you mess up a bit, it’s not a disaster. These irons make golf feel less tricky, and that’s a big plus for me.
The Ping Zing Irons are also pretty easy to use. They might not have all the fancy stuff, but they’re forgiving. If you’re like me, still working on getting the perfect swing, these irons have your back. It’s not a big deal, even if you hit a bit off, especially around the toe. The club’s shape helps you out. And when dealing with rough grass, these irons slide through and let you hit the ball solidly. They might not be the flashiest, but they’re good for someone like me who wants to enjoy playing without too much fuss.
Performance
From my experience, the Ping Eye 2 Irons truly stand out regarding launch, trajectory, and distance control. The cavity back design and the carefully calibrated weight distribution worked seamlessly to promote a higher launch angle, making it remarkably easy for me to get the ball airborne. The meticulous center-of-gravity calibration ensured a consistent and desirable trajectory, providing the perfect balance between carry and roll.
What impressed me most about the Ping Eye 2 irons was their exceptional distance control. The custom tuning port technology allowed me to place the weight within the clubhead precisely, optimizing the center of gravity. This, coupled with the responsive feel of the True Temper Dynamic Gold Shaft, enabled me to generate maximum power efficiently, resulting in consistent and predictable ball flights.
On the other hand, my experience with the Ping Zing irons revealed a different set of strengths. The midsize design and high toe area offered forgiveness that was particularly reassuring around the toe region, protecting against mis-hits. The smooth, rounded sole design proved invaluable, especially in rough conditions, allowing me to make solid contact with the ball. While I found these irons ideal for beginners, the basic performance and the thick, unresponsive face presented challenges with ball speed, highlighting a trade-off between forgiveness and advanced features.
Surprisingly, the Ping Zing irons showcased good roll distance, even on topped shots. Despite lacking sophisticated technology, their perimeter-weighted cavity back design, groundbreaking in 1991, continued to assist with forgiveness. However, the basic performance and the thick, unresponsive face did raise concerns about ball speed for certain players, underscoring the balance between forgiveness and modern features.
Price
A brand new Ping Eye 2 costs about $107, depending on the shaft’s makeup, material, and flex. But you can get a used one for as low as $24. On the other hand, you can get a brand new Ping Zing for as low as $199.
Pros and cons
Like everything else, these two golf clubs have their upsides and downsides. I must share them with you so you can make a good decision about which to purchase.
Not suitable for beginners who need to work on their ball-striking skills.
Added mass on the heel and toe for more heel-toe stability on off-center hits
It has a heavy swing weight that may not appeal to all players.
Which should you buy?
Choosing between the Ping Eye 2 and Ping Zing irons boils down to your priorities on the golf course. If you’re after advanced features, precise control, and a tailored experience, the Ping Eye 2 irons should be on your radar. Their cavity back design, strategic weight distribution, and custom-tuning port technology make them ideal for golfers seeking optimal launch, trajectory, and distance control. The True Temper Dynamic Gold Shaft further contributes to a responsive and stable feel, enhancing overall performance. However, be ready for a slightly steeper learning curve and possibly a higher price tag.
On the other hand, the Ping Zing irons might be a better fit if you value simplicity, forgiveness, and an easy-going golfing experience. Their midsize design, high toe area, and perimeter weighting make them forgiving and accessible, especially for beginners. While lacking some modern technology, they still provide good roll distance and help players navigate challenging conditions. If you prioritize an easy-to-use set that offers forgiveness without overwhelming you with advanced features, the Ping Zing irons are a solid choice.
Final Thoughts
Both Ping Eye 2 and Ping Zing have their own unique strengths, catering to different skill levels and playing styles. Your choice should align with what matters most to you on the course—whether it’s advanced technology and precision or simplicity and forgiveness. Whichever set you go for, both the Ping Zing and Ping Eye 2 irons offer reliable options to enhance your golfing experience.
The most common flight-scope Mevo Plus issues include charging problems, difficulty reading short shots, connectivity issues, inaccurate data readings, and app issues. To address these issues, use the authorized charger, try reinserting the battery, align the device and ball accurately, and ensure the mode setting is accurate.
The Mevo Plus launch monitor has been my top choice due to its portability, affordability, and accurate club and ball data tracking. Its real-time metrics have provided invaluable insights for refining my swings. However, a few drawbacks impacting its overall functionality ultimately led me to turn to a different launch monitor. Initially, charging the Mevo Plus posed challenges. Then, getting my Mevo+ to read short chips and putts was frustrating. Connecting the launch monitor to my iPad was a hassle. I didn’t want the $1,869 I spent on the device to go to waste, so I had to find ways to resolve these issues.
Through thorough research and discussions with my local technicians, I learned that ensuring compatibility between my Mevo Plus and iPad was crucial. Additionally, keeping them in close proximity was necessary to facilitate a stable connection. To resolve the issue of reading putts, I ensured proper alignment of the Mevo Plus and the ball on a flat surface free of obstacles. I found a solution for charging by using the correct charger and ensuring the battery was inserted properly.
After encountering a fellow golfer with similar complaints about the Mevo Plus, I conducted extensive research to help others facing similar issues. If you’re experiencing problems with your Mevo Plus, read on. In this article, I’ll discuss common issues and provide solutions to help you fully maximize your launch monitor. Let’s delve into the details.
Your Flightscope Mevo Plus is not powering up.
If your Mevo+ is not turning on, the issue likely stems from the battery. This could be due to either an insufficient charge or a defective battery.
Solution
Connect your Mevo Plus to a power source using the provided USB cable. The charging process demands several hours, particularly if the battery has been completely depleted.
If it still doesn’t come on after proper charging, you may need a new battery for your device.
Your Mevo Plus isn’t charging.
If you’re finding that your Mevo Plus is not charging, you’re not alone—it’s a common issue. This may happen because you’re using the wrong charger or the battery isn’t inserted properly.
Solution
Make sure to exclusively use the provided Flightscope OEM charger with your device. Using any other charger could potentially harm your battery.
You could also try troubleshooting your Mevo Plus by reinserting the battery. Take a minute to gently pull off the red rubber trim covering the battery compartment, ensuring it does not fully detach. Once exposed, remove the battery for about a minute and carefully put it back in place. This quick disconnection is a soft reset and can help address potential glitches in the charging process.
If you’ve exhausted all other attempts to charge your Mevo+ without success, it may indicate a Q7 fault. In such instances, you should contact customer support; you will have to return the device to the company to facilitate the replacement of the system board in the affected unit.
Your Mevo Plus is having difficulty detecting or reading putts.
If your Mevo Plus is not accurately reading putts, there are a few potential reasons. It could be due to the use of golf balls with metal stickers. It could also be due to obstacles or uneven surfaces between the ball and the Mevo Plus path.
Another factor to consider is putting it at a distance beyond the recommended range for accurate readings. I experienced this issue when attempting to putt from a full swing distance of 9 feet.
Solution
Create a level and clear path from your golf ball to the Mevo Plus. Eradicate any bumps or obstacles to ensure accurate readings during putting. A smooth and unobstructed surface enhances the Mevo Plus’s ability to capture precise data, contributing to a more effective and reliable putting experience.
Adjust your putting distance to 7 feet, slightly shorter than the recommended 8 feet for full swings. You can even try 6 feet or slightly closer to obtain the desired results. This ensures better alignment with the device’s specifications, enhancing accuracy in capturing putt readings for improved and more reliable performance.
Opt for a regular golf ball without metallic stickers. This choice ensures precise and interference-free putt readings, enhancing the device’s accuracy for a more reliable and effective putting experience.
Try lifting your putter head in the follow-through. Avoid keeping it down the target line, as this can obstruct the device from accurately reading the golf ball.
Your Mevo Plus isn’t detecting or reading short chip shots accurately.
Another frequent issue with the Mevo Plus involves difficulty accurately reading short chip shots. This problem often arises due to improper settings on the Mevo+ device. It has three modes, and using the wrong one can lead to difficulty capturing data for short chips.
Ensure you’re using the right setting—specifically, the “short indoor setting.” This setting is tailored to enhance accuracy for short-range shots indoors. By selecting the short indoor setting, you fine-tune the Mevo Plus to better capture the details of short chip shots, offering reliable and detailed feedback.
Adjust the tilt lower than the recommended 12 degrees. I’ve found that settings like 11.5 or 11 degrees improve my Mevo Plus device’s ability to capture lower-chip shots accurately.
Experiment with chipping from closer distances. I sometimes notice that chipping from the recommended 8 feet for full shots leads to difficulty reading. But I got better results when I tried closer distances, like 7 feet. Bringing your chips closer allows the Mevo Plus to focus and analyze these shots more effectively, offering potentially more precise feedback.
Create a flat and uniform surface from your Mevo Plus to the ball by extending any material about the same height as your hitting mat. I’ve found that foam tiles work well for this purpose. You can try any other material. Just ensure that it is the same height as your golf mat. This ensures a seamless and consistent surface, minimizing variations in elevation.
Your Flightscope Mevo+ is experiencing connectivity issues.
Connectivity issues between your device and the Mevo Plus may arise from a lack of network compatibility. I encountered this problem with my Mevo+. My Mevo+ operates on a 5 GHz WiFi connection, and my iPad operates on a 2.4 GHz band; at the time, I didn’t realize that compatibility was the issue, and I was struggling to get both devices to connect.
Another potential issue may arise if the two devices—your phone or tablet and the Flightscope Mevo+—are positioned too far apart. Considering the proximity between the devices is essential, as an excessive distance can lead to connectivity problems.
Solution
If your device operates on a 2.4 GHz band, consider switching to the 2.4 GHz option in the Mevo+ WiFi settings. To do this,
Start by enabling WiFi and Bluetooth on the device you intend to connect. This ensures the Mevo+ can communicate effectively with your device, allowing for a seamless and stable connection.
Access the Mevo+ app on your device and proceed to the advanced settings section. Within the advanced settings, locate and select the option for WiFi settings.
Within the WiFi settings menu, you’ll encounter choices between two frequency bands: 5 GHz and 2.4 GHz. Clicking 2.4 GHz should resolve the issue and enable you to connect your devices.
Ensure that your phone’s or tablet’s Bluetooth or WiFi is activated and within proximity of the device. The distance between the devices influences the effectiveness of the connection. Keeping them closer enhances the likelihood of a stable and dependable connection.
Flightscope Mevo+ App-Related Issues
Common problems with the app often stem from it being outdated or having internet connection issues.
Solutions
Ensure your app runs on the latest firmware version by performing timely updates. To update the app, navigate to the designated app store on an iPhone or iPad and search for the Mevo Plus app. If an update is available, follow the prompts to download and install it. Regularly checking for updates ensures that you benefit from advancements made by the developers, fostering a more stable and feature-rich user experience.
A consistent and reliable internet connection is essential for the Mevo Plus app to operate effectively. If you encounter connectivity issues, consider adjusting your proximity to the router or switching to an alternative Wi-Fi network. Moving closer to your router can enhance signal strength and potentially resolve disruptions in connectivity.
If issues persist with the Mevo Plus app, take proactive steps by force-stopping the app. This clears the app’s cache, which removes temporary files that could contribute to performance issues. This can typically be done through the app settings on your device. Finally, restart your phone or device to refresh the system processes.
If the aforementioned steps do not resolve the issue, consider contacting a technician or FlightScope support for additional assistance. Seeking professional help ensures a more in-depth analysis and specialized guidance to address any problems with your Mevo Plus device.
Closing remark
The FlightScope Mevo Plus offers great features like portability and precise data tracking. However, issues like charging issues or connectivity problems can limit its functionality. To avoid and fix these issues, use the authorized charger, align the device and ball accurately, choose the right settings for short shots, and troubleshoot connectivity.
Regularly updating the app and maintaining a stable internet connection are essential. If issues persist, seeking professional assistance ensures a comprehensive resolution and maximizes your Mevo Plus experience.
When choosing the best golf balls for your simulator, choose new ones to preserve your impact screen, and select the color (white, orange, or yellow) suitable for your simulator setup. Prioritize highly durable options for extended use and look for balls with logos to enhance tracking by your launch monitor. Ensure the selected golf balls match your playing style.
I wanted a Christmas present for my retired father, who loves golf. Since he got a simulator set up earlier this year, I knew getting him the best golf balls to enhance his simulation experience would be the perfect gift. So, I decided to try out some of the best golf balls to determine which was best for the simulator. I have ranked the top 3 that excelled during my test:
Ultimately, I decided to go with the Srixon Soft Feel Golf Ball. It provided a remarkably soft feel and impressive distance and proved particularly beneficial for my father, whose swing speed has decreased with age. He gained an extra 10 to 15 yards compared to other balls. The affordable price range also made it a practical choice. While the Titleist Pro V1 Golf Ball offers excellent performance and durability, it has a higher cost and is less suitable for golfing beginners and senior golfers.
In the rest of this article, I’ll review the relevant specifications of these balls, share how they performed during testing, and outline their benefits and areas where I think improvement can be made. This way, you have all the information you need to make a well-informed decision about the best golf ball for your simulator setup.
Specification Comparison
The table below compares the key features of each golf ball, so you can get a quick overview of what each has to offer in case you are short on time.
Golf Ball
Srixon Soft Feel Golf Ball
Titleist Pro V1 Golf Ball
Bridgestone Tour B XS 2018 Golf Ball
Construction
2-piece
3-piece
3-piece
Compression
60
87
75
Cover
Ionomer
Urethane Elastomer
REACTIV iQ SMART cover
Dimple Number
338
388
Dual dipple technology
Price
$22.99
$54.99
$34.99
Greenside Spin
Mid
Low long-game spin
High
Srixon Soft Feel Golf Balls
Srixon Soft Feel Golf Balls
$22.99
They felt soft when hitting and easily controlled around the green areas.
They dont cost too much, which was nice for my budget.
These balls were good for my golf simulator, making it feel like I was playing on a real golf course.
Picking the yellow color made the balls easy to track, helping to enhance accuracy.
Srixon Soft Feel Golf Balls offer impressive distance and reliable spin control, particularly suitable for golfers with low or mid-range swing speeds. The balls provide a soft feel and effective control around the greens, making them an excellent choice if you prioritize this aspect of the game.
Their affordability is a plus. While their spin may not match Titleist’s, this factor was not a significant concern for my dad, making the Srixon Soft Feel a well-suited choice for his preferences.
Features
The Srixon Soft Feel golf ball, with its FastLayer Core, provides incredible softness and remarkable distance, especially when teeing off. The 338 Speed Dimple Pattern is a standout feature, offering increased distance and superior performance in windy conditions. These dimples work to minimize drag during launch and boost lift during descent.
I find the multilayer design of these balls particularly advantageous for my golf simulator setup, as they effectively replicate the performance nuances of real golf courses. The soft, thin ionomer cover adds to the appeal by delivering a softer feel on every type of shot. The Srixon Soft Feel golf ball, with its unique combination of features, proves to be an excellent choice for various aspects of the game.
Performance
Deciding on new golf balls was crucial to protecting my impact screen and enhancing the overall simulation experience. After testing both the Srixon Soft Feel and Titleist Pro V1, I found the Srixon Soft Feel to be my preferred option.
I chose yellow, which performed well with my SkyTrak launch monitor. The yellow color and the Srixon logo improved accuracy by providing visual reference points for my launch monitor. The logo is a unique identification feature that enhances ball tracking and accuracy.
For my 70-year-old father, with a reduced swing speed, the Srixon Soft Feel delivered an impressive performance. It offered him an extra 10 to 15 yards compared to other balls. The softer compression dynamics allowed him to hit fairway woods with increased distance, a pleasant surprise given his age.
However, I observed that the ball was less durable than high-end balls like the Titleist Pro V1 balls. Despite this, it was still of pretty good quality. I would recommend it to anyone looking for a sensible option for casual golfing on the course and an indoor simulation experience.
It also produced consistent results on my SkyTrak unit for spin and distance. In summary, the Srixon Soft Feel fits the bill if you are an average or senior golfer seeking a softball that performs well in various aspects. It feels good for chipping around the green and provides a well-rounded performance off the tee and in simulation sessions.
Pricing
In terms of pricing, the Srixon Soft Feel Golf Balls are a cost-effective option compared to high-end balls. They are available at the PGA Tour Superstore for $22.99. They’re affordable and provide optimal performance, which makes them a great buy.
What I liked:
They felt soft when hitting and easily controlled around the green areas.
They didn’t cost too much, which was nice for my budget.
These balls were good for my golf simulator, making it feel like I was playing on a real golf course.
Picking the yellow color made the balls easy to track, helping to enhance accuracy.
For my dad, a senior golfer who doesn’t swing as fast, these balls provided increased distance.
What I didn’t like:
Compared to some more expensive alternatives, they don’t spin as much.
Titleist Pro V1 Golf Balls
Titleist Pro V1 Golf Balls
$54.99
These balls have remarkable durability.
Excels in various aspects, including long-distance shots, forgiveness, feel off the club, and proficiency in chipping and putting.
It provides substantial distance compared to other balls, and the feel is notably superior.
This golf ball provides a reliable and steady trajectory, standing out as one of the most durable options. With features like long game spin, superb control on the greens, and a high compression rating, it’s an excellent pick if your driver’s swing speed is 90 mph or higher.
However, it’s a premium choice, and its higher price reflects that. Given its expense, I wouldn’t suggest it for beginners or senior golfers, which is why it wasn’t the first choice for my dad, despite its impressive performance.
Features
This golf ball is known for its softer feel, low-game spin, and flatter trajectory. It is ideal for players who seek yardage, the ability to control shot trajectory, and precision in scoring with a delicate touch.
The ball incorporates a new high-gradient core, serving as a central engine to achieve high speed and lower spin during long-game shots. A spherically-tiled 388 tetrahedral dimple design ensures a penetrating and consistent flight for better overall performance.
Available in two color options, white and yellow, there’s also the option for personalization to add a custom touch to your golfing experience.
Performance
I really liked this golf ball because it is highly durable and has a soft feel, especially when I used it with shorter irons. It’s of great quality, which is great for simulators. It saves you from having to replace the mat or screen because of damage from a worn-out ball.
I like that it was quite forgiving of my shots; even when I didn’t hit perfectly, I still got great distance. It also works well for chipping and putting. The feel of this ball around the greens is really good. My friend, a 4 to 6 handicap player who is an average golfer, tried it out, giving him good ball flight and spin.
It’s a fantastic golf ball that covers range and spin and offers a satisfying feel. However, if you are a beginner or high handicapper starting out, you should not get these balls but go for other alternatives, as they are designed to spin more aggressively than most golf balls.
While the Pro V1 is solid, particularly around the greens, the extra cost doesn’t necessarily deliver significantly more value than more affordable options. There are alternatives that offer similar zip, feel, and distance and are better suited for average golfers.
This ball is great for simulators, but it’s even better on the golf course.
Pricing
The Titleist Pro V1 golf balls are really good, but they are a bit expensive. They are available for $54.99 at the PGA Tour Superstore. These are very durable and will perform really well with your simulator setup. They are a good investment if you are a serious golfer and a low handicapper, particularly because you won’t have to worry about losing them on the course if you use them with your simulator setup. But if you are a handicapper or a beginner, I recommend choosing more affordable alternatives better suited for your skill level.
What I liked:
These balls have remarkable durability.
Excels in various aspects, including long-distance shots, forgiveness, feel off the club, and proficiency in chipping and putting.
It provides substantial distance compared to other balls, and the feel is notably superior.
What I didn’t like:
not ideal for beginners or senior golfers.
They come at a higher price point.
Bridgestone Tour B XS 2018 Golf Balls
Bridgestone Tour B XS 2018 Golf Balls
$34.99
Provides excellent distance off the tee.
Offers an impressive spin, especially with wedges.
Provides a higher trajectory for more precise shots.
These golf balls are a high-end option, providing good distance and control on the course. They fall into the mid-range price category. Suitable for serious and casual golfers, they shine, particularly for players with lower handicaps and higher swing speeds. However, their durability is a concern, as the cover tends to come off and peel over time.
Features
These golf balls are designed with Dual Dimple Technology, which means they have both big and small dimples. This helps the ball move through the air better, making it fly in a straight line.
They’re not too hard or too soft; they have a medium compression rating of 75. This makes them good for people who don’t swing the club too fast, giving them more distance.
These balls aim to be accurate and feel soft when you hit them, especially when you’re close to the green. They’re made with a special cover called reactive urethane, which helps the ball spin and gives you control when making approach shots. This cover also helps the ball bounce off the tee quickly.
Inside the ball, there’s a Gradational Compression Core, which helps energy move through the ball and makes it go faster.
Performance
I’ve found these golf balls to deliver good distance off the tee and impressive spin when using wedges. I compared the Bridgestone and Titleist ProV, hitting ten balls each. The Bridgestone outperformed, proving to be the longest and straightest shots, especially with solid drives.
What stands out for me is the ball’s flight, offering a higher trajectory that allows for more precise shot placement. The moderate spin is a plus, ensuring that missed hits don’t veer too far off course. The multi-layered construction gives excellent distance while maintaining good spin.
I’ve experienced great spin around the greens and with my simulator, and the feel of the tee box is satisfying. Even a friend who doesn’t consider themselves a pro tried them out and loved the distance and holding these balls provided. These balls are better suited for low handicappers.
However, one issue I’ve encountered is that the outer cover tends to come off too easily after some wedge shots, as the cover quality is not very durable. This could lead to chipping and damage to your impact screen, so I recommend going for balls of better quality.
Pricing
The Bridgestone Tour B XS 2018 Golf Balls are priced in the middle range, not as expensive as the Titleist V1 Pro or as cheap. They are priced at $34.99 and are available at the PGA Tour Superstore. However, there’s a concern about the covers coming off over time, as they are less durable than more expensive options. I’d suggest considering a different option with better quality. These balls are not the most budget-friendly, and investing in them only to have the cover come off after a few shots would be disappointing.
What I liked:
Provides excellent distance off the tee.
Offers an impressive spin, especially with wedges.
provides a higher trajectory for more precise shots.
Effective for various swing speeds.
It gives good spin and control around greens.
What I didn’t like:
The outer cover is not durable and comes off after several shots.
Factors You Should Consider Before Choosing a Golf Ball for Your Simulator
The newness of the ball
Opting for new golf balls is advisable to safeguard both your impact screen and hitting mat. Using worn-out balls could damage your impact screen, incurring additional expenses for replacement. Furthermore, utilizing new, high-quality golf balls enhances the simulation experience.
Ball color
Launch monitors typically rely on specialized technology to track ball data. Some require the use of specific colored balls for optimal performance. White and yellow balls are commonly preferred due to their distinct contrast, facilitating accurate ball tracking. Foresight launch monitors, in particular, demonstrate improved functionality and accuracy when paired with white or yellow balls. It’s important to note that the ball’s color can significantly impact your simulator results.
Ball logo placement
The best golf balls for simulators are those with logos, offering two key advantages. This is one feature that the balls reviewed in this article share. Firstly, the logo on the golf ball serves as a visual reference point, enhancing the precision of the launch monitor in tracking the ball’s movement. Secondly, the logo provides distinctive identification, ensuring each ball is uniquely identifiable. This unique identification contributes to the efficiency of the tracking process on your launch monitor.
Ball performance
Srixon Soft Feel (SE) golf balls are specifically crafted to offer a well-rounded performance, featuring a soft feel that is resilient enough to endure the demands of simulator play. Titleist Pro V1 balls, on the other hand, are highly durable and designed for elite competitive play, providing advantages that may not be fully exploited in a simulator environment. Both balls are designed to enhance the simulation experience and offer a feel resembling that of a real course.
Personal playing style
Lastly, factoring in your individual playing style is essential when selecting a golf ball. Different golf balls boast unique attributes tailored for diverse conditions and playing styles. Certain balls are crafted to provide a soft feel across all shots while still achieving impressive distance, while others excel in both soft and firm course conditions. It’s crucial to align your ball choice with your specific playing preferences and the conditions you commonly encounter on the real golf course.
Final Verdict
The Srixon Soft Feel Golf Ball is my top choice for a simulator setup because it offers impressive distance, soft feel, and affordability, making it a well-rounded option, especially for those with mid- to low-swing speeds. It’s a great choice for senior golfers and beginners. The yellow color option, along with the presence of logos, also adds to its suitability for simulator setup.
Titleist Pro V1 Golf Ball offers exceptional performance and durability, but it has a higher cost. While it’s also a great but more expensive choice for a simulator setup, I would only recommend it if you are a serious golfer or high handicapper willing to spend a little more.
After thorough testing, i discovered that the driving rod is the best option for improving shot precision and control. Its sleek design and compact head make it perfect for low-handicappers who want a low launch angle. On the other hand, the hybrid has a larger, more flexible authority and face shape.
This characteristic makes it the top choice if you want to increase your distance while still benefiting from a higher launch and improved spin. The hybrid is especially advantageous for high-handicappers, as it helps reduce mishits and enhance overall performance. A video from Precision Golf Limited that thoroughly compared the driving iron and a hybrid caught my attention. Both clubs demonstrated standout features, which made me curious about the potential benefits they could offer golfers. Feeling compelled to explore this firsthand, I have decided to test both clubs and evaluate their performance based on my experiences. Rest assured, I will provide a detailed review to give you insights into what each club brings.
To simplify your decision-making process, I have created a comprehensive table that presents the most relevant information. This way, you can choose between the driving iron and the hybrid based on the key aspects that matter.
Stay tuned for an in-depth analysis of my personal experiences with these clubs.
Comparison chart
Factors
Driving Iron
Hybrid
Material
Forged and cast iron or steel
Lightweight composite
Head Design
Sleek and compact
larger and rounded with a high moment of inertia
Face design
Thin face for control and ball speed
A flexible face design provides forgiveness and enhances distance.
Launch and spin.
produces lower ball flight
It provides a higher launch and more spin.
Price
More affordable
The product is more expensive because of its advanced technical features.
Head design
The difference in the head design is one of the most notable features that caught my attention.
Opting for the Cleveland Launcher UHX for the driving iron test, I experienced its hollow body construction and compact profile firsthand, contributing to heightened shot precision without compromising speed.
The thin topline and minimal offset further solidified the driving iron’s reputation for shaping shots, positioning it as an excellent choice for seasoned golfers.
However, while advantageous for shot shaping, the longer clubface and additional mass at the sole presented a drawback that tilted my inclination towards hybrids, which enhanced support and control on the fairway.
Turning to the TaylorMade SIM2 Max hybrid, which I used for my hybrid test, the head design of this club distinctly sets it apart from the driving iron. Sporting a larger, more rounded head that remained compact, the TaylorMade SIM2 Max hybrid was much easier for me to use than the driving iron.
The expanded head dimensions also translated to accessibility for a broader range of handicaps during my gameplay.
The Thru-Slot Speed Pocket proved a game-changer, ensuring increased face flexibility and preserving ball speed and distance, particularly on low-face strikes.
Improving the design of the club face is necessary.
The driving iron’s straight and thin club face immediately caught my attention during my testing. This design element proved instrumental in boosting ball speed, offering a tangible impact on the velocity as I made each shot. This feature also contributed to heightened shot control and an impressive level of feel for the club.
However, it became evident that the driving iron’s features came with a trade-off. The club’s narrower sole and higher center of gravity made it less forgiving than the hybrid.
The curved design of the hybrid’s club face maximized flexibility, resulting in enhanced distance and a more substantial sweet spot for increased forgiveness.
Based on my experiences, I would recommend the hybrid for those seeking a reliable and forgiving club, especially if struggles with off-center strikes are recurring. The hybrid’s emphasis on flexibility and forgiveness makes it suitable for golfers looking to maintain consistency across various playing conditions.
Material
Before delving into my reviews, I found valuable insights online that shed light on the diverse materials used to drive irons. This spectrum ranges from traditional forged steel to more contemporary cast options.
This blend will allow you to experience the feel and feedback associated with classic golf clubs. During my recent test, I discovered that the Cleveland Launcher UHX, my chosen driving iron companion, is steel-made.
Conversely, most hybrids exploit the advantages of lightweight composite materials, showcasing an innovative approach to material usage. This strategic incorporation of advanced materials contributes significantly to a hybrid’s ability to achieve higher ball launches and extended carry distances.
The TaylorMade SIM2 Max hybrid, which played a central role in my test, featured a construction material known as high-strength C300 steel. This choice of material ensures a strong and fast face, engineered to deliver explosive ball speeds, aligning with the hybrid’s emphasis on distance and performance innovation.
Performance
Embarking on a test drive on the golf course, I set a target of hitting a green 180 metres away with the driving iron and hybrid. A noticeable distinction emerged as the hybrid exhibited a higher launch at 13.8° than the driving iron, which launched at 11.5°.
Even when I experimented with a steeper playstyle for the driving iron, the launch results remained consistent.
The driving iron’s commendable ability to shape shots and navigate through tight fairways stood out prominently during my test, significantly elevating the precision of my shots.
Notably, my swings with the hybrid yielded substantially higher ball spins of 4500 rpm when compared to the driving iron, which was 3800 rpm.
The hybrid will be my ideal recommendation if you are still refining your swing technique.
The fact that the hybrid clubs are very versatile makes them great companions whether you want to hit the course, the fairway, or the range.
This adaptability underscores the hybrid’s value as a versatile and forgiving companion for golfers across different skill levels.
Price
Driving irons are usually more budget-friendly. A wide selection of options enables you to select based on your preferred brand, material, and performance features while staying within your budget.
The hybrid, on the other hand, comes with a slightly higher price tag. However, the advanced materials and performance benefits justify the investment. There are various hybrids available for you on the PGA Tour Superstore to choose from if you are a player who prioritizes forgiveness and ease of use.
Pros and cons
I’m a golfer who values shot shaping and demands a certain level of workability for my clubs; the driving iron greatly aligns with my playing style. The forgiveness and versatility of the hybrids did, however, appeal to me. So I will share some pros and cons of using both clubs.
Best Driving Irons
Titleist U-505 Utility Iron with Graphite Shaft
Titleist U-505 Utility Iron with Graphite Shaft
$249.99
Enhanced Ball Speed: The utility iron is engineered with a thin, fast face that promotes increased ball speed, aiding golfers in achieving greater distance.
Improved Forgiveness: Its design incorporates high-density tungsten weighting, which provides a low center of gravity. This enhances forgiveness, making it easier to hit well, even on off-center strikes.
Versatile Performance: Ideal for various lies and conditions, the U-505 utility iron offers versatility, performing well on tee shots, fairway shots, and out of the rough.
Graphite Shaft Benefits: The graphite shaft reduces the club’s overall weight, allowing for faster swing speeds and potentially greater distance. It also tends to absorb vibrations better, offering a more comfortable feel.
I’ve been using it for 3 months, and it has consistently boosted my confidence every time I step onto the green. This driving iron’s soft and responsive feel has significantly improved my shots and overall performance. I’m more drawn to long iron, thanks to this particular driving iron.
The hybrid shafts have significantly improved speeds and launched challenging long-range shots with precision.
Its unique design is a dynamic feature. Unlike many driving irons that tend to compromise forgiveness compared to hybrids, this one incorporates new, denser D18 tungsten weights. This thoughtful design finds the sweet spot between the traditional feel of a driving iron and the level of forgiveness required for enhanced performance.
The icing on the cake is how seamlessly it fits into my golf bag. The shorter blade, shallow face, and wide sole make it a perfect addition.
What I liked:
The club provides a soft and responsive feel, adding to my confidence in the course.
Tungsten weighing contributes to a lower center of gravity, enhancing forgiveness in each shot.
Its compact design is a plus.
The driving iron offers increased forgiveness compared to many other driving irons.
What I didn’t like:
It might not be optimal for high handicappers, as it is less forgiving than hybrids.
PING G425 Irons with Steel Shafts
PING G425 Irons with Steel Shafts
$684.98
Improved Aesthetics and Confidence at Address: The PING G425 irons present a more premium look with simplified badging and a compact, sleek design, which is visually appealing and inspires confidence at address
Metal-Wood Style Iron: These irons are designed to assist in launching the ball higher without being overly bulky, offering a clean and compact design that is more streamlined compared to some alternatives
Variable Face Thickness for Enhanced Performance: The unique construction of the G425 irons increases flexing, which leads to more incredible ball speed, higher launch, and more distance
Increased Forgiveness: Enhanced perimeter weighting, aided by a tungsten toe screw and hosel weight, makes these clubs extremely forgiving, helping to improve performance even on off-center hits.
The first thing that caught my attention was the design of this driving iron. It had a metal-wood-style, variable face thickness, which gave off a more classic look. Although I prefer my hybrid to have a more modern look, I still look forward to seeing how it holds up over time.
It turns out this new look provided an advantage. The variable face thickness contributed to significant ball-speed gains, launching shots higher and farther.
I also appreciated the shift in the club’s weight distribution, with a heel-to-toe adjustment compared to the G410 model I had tried alongside it. This alteration improved the feel and sound during swings, adding to the overall positive experience.
Durability is a crucial factor for me, and the stainless steel body of this driving iron ensures it can withstand regular use. The added benefit of stability, particularly with the increased clubhead weight, further solidifies its reliability on the course.
What I liked:
The face technology boosts ball speed and helps me hit longer distances.
It’s durable and stable, thanks to smart material choices.
I can personalize it with different shafts and adjust the lie angle to fit my style.
What I didn’t like:
It is relatively more expensive, which could be a drawback for budget-conscious buyers.
The feel is subjective; some may like it, others may not.
It might not be for you if you prefer a more modern design.
SRIXON ZX Utility
SRIXON ZX Utility
$149.98
Appealing Aesthetics and Design: The SRIXON ZX Utility Iron is visually appealing, offering a blade-like appearance with a cavity-free back, minimal branding, and a combination of matte and chrome finishes. This design suits handicap players and inspires confidence at the address.
Excellent Feedback and Feel: It provides transparent feedback on mishits, allowing golfers to know precisely where the ball met the face. Well-struck shots deliver a fast and crisp feel, enhancing the playing experience.
Forgiveness on Thin Shots: The SRIXON ZX Utility Iron performs well on thin shots, maintaining a high launch angle even on mishits. This feature is beneficial for players who tend to hit long irons thin.
I was impressed by the incredibly soft feel of this driving iron, thanks to its forged 1020 carbon steel body that absorbs vibrations effectively.
Its smaller profile made it a perfect fit for my golf bag. This is ideal for low-handicap golfers seeking more forgiveness than regular driving irons. The fully hollow construction increases distance and ball speed, while including tungsten in the base lowers the center of gravity for a higher launch. The more affordable price tag is a plus.
What I liked:
A budget-friendly option.
The blade-like design enhances the overall stylish and appealing appearance.
Provides added distance, control, and a high launch off the tee.
What I didn’t like:
Some people may find it slightly less consistent in distance control than other driving irons.
Best Hybrids Irons
TaylorMade Stealth 2 Hybrid
TaylorMade Stealth 2 Hybrid
$249.98
Exceptional Distance: The Stealth 2 Hybrid is noted for its superior distance, consistently ranking as one of the longest hybrids in testing scenarios. This feature is particularly beneficial for golfers looking to replace long irons with a more powerful option.
Refined Design and Performance: It has received minor refinements over its predecessor, improving its overall performance. The hybrid combines a classic head design with technological upgrades, making it a powerful long-iron replacement for a wide range of golfers.
Solid Feel and Sound: The Stealth 2 HD Rescue model offers an incredibly solid feel, reminiscent of old persimmon woods, which many golfers may find appealing. Pure strikes produce a distinct snap, enhancing the overall hitting experience.
High Ball Speeds and Forgiveness: This hybrid is designed to produce exceptional ball speeds and offers ample forgiveness, making it a suitable choice for the majority of golfers, especially those seeking reliability in their long-game
One of the most important factors I consider when buying a hybrid is yardage. So I always go for the best in that area and the Taylormade Stealth 2 hybrid shines.
What sets the Stealth 2 apart for me is the exceptional feel it delivers, even when navigating through rough fairways. The softer touch makes a noticeable difference in overall playability.
The lower center of gravity is an improvement from the original Stealth Rescue, which ensures a more centered CG projection that significantly enhances the club’s performance, especially on those critical middle-face strikes.
The Twist Face design is a stroke of genius, addressing mishap tendencies. This feature translates to increased forgiveness and gives you more accurate shots.
And let’s talk about the flexible Speed PocketTM—a real game-changer. It maximizes ball speeds and adds a layer of forgiveness, proving invaluable, especially on those low-face strikes that can be challenging to master.
What I liked:
I enjoyed the enhanced feel and the satisfying sounds the Taylormade Stealth 2 hybrid provides with each swing.
The club impressed me with its ability to deliver impressive long distances on the course.
The higher launch, thanks to the high center of gravity, added a level of control and effectiveness to my ball flight that I appreciated.
What I didn’t like:
The cost may be a consideration for budget-conscious buyers.
While Callaway hybrids haven’t always been my top choice, the Paradym hybrid is a notable exception. Its streamlined and modern appearance resonated with my taste.
Incorporating high-density tungsten and the low center of gravity (CG) pushed forward in the design leads to lower spin and increased ball speed, contributing to improved overall performance on the course.
The wide range of loft options they offer is an added advantage. I highly recommend consulting with a fitter to maximize the benefits of this feature. I highly recommend consulting with a fitter to maximize this feature.
What I liked:
The Callaway Paradym hybrid is visually appealing and has a modern design.
Our product offers enhanced ball stability and speed and impressive distance coverage.
The hybrid showcased a remarkable level of forgiveness, even on mis-hits.
The availability of a wide range of loft options allows for a personalized selection to enhance the overall set makeup.
What I didn’t like:
The slightly higher price tag makes them slightly more expensive than other options.
Cleveland Launcher XL Halo Hybrid
Cleveland Launcher XL Halo Hybrid
$149.98
Versatile Performance: The Cleveland Launcher XL Halo is praised for its versatility on the golf course, allowing golfers to hit easily from any lie and quickly get the ball airborne, enhancing playability in various situations
Advanced Forgiveness: Featuring Gliderail Technology with three rails on the sole, this hybrid is built for premium forgiveness, ensuring better contact and playability even on mis-hits
High MOI Design: Boasting an MOI (Moment of Inertia) of 2,961 g-cm² — the highest ever in a Cleveland Golf hybrid — it provides increased stability for optimal ball striking regardless of the lie
Ease of Use: The club is designed to be forgiving and easy to hit, offering a large head for confidence and stability provided by the 3 Gliderails, which helps in maintaining consistent performance and excellent turf interaction
The Launcher XL stands out as one hybrid in the market that delivers a performance boost with higher launches and exceptional forgiveness. The larger club head allows for the strategic placement of mass away from the center, ensuring consistent long distances even when the hits aren’t dead center.
The shape of the club head demonstrates a perfect balance between enhanced performance and visual appeal. It’s not just a tool for the game; it looks good on the course too.
The inclusion of twin rails along the sole is a fantastic touch. It keeps the face straight through impact, giving me confidence that my ball striking will be on point, even when the swings are less than perfect.
One thing that stood out was the design’s focus on maximizing energy transfer. The alternating zones of flexibility and rigidity translate into incredible ball speed and impressive distance.
If you are looking for a budget-friendly driving iron offering higher launches and incredible forgiveness, the Cleveland Launcher XL would be a great choice.
What I liked:
The ball speed and distance provided by the cup-face technology are truly impressive.
The wide-body design adds substantial forgiveness and ensures a higher launch for added performance.
What I didn’t like:
The feel is subjective; if you prefer a softer feel, it may not be your liking.
Final verdict
Ultimately, individual preferences, skill level, and playing style significantly determine which club best fits your game. The driving iron offers a unique combination of responsiveness and increased ball speed. If you relish the challenge of shaping shots, it is your go-to club, and you value the tactile feedback of executing each swing. It’s affordability is a plus.
The hybrid will be your preferred choice if you like the versatility and forgiveness of clubs. The flexibility in the face design ensures that even off-center strikes can yield admirable shots. These advanced features make up for the additional cost of purchasing this club.
There’s not much difference between the Bushnell Launch Pro and the GC3 launch monitors. The only factor that sets both devices apart is the pricing model, which confuses many buyers.
I’m fortunate to own these two launch monitors, so I’ve created this article to break down the offerings of each of them.
_____________________________
KEY TAKEAWAYS
Bushnell Launch Pro and the GC3 Launch Monitor look the same in appearance. Only one is branded as “Foresight Sports,” while the other is branded as “Bushnell Golf/Foresight Sports.”
In terms of performance, both devices perform the same. These launch monitors are built on the same technology and provide the same set of data and features.
Both devices are celebrated as among the best launch monitor/simulator products on the market, so you can’t go wrong by choosing any of them.
The only difference between both is the pricing model. The GC3 gives you the shooting match right out of the box, while the Bushnell Launch Pro lets you buy just the features that interest you.
Foresight GC3 will set you back $7,000 with access to all functionality out of the box. The Bushnell Launch Pro retails at $3,500 with access to basic functions. You need to pay $199, $249, $499, or $699 per year for advanced features, depending on the software package.
_____________________________
You can see that the Bushnell Launch Pro and Foresight GC3 share a lot of similarities. But I will still detail the specific features of both devices.
Image
Product
Detail
Price
Bushnell Launch Pro
This launch monitor measures 5″ x 6″ x 12″, weighing 5 lbs, with a 3″ x 2″ touchscreen display. It offers various ball data points, with 5-7 hours of battery life, Wi-Fi, and PC connectivity.
Enhanced by integration with the FSX performance and gaming suite. Its superior design and quality materials guarantee reliable and accurate performance.
Note: Buying a new Bushnell Launch Pro monitor instantly gives you access to the Basic software subscription, where the above-listed metrics are enjoyed for one year of usage. So, if you want to continue using the above metrics after one year of free use, you pay $249 annually.
To use the Bushnell Launch Pro as a simulator, you need to subscribe to either the Silver or Gold software package. While both premium packages include everything in the Basic plan, the Silver package, for $499 per year, gives you five simulated golf courses and allows for up to four players.
On the other hand, the Gold package costs $699 per year and comes with ten courses and eight players.
ForeSight GC3 Pricing Model and Offerings
After buying the Foresight GC3 launch monitor for $7,000, you enjoy everything the Bushnell Pro can do without an annual software package. So it’s a one-time purchase, which explains why it’s more expensive at the initial purchase than the Bushnell Launch Pro.
If you can afford it, it’s a pretty good deal, right?
The issue is that, as much as the price point is a steal, not everyone would need all those metrics. So, paying $7,000 is hard to justify. Even if you need all the metrics, the golf technology trend keeps evolving, and innovation can hit the market that would outlive the offerings of the GC3.
In such a scenario, people with the Launch Pro are at an advantage because the innovation can be integrated into their launch monitors through subscriptions.
A recent update on the Foresight Sports GC3 and Bushnell Launch Pro Updates devices allows users to access the GC3 Ball Enabled—a configuration of the GC3 launch monitor with ball data only—now available in this exclusive website bundle.
It includes FSX Play, FSX 2020, FSX Pro, and 25 golf courses.
I like how the golf simulator videos in the video below explain the necessary details of this upgrade, including the latest pricing, software changes, integration, Peer 2 Peer Beta, and more:
So which should you go for?
The best device to opt for between the Bushnell Launch Pro and GC3 depends on your budget and what you need a launch monitor for.
There are not many things to discuss on the side of performance, accuracy, and appearance. Both devices are identical, if not equal. The main concern is the pricing model and ensuring you’re getting enough value for your money.
If you don’t want all the robust features of an advanced launch monitor that the Foresight GC3 offers at a one-time price, there’s no need to splurge. All you need is Launch Pro with a basic subscription.
Even with the price of the GC3, you can afford a Launch Pro plus 15 years of Basic Software (remember, the first year is free).
Even when you’re going for the Launch Pro silver plan, the price of the GC3 can afford you seven years of subscription. And if you bought the Gold subscription with a Launch Pro, it would take five years before you spent what you would on a GC3.
However, if you hate subscriptions, the Foresight GC3 is the right option for you. You make a one-time purchase, have access to all the data you need and don’t need, and forget about paying annual bills.
After all, it’s better to have it and not need it than to need it and not have it.
Bushnell Tour V4 and Callaway 300 Pro are powerful rangefinders that get lots of love from golf communities. They both allow for automatic and accurate slope compensation and are identical in features. This explains why it’s difficult for many buyers to pick between these two options.
I decided to try these two rangefinders side-by-side, and the first discovery from my comparison test is that the Callaway 300 Pro is less accurate for longer distances, but the Bushnell is only more accurate by 100 yards. But many people would not consider this a big deal considering the lower price of the Callaway 300 Pro, its scan targeting feature, and a superior lens make it a steal for $200.
I’ve been a loyal fan of the Leupold RX 600 range finder but had to replace it with a slope-equipped rangefinder. During my search, I discovered many people are in the dilemma of flipping between the Bushnell Tour V4 Shift and the Callaway 300 Pro. I decided to cut out a budget to experience these models individually.
The first impression was the price difference. The Bushnell is twice the price of the Callaway, but is it worth the extra cost? I have documented my experience in comparison with these two devices to help you decide which is better for you.
Bushnell vs. Callaway Rangefinder: Compared
Before we delve into the full comparison, below is a table comparing both rangefinders across relevant factors:
Factors
Bushnell Tour V4
Callaway 300 Pro
Dimension
2.61 L x 1.33″ W x 1.97″ H
4″L x 2.7″W x 1.4″H
Weight
0.75 Pounds
0.5 Pounds
Slope Function
Yes
Yes
Magnification
x5
x6
Range
1,000 yards and 400+ yards to a flag within one yard
The Bushnell Tour V4 rangefinder features PinSeeker technology with Jolt, which delivers short vibrating bursts to confirm that the laser has locked onto the flag.
It’s incredibly precise, accurately ranging from 5 to 1,000 yards and pinpointing the flag within one yard, even at 400+ yards.
The 5x magnification and fast focus system ensure a clear view of my shot. But it is nothing compared to a 6-x-powered rangefinder.
One standout feature is the patented slope technology, which calculates the compensated distance based on the hole’s incline or decline, giving me a more accurate target reading. The compact size of the Tour V4 is a notable improvement, and it swiftly acquires targets.
On the other hand, the Callaway 300 Pro offers 6x magnification, providing a range of 5-1000 yards with an impressive +/- 1-yard accuracy.
It also offers measurements in yards and meters, catering to everyone’s preferences. The Pin-Locking Technology, with Pin Acquisition Technology (P.A.T.), allows you to lock onto a pin up to 300 yards away.
Plus, there’s a nifty pulse confirmation—a short vibrating “burst” lets you know when you’ve locked onto the pin accurately.
The External Slope On/Off Switch is great for tournament play, ensuring it complies with the rules.
The premium molded hard carry case with a carabiner and elastic “quick-close” band adds to the overall value.
However, if you wear glasses, you might find it tricky to get your eye close enough to see all the data at once.
You’ll need to adjust the device to find the right angle.
The effective distance with a slope enabled appears in the bottom corner, and the vibration feedback is clear.
Accuracy
When it comes to accuracy, both rangefinders are great. They give similar results, and the slope adjustment efficiency of both devices is identical.
However, during testing, I noticed that the Bushnell V4 targeted flags from a further distance, and I had trouble locking onto pins farther than 300 yards when using the Callaway 300 Pro.
Meanwhile, the Callaway 300 has a more powerful lens with 6x magnification, even though it’s not as accurate as the Bushnell Tour V4.
I also like that the Callaway has a scan mode that simultaneously brings up distances to multiple targets. This gives it an edge over Bushnell.
Price
If you’re on a tight budget, the Callaway 300 Pro would appeal more to you because it’s half the price of the Bushnell V4.
The area of price is where these two devices vary widely. With $200, you can get the Callaway 300, but you need $400 to purchase the Bushnell V4.
Battery
The Bushnell V4 has a battery that runs off a 3-volt battery that comes with a casing. While testing this device, the batter held up for full 18-hole rounds.
The Callaway 300 Pro is operated by a single 3-volt battery that holds up for close to two and a half 18-hole rounds.
While the Callaway comes with appealing accessories like the lanyard strap, cleaning cloth, and carrying case, the Bushnell battery has a longer life than the Callaway.
Pros and cons
Indeed, there’s no perfect product out there. There are always two sides to the coin. To further help you decide which of these launch monitors is best for you, consider the pros and cons of each:
Bushnell Tour V4 Rangefinder
PROS
CONS
Can measure distance to pins up to 400 yards
5x magnification compared to Callaway 300 Pro’s 6x magnification
However, depending on your needs and budget, one will be a better choice.
With these in mind, here’s my rating for both devices based on my experience with them:
Rating
Bushnell Tour V4
Callaway 300 Pro
Optics
10
8
Accuracy
9
9
Performance
8
9.5
Ease of Use
10
9
Looks
10
7
TOTAL (50 points):
47 Points
42.5 Points
The Callaway 300 is a bang for a buck. But it’s less accurate for longer distances. So, if you value accuracy, especially for game improvement, the Bushnell V4 is a better buy, but remember, it’s only more accurate by 100 yards.
If you value the scan targeting feature and affordability, you can overlook this accuracy gap and proceed with the call.
The Garmin R10 and Flightscope Mevo Plus are among the market’s most talked-about launch monitors.
If you’re torn between both models, the good news is that there’s no bad decision. These two devices have proven to be reliable.
But one will surely be more suitable for your needs than the other.
The major selling point of the Mevo+ is the Wi-Fi hotspot, internal alignment camera, 17 practice ranges, five simulated courses, and lots of shot data. On the other hand, the Garmin R10 flourishes in archives club stats, being a driving range simulator, smartphone compatible, 10-hour battery life, waterproof, and rechargeable battery.
I have had the Mevo Plus for a few months now and realized it’s a much better choice for scratch players and those who regularly compete in tournaments.
The R10 appeared to be a better choice for a solid launch monitor at an affordable price.
But other relevant performance factors lead to this conclusion, which I have detailed in the rest of this article.
To begin with, I have created the table below to give a rundown of what sets the R10 and Mevo Plus apart to help you make a decision:
Club Head Speed, Club Face Angle, Club Path Angle, Angle of Attack, Ball Speed, Launch Angle, Launch Direction, Spin Axis, Spin Rate, Apex Height, Smash Factor, Carry Distance, Total Distance, and Deviation Distance
Existing Mevo data in addition to Horizontal Launch Angle, Lateral Landing, Angle of Attack, Total Distance, Roll Distance, Spin Axis, Spin Loft, and Shot Shape (20 in total)
It’s cool that each device has its own dedicated app, and, to be fair, both are very good.
However, after using the R10 for a while, I noticed that it’s more user-friendly, especially for someone breaking into the world of launch simulators.
The way data is presented on the Garmin Golf App is easy to understand, but I can’t say the same for experience when it comes to making comparisons and digging into numbers.
The FS Golf app seems to do it better. Many users have also reported difficulty connecting the Garmin Golf App with the iPad.
I didn’t experience this issue, but it bears mentioning.
The app offering of the FlightScope Mevo+ makes it feel professional. When you track with the Mevo+, it feels like you’re using a higher-end device like Trackman.
The experience is similar.
Data Metrics
The data metrics offered by both devices are satisfactory.
The Garmin R10 doesn’t offer as many metrics as the Mevo+, and I didn’t expect it to.
But for its price range, it’s impressive that we can enjoy metrics like Face to Path or Club Path that are only included in the Pro Package with the Mevo Plus.
Here’s a full image of what the Garmin R10 launch monitor offers:
With the Flightscope Mevo+, you get 16 data sets, but you can upgrade to the Mevo+ Pro Package for an extra $1,000 to get 11 different metrics.
This is a steal because it is affordable compared to getting the total package in a launch monitor that costs thousands of dollars.
Here’s a full image of what the Flightscope Mevo + launch monitor offers:
Regarding who offers more data metrics, Mevo+ is undoubtedly spot on.
If you’re concerned with game improvement while shopping for launch monitors, this is the green light at the Mevo+.
Performance
Regarding performance, it’s easy to conclude that both devices have a tie because they equally come with a mobile subscription to the e6 Simulator software, a well-known simulator option on the market.
P.S.: You can’t connect the software to your PC or projector. It’s simply mobile subscription-based.
It is worth noting that the R10 doesn’t track putts, whereas the Mevo+ will.
The performance of the FlightScope Mevo+ and the Garmin R10 indoors is decent, but the Mevo+ has an edge for indoor use since it allows you to use an AC wall adapter for continuous power.
The Garmin R10 doesn’t have this feature, but it compensates for its long-lasting battery life, which is up to 10 hours—seven hours more than the Flightscope.
Ease of Use
The Garmin R10 is Bluetooth-based, and the FlightScope Mevo+ has a Wi-Fi network to connect to. So, both are easy to use with their respective connection modules.
However, some people using iPads with no cellular data plan usually experience data issues with the Mevo Plus.
Since the R10 gets everything done within the Garmin golf app, it is easy to use. If you’re familiar with the Garmin ecosystem, using the R10 won’t be an issue.
Using Garmin is easier. The physical design allows for a simple plug-and-play. If you don’t like professional-level devices, the FS Mevo+ will look cumbersome to use.
The many options on the app can be a good thing but ironically, they turn out to be a not-so-great offering.
Meanwhile, for ease of usage, the Mevo+ requires 16 feet of space (8 feet behind the ball and 8 feet in front), while the R10 needs 8 feet in front of the ball but only seven behind.
In other words, both devices have similar space limitations.
But the Mevo+ gave me more accurate readings when I moved it closer behind me.
Accuracy
Regarding accuracy, I wasn’t surprised to discover how the Mevo+ outranked the Garmin. It’s an expensive device, so I can only expect a lot.
In all fairness, both devices are accurate for what they are.
The difference in accuracy and performance between these two devices would probably not mean much if you’re an amateur golfer looking for some help in your practice sessions or for a fun garage simulator setup.
To put things in perspective, only two in ten shots were misread while using the Garmin R10, which is interpreted as 80% accuracy.
That’s not bad for a launch monitor below a thousand dollars. Plus, it’s easier and more accurate to use straight out of the box than the Mevo+.
But the Mevo+ has superior accuracy that pro golfers will value.
If you’re coming down from the Bushnell Lauch Pro or Trackman, you’d want to stick to the likes of Mevo+ because they offer close accuracy experience.
Overall, the lie and loft angle of the device will determine its accuracy.
Some people who have reviewed these two devices say Garmin is more accurate, and I can only imagine it’s due to weather and elevation settings, the type of ball, and other relevant factors that influence the accuracy of launch monitors apart from the device itself.
Pros and cons
Indeed, there’s no perfect product out there.
There are always two sides to the coin. To further help you decide which of these launch monitors is best for you, consider the pros and cons of each:
Garmin Approach R10
What I like
What I don’t like
It’s a great value for the money.
It loses connection outdoors easily.
Easy to set up and use. Also very portable
It can take a few swings of trial and error to get it at the angle where the horizontal misses and correct it.
It allows you to save data from your practice sessions to view at any time.
The launch direction accuracy was consistently off by at least 4 degrees.
It is an affordable but reliable launch monitor.
It would be better if slow motion were added to the video capabilities.
Stronger battery life that lasts up to 10 hours
You need to pay for a subscription to use the Home Tee Hero mode.
Flightscope Mevo Plus
What I like
What I don’t like
It’s game-improvement-oriented
more expensive than the R10
Onboard Wi-Fi hotspot for a stronger connection
Short-game accuracy is not so great.
Stress-free alignment process
Not as fast as the R10 when registering shot readings
It works great for outdoor
Lagging performance indoors
The shot data is impressive.
Not as portable as the R10
Verdict summary
Both the Garmin R10 and Mevo Plus are great devices.
I like the built-in stand of the Mevo Plus. The overall construction quality of the device feels more “pro level” than any of the other launch monitors under $2,000 I’ve used.
The Garmin R10 itself is also impressive.
To conclude, I had to observe their performance on portability and battery, setup, primary app, user experience, data points, accuracy, indoor and outdoor use, and even battery life.
With these in mind, here’s my rating for both devices based on my experience with them:
Rating
Garmin Approach R10
Mevo Plus
Metrics provided
7.5
10
Accuracy
7.0
10
Performance
8.5
9.5
Ease of Use
10
8
Looks
8.0
9.5
TOTAL (50 points):
41 points
47 points
In this comparison review, the Flightscope Mevo Plus launch monitor wins over the Garmin Approach R10.
If you’re on a tight budget, the Garmin R10 is a more feasible option, and you won’t regret purchasing it. But I think the Flightscope Mevo Plus is a better launch monitor because it offers more.
From the software quality to the data points offered and accuracy, the Mevo Plus is just great overall.
You will only have to pay significantly more for it.
The Garmin Approach R10 is a handy and affordable little launch monitor you can take anywhere, while the Skytrak is a higher-end golf launch monitor. Still, it’s pretty much the opposite of the Garmin Approach R10. I tested both devices and will show you in this article how they measure up against each other.
After multiple tests, the Garmin R10 proved to be a better option for taking swing videos, while SkyTrack stands tall for tracking swing data. Meanwhile, both devices do not measure club paths, which you can get on higher-end launch monitors. The SkyTrak struggles to work at its best outdoors but works better than the Garmin indoors. Still, the features of both devices overlap, and if one is better than the other, it’s only with a little margin (aside from the price difference, of course).
I became more interested in placing these two devices head-to-head after watching how David Maxfield Golf, in a video, compared the Flightscope Mevo Plus to the Garmin R10, and both units tracked the shots simultaneously and were identical with every hit. So what about someone willing to spend a few extra hundred dollars for something better? Is the Skytrak launch monitor worth it?
You will find out in this full review. In case you’re in a hurry, I have created the table below to give a rundown of what sets the R10 and Skytrack apart to help you make a decision:
Garmin R10 vs. Skytrack: Comparison Chart
The Skytrak shines in the area’s weather settings and the fact that it works by photometric readings. The wireless setup is also a huge plus. But the Garmin Approach R10 also has robust offerings, from archives club stats and a driving range simulator to smartphone compatibility and 10-hour battery life.
Club Head Speed, Club Face Angle, Club Path Angle, Angle of Attack, Ball Speed, Launch Angle, Launch Direction, Spin Axis, Spin Rate, Apex Height, Smash Factor, Carry Distance, Total Distance, and Deviation Distance
Ball speed, launch angle, back and side spin, side angle, carry distance, roll, total distance, club head speed, angle of decent, distance offline, a 3D flightpath with apex height and hang time
One peculiar thing about the Garmin R10 is the video recording feature that overlays your shot data onto the footage. It makes the device stand out because it allows you to repeatedly see your swing and mechanical data for better analysis.
The R10 allows you to access virtual course simulations and game modes, which is great for players’ improvement.
The Skytrak launch monitor’s performance revolves around using photometric technology to give short readings. Unlike radar technology, Skytrack maintains its accuracy outdoors with this design.
I also love how the device simulates courses nicely on my tablet and laptop.
Data parameters
The fact that the Skytrak costs more than the R10 is a shocker, especially when it doesn’t offer as many measuring metrics as the R10 does.
When using the Garmin R10, you can track club head speed, club face angle, path angle, and angle of attack. The device also records ball speed, launch angle, direction, spin axis and rate, apex height, smash factor, and carry distance.
With the R10, you can also see your total distance and deviation distance.
On the other hand, the Skytrack launch monitor only measures ball speed, launch angle, back and side spin, side angle, carry distance, roll, and total distance.
You can also track club head speed, angle of decent, distance offline, a 3D flightpath with apex height, and hang time.
Ease of Use
The Garmin R10 has a straightforward setup, making it easier to use than the Skytrack launch monitor.
With the R10, you must connect the device to your phone or tablet via the Garmin Golf App.
The R10 is also more portable than the Skytrack, which makes it easier to move around. It’s smaller than a smartphone when it’s not loaded into the foldable tripod. So that counts as something under ease of use.
Accuracy
The Garmin Approach R10 uses radar to track shots, which favoured me the most when swinging outdoors. The device was accurate during testing, with a total distance of about 3 yards. Sadly, this dropped by about 5 yards when I took it indoors.
In the case of Skytrak, more accuracy was experienced indoors than outdoors. The high-speed cameras in this device ironically became a disadvantage for outdoor swings, especially because it was a sunny day and the light interfered with the cameras, which impacted the accuracy. This has been the experience of many other Skytrack owners.
I would recommend the Garmin R10 in a heartbeat if you want to practice at the range and need more reliable information.
Pros and cons
Indeed, there’s no perfect product out there. There are always two sides to the coin. To further help you decide which of these launch monitors is best for you, consider the pros and cons of each:
Garmin Approach R10
What I like
What I don’t like
Record all the data you could want. It’s a great value for the money.
You need to pay for a subscription to use the Home Tee Hero mode.
Easy to set up and use. Also very portable
It can take a few swings of trial and error to get it at the angle where the horizontal misses and correct it.
The automatic video recording feature is very helpful for analyzing your swing.
The launch direction accuracy was consistently off by at least 4 degrees.
It is still affordable, considering its high-tech
It would be better if slow motion were added to the video capabilities.
Stronger battery life than the Skytrack
SkyTrack Launch Monitor
What I like
What I don’t like
Reliable wireless connection
It can take between 5 and 7 seconds to pull up shout metrics.
The simulated renderings of famous courses look nice.
It’s expensive for budget-conscious golfers.
You can archive your shot data and review it whenever you want.
It doesn’t offer as many shot metrics as the R10 or even the Mevo Plus.
Not as portable as the R10
Verdict Summary
Although Skytrack is a solid device, it struggles a lot with the driver—high ball speeds—and with chipping and putting.
Also, the R10 can be used outdoors and is amazing outdoors, but the sky track struggled to provide consistent results outdoors. And even indoors, it required sufficient lightning. If you don’t have the space for the R10, the Skytrak is a great option at the price point and is fun for its value.
With these in mind, here’s my rating for both devices based on my experience with them:
Rating
Garmin Approach R10
SkyTrack
Metrics provided
10
8.0
Accuracy
9.5
7.0
Performance
9.0
8.0
Ease of Use
9.0
8.5
Looks
7.5
10
TOTAL (50 points):
45 points
41 points
The bottom line is that the Skytrack launch monitor is a better option if you operate with limited space, as it can sit facing the golfer just outside the ball starting position. In contrast, you need at least 1.8 to 2.4 meters behind the ball-starting job for the Garmin R10.
If you’re on a tight budget, the R10 is undoubtedly the best way to go, and you won’t regret the purchase.
Sports professionals typically use the best golf launch monitors, which can cost up to $1000 or more. If you’re just starting out or on a tight budget, options like Foresight Sports GCQuad or the Full Swing Kit will be overkill. Garmin Approach R10 and Rapsodo Mobile Launch Monitor (MLM) are among the few quality and budget-friendly launch monitors on the market presently, so it’s predictable for you to be conflicted between them. I tested both devices, and I will show you in this article how they measure up.
In brief, the Rapsodo MLM is the easiest to set up for practice between the two. It supplies accurate but basic information on swings and will make a great addition to your setup at home. On the other hand, the Garmin Approach R10, during the testing, proved to be a better option that can double up as a simulator. It is also a better option for outdoor usage. Still, the Rapsodo MLM is undoubtedly your best bet if you’re on a tight budget.
Maybe you’re looking to buy a personal launch monitor while under budget. The Rapsodo Mobile Launch Monitor (MLM)” and the Garmin R10 are expected to be the best options.
I have documented valuable information about these devices and how they compare across many relevant factors in this article. If you’re in a hurry, the table below will explain what sets these two launch monitors apart.
Garmin R10 vs. Rapsodo: Comparison Chart
The best way to figure out which of these products is best for your game is to consider broadly the characteristics and specifications of both of them. I have created this comparison chart to help you with that:
Factors
Garmin Approach R10
Rapsodo
Data parameters provided
Club Head Speed, Club Face Angle, Club Path Angle, Angle of Attack, Ball Speed, Launch Angle, Launch Direction, Spin Axis, Spin Rate, Apex Height, Smash Factor, Carry Distance, Total Distance, and Deviation Distance
Carry Distance, Side Carry, Spin Rate, Club Speed, Ball Speed, Vertical Launch, Smash Factor, Launch Angle, Apex Height, and Shot Type
Club Head Speed, Club Face Angle, Club Path Angle, Angle of Attack, Ball Speed, Launch Angle, Launch Direction, Spin Axis, Spin Rate, Apex Height, Smash Factor, Carry Distance, Total Distance, and Deviation Distance
The app and subscription service of both launch monitors are decent, but the Garmin R10 seems to be more bang for your buck because you can access courses alongside the launch monitor.
Rapsodo allows you to record every swing, but you only get 100 videos for free, which leaves you with two options: constantly delete videos or pay $99 for unlimited storage.
Performance
I have tasted several other budget-friendly launch monitors enough to realize that certain features and performances are generally expected from any launch monitor. So, it would be too much to call them grand.
But what sets the Garmin R10 apart is that it first requires you to set up a selfie stick or tripod to get a swing video, versus the Rapsodo MLM, which does this by default.
The Rapsodo does not capture videos from the best angle, so it is hard to do much swing evaluation, but it is hassle-free.
If set up properly, the Garmin is great. In the performance category, I’d say the Rapsodo does a bit better, but it is still up for debate because Garmin takes extra steps to get recordings, and the Rapsodo does not record from the best angle.
Data Parameters
There’s no straightforward way to make a judgment on which launch monitor outperforms the other when it comes to metrics. For instance, the Rapsodo and Garmin share such things as club speed, ball speed, apex, and distance, of which, during testing, results were pretty close to each other.
However, I did notice that the R10 extrapolates for club path, swing direction, angle of attack, and spin rates. This is the edge the R10 has over Rapsodo.
If you’re purchasing a launch monitor for fun and not necessarily for game improvement, then the Garmin R10 lapses won’t be a deal-breaker.
However, if you are looking for significant swing changes, the data on the Rapsodo appears to be more reliable.
Ease of Use
Rapsodo MLM reeks of simplicity, from the design to the usage. But it doesn’t defeat the Garmin on this one.
On the Garmin R10, there’s information overload—so many metrics to track, which can be a good thing and, ironically, a not-so-great item for those who just want a simple device for basic measurement.
Because I use an iPhone, I noticed while at the range that the Garmin was much easier to read all of your metrics, while Rapsodo requires you to exit the sessions and return before seeing some metrics. I wish the Rapsodo worked on this because it’s a hassle to leave the session and produce, especially when it’s single-swing data I want to look at.
The interface is different when you use an iPad, but many people use their iPhone, so it’s a flaw on the part of the Rapsodo.
Pros and cons
Indeed, there’s no perfect product out there. There are always two sides to the coin. To further help you decide which of these launch monitors is best for you, consider the pros and cons of each:
Garmin R10
What I like
What I don’t like
Record all the data you could want. It’s a great value for the money.
The course simulator costs $10 a month and is cartoony and not worth it compared to simply doing the practice range.
It comes with a companion app that makes it super easy to use.
Temperamental with alignment
With the R10, you can access courses to play if you want to use the portable device as a simulator.
No ball normalization feature
It is still affordable, considering its high-tech
It would be better if slow motion were added to the video capabilities.
Rapsodo
What I like
What I don’t like
Easy to set and use
It doesn’t display spin numbers.
Visual aid for your shots
Short battery life
It helps to track your performance with each club individually.
Not compatible with Android phones
Verdict Summary
Based on this elaborate comparison, the Garmin R10 appeared to be a better golf launch monitor than the Rapsodo, but it’s with a less significant margin. The R10 wins as the best launch monitor for under $600.
I think the ability to double as a sim can make the range a little bit more fun. This is what you won’t get with the Rapsodo MLM.
P.S.: The R10 comes with five courses and a driving range on E6, which is supposed to be a major bonus, but E6 sucked on my iPhone. It was so choppy and did a battery hog.
We’ve also explored other areas and how these two devices measure against each other. With these in mind, here’s my rating from my experience with using these two launch monitors:
Rating
Garmin Approach R10
Rapsodo
Data Offered
10
6.5
Accuracy
6.5
8.5
Performance
8.0
9.5
Ease of Use
6.5
7.0
Looks
9.0
6.0
TOTAL (50 points):
40 Points
37.5 Points
I’ve used the Rapsodo for a while before purchasing the R10 for this review. The R10 came as a recommendation because I was particular about knowing advanced metrics such as swing path, club face, and angle of attack.
I am a little disappointed in those metrics based on what I see online compared to advanced launch monitors like Trackman.
Of course, the R10 won’t perform like a $15,000 device, but the fact that the advanced metrics offered were even shaky doesn’t fully justify upgrading from Rapsodo.
However, this is because I already have a Rapsodo MLM. If you don’t have a launch monitor and this is your first purchase, I recommend the Garmin R10.
Flightscope Mevo and Garmin Approach R10 are powerful radar-based launch monitors that instantly come to mind when considering options well under $1,000. This is why many amateur golfers (even some pros) are often conflicted about which to choose. So which is best for you?
After testing both devices, I realized that the Garmin Approach R10 offers much more than the FlightScope Mevo (and even Mevo Plus). I noticed more precision with the R10’s metrics, richer visual graphics in game modes, water resistance for outdoor playing, and access to over 41,000 courses worldwide with E6 compatibility that Mevo doesn’t have.
Although the Mevo deserves its flowers, you can understand your shots better; the device has great battery life and receives constant feedback with the audio function. However, it does not measure horizontal and vertical launch angles and estimates spin based on club path and horizontal movement, as seen in the R10.
It could be that you’re looking to invest in a tracker without spending a fortune—just to be able to practice from home. The Mevo is more budget-friendly if you are seriously on a tight budget. But what will you be missing by forgoing R10 because of an additional hundred dollars?
You will find out in the rest of this article as I compare the Flightscope Mevo and Garmin Approach R10 launch monitors side-by-side.
Mevo vs. Garmin R10: Comparison Chart
The best way to figure out which of these products is best for your game is to consider broadly the characteristics and specifications of both of them. I have created this comparison chart to help you with that:
Factors
Flightscope Mevo
Garmin Approach R10
Metrics captured
Carry Distance, Spin Rate, Club Speed, Ball Speed, Vertical Launch, Smash Factor, Apex Height, and Flight Time
Club Head Speed, Club Face Angle, Club Path Angle, Angle of Attack, Ball Speed, Launch Angle, Launch Direction, Spin Axis, Spin Rate, Apex Height, Smash Factor, Carry Distance, Total Distance, and Deviation Distance
Club Head Speed, Club Face Angle, Club Path Angle, Angle of Attack, Ball Speed, Launch Angle, Launch Direction, Spin Axis, Spin Rate, Apex Height, Smash Factor, Carry Distance, Total Distance, and Deviation Distance
The app provides real-time data, including launch angle, ball speed, clubhead speed, spin rate, and more. It also tracks shot dispersion and offers club data to help you analyze your swing.
One standout feature of the Mevo app is its video integration, which allows you to overlay your swing data on your recorded swings for better analysis.
The Garmin Approach R10 uses the “Garmin Golf” app for data analysis. The app also lets you record your shots and review your session data.
One advantage of the Garmin app is that it connects to a broader ecosystem of Garmin devices, which can be appealing if you already use Garmin products.
Performance
It is undeniable that the Garmin R10 wins the Mevo in terms of performance. Garmin offers you a 6-course license for E6. So you can do realistic simulations on those courses. Other launch monitors, like Mevo (not Mevo Plus), only give you the driving range app.
If we compare the Garmin simulator app with Mevo’s, I’ll choose the latter because Gramin’s interface is very cartoony-looking. I also struggled with distance accuracy.
The saving grace is that it comes with E6 with 6 courses and a driving range, and I have found that to be spot on accuracy-wise and much more realistic-looking than anything offered in the Mevo.
The downside to the performance of the R10 is that consistent setup is important—you need 8 feet from ball to net or screen, and the R10 needs to be 7 feet behind you.
I’ve been using the Mevo indoors in my garage, but the R10 works greatly outdoors, thanks to the waterproofness that’s not present in the Mevo.
Data Parameters
The metrics captured are another area where the Garmin R10 wins against the Flightscope Mevo.
The Garmin R10 will measure club head speed, face angle, path angle, angle of attack, ball speed, launch angle and direction, spin axis and rate, apex height, and even smash factor.
You can also track carry, total, and deviation distances with the R10.
Unfortunately, the Mevo only records carry distance, spin rate, club speed, ball speed, vertical launch, smash factor, height, and flight time.
Ease of Use
When using the Mevo, you simply turn it on, sync Bluetooth, set it 6 feet behind your swing line, and fire away. The setup is straightforward, and you can use your phone (Android or iOS) to see results, including video.
The ease of setting up the R10 is arguable because the unit needs to be 6-7 feet behind and level with your ball. It’s hard to have that setup.
So I get surprised when many “experts” on forums recommend this unit for those looking for an entry-level shot tracker and simulator. (The price, maybe?)
Generally, you won’t struggle with any of these launch monitors if you’re not tech-savvy. Their designs are simple and easy to navigate around.
Accuracy
On many review platforms, users have agreed that the Garmin R10 sometimes doesn’t read some shots. During my first testing sessions, I set the R10 up next to a launch monitor that cost about 10 times the R10 price.
The distances were +/- 2 yds, the speeds were within five mph, and the Garmin provided some metrics the other unit didn’t offer (such as angle of attack). The spin rates were way apart (+/-1000 RPM).
So, I strongly believe that many reported cases of inaccuracy in the R10 have to do with positioning, which can take some time to get correctly. An alignment stand and a small height riser may be needed to make it catch your shots at the range. This tells us why the Mevo seems easier to use than the R10.
For the price, the Flightscope Mevo is an impressively accurate launch monitor. It missed only two of more than 100 shots taken during testing. And it gave accurate information regarding my swings.
Pros and cons
Indeed, there’s no perfect product out there. There are always two sides to the coin. To further help you decide which of these launch monitors is best for you, consider the pros and cons of each:
Flightscope Mevo
What I like
What I don’t like
Among the most accurate golf launch monitors are those under $500. You can rely on the FlightScope Mevo data to improve your swing.
It relies on your mobile device for its features.
The Mevo FS Golf App is simple and easy to navigate. It is ideal for non-tech-savvy golfers.
Not accurate with shorter shots
Easy to move around
The app consumes your phone battery quickly, especially when running in the background.
Instant feedback with the audio function
Garmin Approach R10
What I like
What I don’t like
Record all the data you could want. It’s a great value for the money.
The course simulator costs $10 a month and is cartoony and not worth it compared to simply doing the practice range.
It comes with a companion app that makes it super easy to use.
It can take a few swings of trial and error to get it at the angle where the horizontal misses and correct it.
With the R10, you can access courses to play if you want to use the portable device as a simulator.
Setup can be a bit finicky sometimes.
It is still affordable, considering its high-tech
It would be better if slow motion were added to the video capabilities.
Stronger battery life than the Mevo
Verdict Summary
Based on my comparison, I’ll crown the Garmin R10 as the superior device because it has a serious advantage over the ordinary Mevo. It could have stood a chance if the comparison was between Meco Plus. However, Mevo is an older model, so you can expect to miss out on a lot by sticking with it.
With this in mind, this is my verdict rating on a scale of 0 to 10 for each device based on my experience with them:
Rating
Flightscope Mevo
Garmin Approach R10
Data Options
7.0
10
Accuracy
8.5
6.5
Performance
6
9.5
Ease of Use
8.5
6.0
Looks
7.0
10
TOTAL (50 points):
37 points
42 points
In a list of popular portable launch monitors, it’s hard to ignore the Flightscope Mevo and Garmin Approach R10.
In this article, I have attempted to pit the Mevo versus the Garmin R10 across key areas that should help you decide which is best based on your specific golf simulator needs.
Despite the win of the R10, there’s no clear winner when comparing the FlightScope and Garmin R10, as they both have pros and cons. If you’re on a tight budget, the Mevo is the sure bet, and you won’t regret the purchase.
The FlightScope is slightly more accurate when measuring ball flight, but the Garmin R10 is more user-friendly and has more features. But the E6 compatibility of the R10 will easily win buyers over.
What do you think about these two launch monitors? Let me know in the comments.
If you’re looking for a launch monitor under a $500 budget, the FlightScope Mevo and Rapsodo MLM are two profound options you can never go wrong with. I’ve tested both, and I can say that none are bad. But let’s be real; you probably won’t buy both. So which is a better option for you than the other?
Long story short, its user-friendliness makes the Rapsodo better than the Flightscope Mevo. However, the Mevo showed more accuracy during my testing than the Rapsodo.
People buy launch monitors for different reasons. Your reason for getting a budget-friendly launch monitor can influence how you see these two rival products. In my case, I don’t have an indoor hitting space; my primary usage for a launch monitor is enhancing my practice at the range. So, I was more interested in a tool that could accurately collect my ball and swing stats, gapping, gamification, fun, etc.
I learned a lot of differences between the Flightscope Mevo and Rapsodo, which I have decided to document in this review to help anyone who is conflicted between the two products and needs to make a decision.
Rapsodo vs. Mevo: Comparison Chart
The best way to figure out which of these products is best for your game is to consider broadly the characteristics and specifications of both of them. I have created this comparison chart to help you with that:
Factors
Flightscope Mevo
Rapsodo
Data parameters provided
Carry Distance, Spin Rate, Club Speed, Ball Speed, Vertical Launch, Smash Factor, Apex Height, and Flight Time
Carry Distance, Side Carry, Spin Rate, Club Speed, Ball Speed, Vertical Launch, Smash Factor, Launch Angle, Apex Height, and Shot Type
The Rapsodo seems to have an edge over the Flightscope Mevo in the app interface and design. I like the slick graphics, video, and audio readout of statistics and tables for post-round analysis in the Rapsodo App.
Although the Rapsodo app is less customizable compared to the Mevo On Mevo, you can remove shanks or mishits that don’t represent your normal shot. You also get visual and audio readouts of stats during practice.
But most importantly, the states and tables are easily digestible.
The graphics on the Mevo app aren’t incredible, and there’s no visual overlay or real gamification.
The Rapsodo shines in these areas—there’s a graphical overlay based on a GPS map of your range.
Both launch monitor apps can sync video if you mount the phone somewhere.
Performance
Regarding performance, the Mevo will take the crown because, during my testing, it only missed two shots out of more than 100 ball hits. I was expecting the app to crash, but it didn’t, and the stats are all customizable and accessible.
I also like how, with the Memo, the software is ready for the next shot before the first one hits the ground, which is good if you’re interested in simple rapid-firing practice.
On the other hand, Rapsodo did perform well, with pretty impressive results. But it was not the best experience for usage. At one point, the device stopped recording video due to my iPhone XR overheating. It also missed about 8% of the shots, many of which were pitch shots.
Still, these won’t make me deny how impressed I was with the Rapsodo’s great visuals for the shots and games that make the overall experience fun.
The battery performance of both launch monitors appeared to be equally decent.
Data Parameters
As mentioned earlier, Flightscope Mevo will capture ball speed, club speed, backspin rpm, carry yards, launch angle, smash factor, peak height, and time in the air.
I was disappointed to discover that it doesn’t record sidespin or angle. In other words, when using the Mevo, you can’t know how far offline you are.
Rapsodo, on the other hand, captures all the data that the Mevo does, but it also records launch direction. So this is the launch monitor to choose if you seriously prioritize knowing how far you are offline with each shot.
The Rapsodo still does not record backspin rpm, which is a deal-breaker when hitting drivers and wedges. But again, it boils down to your preference for these parameters.
Ease of Use
Based on the comparison I documented when testing both launch monitors, I think it is fair to say that the Mevo is superior to the Rapsodo regarding ease of use. But I still have reservations about this conclusion.
When using the Mevo, you simply turn it on, sync Bluetooth, set it 6 feet behind your swing line, and fire away. The setup is straightforward, and you can use your phone (Android or iOS) to see results, including video.
Rapsodo has the same procedure for usage. However, you have to set your iPhone to line up with your swing for automatic video.
The hugest edge in terms of ease of use that the Mevo will have over the Rapsodo is that it allows for both Android and iOS, while Rapsodo works with iOS only.
Pro Tip:
You must mount your phone separately when using video to see results.
Don’t bother buying Rapsodo if you don’t have an iPhone or iPad.
Accuracy
For the price, the Flightscope Mevo is an impressively accurate launch monitor compared to the Rapsodo. It missed only two of more than 100 shots taken during testing. And it gave accurate information regarding my swings.
The Mevo does lag in tracking launch angle and spin rate. But it does other sites decently.
Meanwhile, Rapsodo is also one of the most accurate devices for its price, but the lag in spin rate affects the overall accuracy. So, while it gets the job done, I have more confidence in the memo when it boils down to precision.
Pros and cons
Indeed, there’s no perfect product out there. There are always two sides to the coin. To further help you decide which of these launch monitors is best for you, consider the pros and cons of each:
Flightscope Mevo
What I like
What I don’t like
You can understand your shots better with the feature-rich app.
It relies on your mobile device for its features.
Drive accuracy is decent.
Not accurate with shorter shots
The device has great battery life.
The app consumes your phone battery quickly, especially when running in the background.
Instant feedback with the audio function
Rapsodo
What I like
What I don’t like
Easy to set and use
Not a great launch monitor for outdoor use
Visual aid for your shots
Short battery life
It helps to track your performance with each club individually.
Not compatible with Android phones
Verdict Summary
Overall, based on my comparison, I’ll crown the Rapsodo as the superior device because, if you think about it, the only real advantages Mevo offers are visuals from different angles, video playback options, and spin rate measurement (a small silver sticker installation on each ball is even needed to make this happen).
With this in mind, this is my verdict rating on a scale of 0 to 10 for each device based on my experience with them:
Rating
Flightscope Mevo
Rapsodo
Data Options
5.0
7.0
Accuracy
8.5
6.0
Performance
9.0
8.5
Ease of Use
6.5
9.0
Looks
8.5
8
TOTAL:
37.5
38.5
Flightscope Mevo and the Rapsodo MLM will remain among the best options for budget-friendly launch monitors.
In a perfect world, I’d love to merge some of the perks of the Rapsodo with those of the Mevo. One falls short in the area where the other shines. So, you have to forgo a particular advantage.
They are both enjoyable to use. To be fair, both are great, which explains the marginal win. So you don’t have to be worried about investing in a bad option. However, when it comes down to it, you’d want to buy one.
In that case, I’d recommend the Rapsodo over the Flightscope Mevo.
If you’re particularly torn between the Callaway Rogue ST and the PXG Gen 4 driver, this review is for you. I bought and played both drivers to see how they compare to each other and have documented the entire experience in this review.
Both driver brands are dramatically different. The Rogue ST is game-improvement-oriented, as it offers forgiveness and distance. It’s chunky with a medium swing weight, and somehow, it feels like you’re hitting the ball with a toaster.
On the other hand, the PXG Gen 4 provides a premium feel and customization options, so it’s the best fit if you prioritize precision and personalization. There’s a lot of tech in these drivers, but they’re not a hollow cavity back (since they’re filled with foam) and do not feel like a hollow cavity back.
Being a mid-high handicapper, I have a naturally low ball flight and have trouble hitting the ball thin; the light swing weight and flat sole of the Rouge ST exacerbate that.
One thing I quickly discovered is that these clubs are both very forgiving. I also noticed both of them, on those low hits, still fly pretty well on both drivers.
I only had to get a little higher than I usually do. (I am yet to determine the reason, but I get better ball flight with these clubs when I tee up just a hair longer than normal.)
First hits
Second hits
Third hits
On several swings, the PXG was in a much better spot with a lower miss hit on the club, while the rogue was just off in the rough but a little bit longer.
Looks, Sound, and Feel
I seriously like the looks of the PXG Gen 4 driver. It’s an appealing view when you look down on the club. It pulls your eyes in the way that those lines are angled on the top of the club head. So it has an appealing edge over the Callaway.
In terms of feel and sound, the Callaway Rogue ST wins the belt, in my honest opinion, because it has a nice, pleasant thud to its impact and gives wonderful feedback from the club. That way, you can easily identify when you have mishits.
The best way I can describe the sound of the PXG Gen 4 is like snapping a gym towel. You don’t get the most pleasant sound when you hit this club, but it makes up for the result.
Forgiveness
Judging forgiveness with these drivers will be tricky because they are both good. However, the Rogue ST drivers incorporate VFT technology, meaning the face thickness varies across the clubface.
This helps to optimize ball speed on off-center hits, making mishits less punishing and providing more consistent distance.
PXG Gen 4 drivers are designed to offer a premium feel and precision, and while they still provide forgiveness, they may not have the same level of forgiveness as the Rogue ST drivers.
From my experience with these drivers, I figured PXG focuses more on customization and providing a premium experience. So, we can expect this to lead to a slightly different design philosophy.
Workability
If you’re super intentional about your improvement, workability should be an important consideration when picking between these two tough drivers.
You want to know which of them can help your ability to shape their shots intentionally, whether it’s drawing the ball (curving it from right to left for right-handed golfers) or fading it (turning it from left to right for right-handed golfers).
I hit that low hooking shot with both drivers pretty much the same. There was a slightly higher trajectory with the Callaway Rogue and a downward trajectory with the PXG.
There’s nothing much between these two, and I didn’t expect to see much because both are truly forgiving clubs.
Shafts
Regarding shafts, I believe a good club is not just about the head. The post, in combination, will do the magic.
Many people think that once you can find a quality shaft, you can put it in every driver’s head, which is not always ideal because both components must work in tandem.
For this reason, I stuck with stock configurations that you can easily find off the rack. I try to pair a stiff 60g when possible with the stock configuration of the manufacturer.
For the PXG, I used the Hazardous Smoke Yellow Shaft, 60 grams. For the Callaway Rogue, I paired it with the Mitsushibi Tensei Shaft 55 gram and stiff flex.
Price Value
The PXG sells for $529 but at a limited discount of $200. It is an incredible value, dollar for dollar. They also offer military discounts. But I believe $200 is still a great value for what you’re getting. The Callaway Rogue, on the other hand, costs $400 with a stock shaft configuration.
The comparison is pretty definitive. The Callaway Rogue ST takes the lead regarding forgiveness, distance, and accuracy. But again, it depends on your playing style and your budget.
The Rogue ST offers forgiveness and distance. I’ll strongly recommend it as a game-improvement club. The PXG Gen 4 also wins on many grounds, but it would be the best if you need precision and customization options.
The GS Pro simulator software is a cheaper option and is constantly upgraded. TGC, on the other hand, has video-gamey and quality graphics. The presence of crowds and commentary adds to a more realistic golfing experience. The best option for you boils down to preference and budget.
GS Pro and The Golf Club 2019 (TGC) are among the most popular home golf simulator software products on the market right now, and many golf simulator owners are wondering which one they should buy. But I have realized that people want to know which programs are worth the money.
When building my simulator, I had a gaming PC with an i9-12900K and 3080 Ti, the Flightscope Mevo + launch monitor, and a 4K BenQ laser projector. I eventually settled on GS Pro because of the affordability and constant improvement of the software. But I won’t be in a hurry to recommend it without a proper explanation.
Over time, I also purchased the TGC 2019 and have been able to compare both programs side-by-side based on relevant aspects such as price, graphics, customer support, user interface, courses, compatibility, game modes, and multiplayer options.
At the end of this review, you should better know what is best for you and your home golf sims.
The Golf Club 2019 was originally developed as a PC or console game by HB Studios. It carries over a quick interface with many gaming artifacts, such as avatars you can customize and reward points you can earn.
Unfortunately, these don’t have any impact at all on the simulated version of the game.
On the other hand, GS Pro has been developed solely as a golf simulator platform by simulator golfers. This explains why the interface is simple and easy to navigate. It has nothing in there that you won’t want to use.
The graphics quality
Many enthusiasts place graphics display as the number one priority for golf simulators. In all fairness, the graphics on The Golf Club 2019 and GS Pro are amazing.
TGC 2019 is somehow a video game that some people like and others dislike. I love the graphics on TGC because they’re realistic and don’t leave out little features like divot pitch marks on the greens and sand trails where the ball is rolled through the bunkers.
Don’t get me wrong, though. GS Pro has done a wonderful job in terms of graphics. But you don’t get that same video game feel. They tend to be more nature-driven to make it feel like you play real-life golf, but the overall graphics have no finer detail.
However, I love the recent update on the GS Pro, where we now see features like sand splashes when playing shots out of the bunkers, among others.
Many of these courses are poorly designed, but creators have created thousands of real-life golf courses from around the world, such as Augusta National and Whistling States, using Lidar technology that helps to emulate every detail, from hills and undulations to tee positions.
While writing this review, GC Pro, on the other hand, only has >400 courses available for you to play, such as Pacific Dunes 2020 (L) and Wolf Creek Golf Club. The good thing is that these courses are expertly made and are pretty much exact recreations of real classes.
So, for GS Pro, you can be sure not to see amateur-designed or trash-to-play courses.
Audio Quality
In both pieces of software, you get a variety of soothing nature sounds, like birds chirping away and wind blowing softly through the trees.
However, I am biased toward favoring the TGC 2019 sims regarding audio quality because it also provides a quite sarcastic commentator (John) talking to you through your round (this can be turned off if you prefer it).
On TGC, you can also play games with a crowd watching you, which is quite a nice feeling, especially when you get applauded for hitting a good shot.
Unfortunately, GS Pro has no commentator or crowd watching you play. But I get a round of applause sound effect when I hold out from 90 yards on the practice range. But I’m positive that GS Pro may add crowds and commentary in future updates.
Performance
TGC 2019 has fixed penalties for wherever you land. For example, if you land on a heavy roof, your shot will have a 14-distance liability. If you land in the light rough, it will have seven sentences.
If you land on the fairway bunker or any bunker more than 40 yards away from the pin, your shot will have a seven-distance penalty.
GS Pro is a little more dynamic regarding penalties, and it’s considered much more realistic and true to life. Here’s what I mean:
For example, when you land on the roof, the penalty will depend on your shot’s launch angle, which stops you from smashing a three-wood out of the heavy top.
Apart from these, I like that GS Pro factors in your lie on every shot. At the bottom of the screen, you’ll see some numbers that indicate either a left- or right-hand lie before you take a picture.
Overall, these small features built into GS Pro recreate golfing conditions much more accurately and true to real-life conditions than those in TGC, as far as performance goes.
Availability and compatibility
Both the TGC and GS Pro are available to buy as digital downloads, and currently, they’re only available to us on Windows PCs. At the time of writing, you can’t use them on iPads, tablets, or Macs.
According to the manufacturers of both programs, you need a powerful gaming PC or laptop to run them smoothly. And by “powerful,” it means your device’s graphics card.
GS Pro recommends a slightly more powerful GTX 1070 graphics card, while TGC will run smoothly on a GTX 1060 graphics card. But it’s always good to have something more powerful than these.
For launch monitors
Both the GS Pro and The Golf Club 2019 are compatible with various launch monitors. Here is a rundown of all the launch monitors that each product is compatible with:
GS Pro
TGC 2019
SkyTrak
SkyTrak
Garmin R10
Flightscope X3 and Mevo +
Uneekor QED
Trackman 4
Foresight GC2, GC3, Bushnell Launch Pro, and GCQuad
Ernest Sports
FlightScope Mevo + and X3
GSA Golf
Garmin R10
Foresight, GC3/Bushnell Launch Pro
Uneekor QED and Eye XO
Pro Tee United
Multi-Playability and Gaming Modes
Both pieces of software allow you to play locally at home and online with people worldwide.
You can have up to four players simultaneously playing on TGC 2019 and eight on GS Pro.
We must admit that the TGC is a little more established and has been around longer. I can create and join online communities and play as much as possible. There’s even an official Pro Tee that follows the same schedule as the PGA Tour, which is pretty cool.
On the other hand, GS Pro users are super active and connect mostly on Discord to arrange and play online events and competitions.
Regarding game modes, both options give you different options, such as stroke play, match play, alternative shots, and more.
Meanwhile, the TGC 2019 does not have scramble mode.
Price
TGC 2019 costs around $980 on Shop Indoor Golf for a lifetime subscription. So, once you’ve bought it, you don’t have to pay anything else. GSPro, on the other hand, costs $250per year as an annual subscription model. However, you can buy the GSPro as a lifetime purchase for $550, but then you won’t be able to access any future updates to the software.
Meanwhile, you can buy TGC 2019 with an annual subscription as well, which is around $480, but for that price, you get more value for your money just by buying it outright.
Customer Support
I have to say that TGC is good at getting back to customers when they have issues, and I experienced this firsthand. However, GS Pro trumps TGC in customer service and support, especially due to their Discord channel called SGT Simulator Golf Tour, and the members there are very active. They are amazing at helping you troubleshoot any problems you might have with the software.
Another huge plus for GS Pro in terms of support is that they constantly update the software, showing they listen to their community about which upgrades they would like to see in the next releases.
It’s tough to pick which of these pieces of software is the best, especially coming from someone who has tested and enjoyed both options.
You won’t be disappointed in whichever option you choose because they are both amazing. However, one outdoes the other in certain areas.
For example, if wishes were horses, I’d prefer to merge GS Pro and all its features with TGC’s graphics, commentary, and crowds. But that isn’t possible. And again, budget is a factor.
So, if push comes to shove and I have to recommend one for a new golf simulator owner, I recommend the GC Pro. My reason is that it’s cheaper and constantly getting improved or upgraded. So, a new buyer would see this as better value for money than the TGC 2019.
P.S. No free The Golf Club 2019 or GS Pro demos are available. However, GS Pro does offer a 7-day refund policy, so if you don’t like it or it doesn’t work well with your PC, you can get a full refund within the said number of days. The best way to try the TGC is to buy the PC or console version of the game for about $20 and play it to see how you like it.
Ultimately, I hope you find this guide helpful. If you’d love to know anything about this software that I didn’t mention, feel free to share it in the comment section, and I’ll be happy to help.
The Fujikura Ventus Black 6X and 7X are popular golf shaft options but differ in key aspects. The Ventus Black 7X is stiffer and generally preferred by players with faster swing speeds seeking a lower ball flight and less spin. However, the Ventus Black 6X offers a more balanced profile and is suitable for a broader range of golfers.
Last week, I had a few range sessions with the Ventus 6X shaft, pairing it with a Callaway Epic Speed Triple Diamond, and what stuck out for me was the stability at the bottom of the swing. I tweeted about it, and some of my followers argued that 7X has a place to improve my dispersion. I went on to get the Ventus Black 7X and used the opportunity to test, compare, and review both shafts to observe how they performed respectively.
Now, Ventus Black is one of the lowest-launching and fastest-spinning shafts on the market because, generally, this shaft lineup combines the stability of a heavy shaft with a lightweight that enables you to swing it faster naturally.
In this article, I’m going to walk you through my findings. You will learn which of these shafts best suits your playing style, the pros and cons of using the Ventus 6X and 7X, and the significant factors that set them apart.
Ventus Black 6X Or 7X: What’s The Difference, And Why Does It Matter?
Ventus Black 6X and Ventus Black 7X refer to two different models of golf shafts manufactured by Fujikura, a well-known golf shaft company.
The significant difference between the Ventus Black 6X and 7X shafts primarily lies in the flex and how they suit different swing characteristics and player preferences. Choosing the proper shaft flex is important because it can affect the golf shot’s trajectory, accuracy, and overall performance.
You can optimize your launch conditions and achieve the desired ball flight by selecting the appropriate flex.
The Ventus Black 6X and Ventus Black 7X are high-performance graphite shafts for golf drivers. The numbers “6X” and “7X” indicate the flex and stiffness of the shafts. In general, the higher the number, the stiffer the stick.
The Ventus Black 6X is considered to have a stiffer flex than the Ventus Black 7X. The 6X shaft is designed for players with a faster swing speed and a more aggressive swing tempo. It offers a lower launch and spin, which can be beneficial to reduce spin and achieving a more penetrating ball flight.
On the other hand, the Ventus Black 7X is slightly less stiff than the 6X version. It is designed for players with a moderate to fast swing speed and offers a slightly higher launch and spin than the 6X.
So, you’ll find the Black 7X more appealing if you need more help generating distance and achieving an optimal ball flight.
Design and Construction
I have always loved the 6X because it gave me more feel and lighter overall weight, especially since I want control and responsiveness. But after placing the 6X and 7X side-by-side, the critical specification differences (and how they influence performance) became apparent.
Flex
The Ventus Black 6X has a slightly softer flex compared to the 7X. This means it will have a bit more flex and bend during the swing, potentially providing a little more feel and control.
The Ventus Black 7X is stiffer, which can lead to a more stable and consistent trajectory, especially at faster swing speeds.
Weight
As you can see in the chart, the Ventus Black 6X is generally lighter than the 7X. A softer shaft like the Ventus Black 6X may help increase swing speed, potentially leading to more distance. It can also provide a more responsive feel.
The Ventus Black 7X, being slightly heavier, can provide more stability during the swing, potentially resulting in better control and accuracy. But again, this is just a marginal difference of one point (85 and 86, respectively).
Performance Characteristics
The 6X shaft is designed to promotea low launch trajectory. It balances a penetrating ball flight with some added carry distance. The 7X shaft also aims to produce a more downward launch trajectory than the 6X. It is ideal for players who desire a more penetrating ball flight with reduced spin.
In terms of spin, both shaft flex options are engineered to provide a low spin rate, but the 7X shaft offers a more reduced spin compared to the 6X variant.
The shot dispersion pattern for the 6X shaft is tight, offering stability and control throughout the swing, just like the 7X shaft.
Swing Profile Suitability
Generally, the Fujikura Ventus Black shaft is known for its stability, low spin, and mid-launch characteristics. But when it comes down to choosing between the 6X and 7X flex options, your swing characteristics will be the ultimate determinant.
After testing the Ventus Black 6X shaft, I discovered that it best serves players with a smooth tempo, a slightly slower swing speed, and a more controlled transition from the backswing to the downswing.
This is because it offers a bit more flex. So It explains why experts recommend it a lot for players with a swing speed of 90–105 mph. If you have a smoother swing and want more feel and control, you won’t go wrong with the 6X flex.
On the other hand, the Ventus Black 7X shaft is stiffer and better suited for players with a faster swing speed and a more aggressive transition.
On some of my shots, the 7X handled higher swing speeds that ranged from 105 to even 120 mph. So, if you have a quick transition, a more aggressive downswing, and a higher swing speed, the 7X flex can provide stability and control you need to optimize your ball flight.
Ventus Black 6X vs. 7X: Pros And Cons
You should have at the back of your mind that the 6X and 7X belong to the same family of Ventus Black among the Fujikura shaft series. So, they will, in many cases, have similar advantages and disadvantages. The central contradiction is their flexible offerings, which spell out the differences.
Ventus Black 6X
PROS
CONS
Lowlaunchh and low spin characteristics
It doesn’t provide as much distance compared to high-launching shafts
I felt stable and consistent feel throughout my swing
Not an ideal option if you have slower swing speeds.
The control and accuracy are decent
Ventus Black 7X Shaft
PROS
CONS
It offered a higher launch and lower spin compared to the 6X
The 7X flex option of the Ventus Black, for some players, would require more precise timing and swing mechanics
Players with higher swing speeds will like the increased distance
Potentially less forgiving on off-center hits, but thanks to the Velcro technology.
Solid and stable feel at impact
Testing Both Shafts’ Performance
To measure the performance of the Ventus Black 6X and 7X, I headed to my favorite golf course armed with two drivers—a Taylormade SIM2 and a Callaway Epic Max. The first contender, the Fujikura Ventus Black 6X, was the initial shaft I chose to test. Its reputation for stability and mid-launch characteristics piqued my interest.
Performance of the Fujikura Ventus Black 6X:
With the 6X shaft, I consistently experienced impressive distance gains. On average, my drives with the 6X shaft carried approximately 10–15 yards farther than my previous shaft. This extra distance was noticeable on well-struck shots and those with a slight mishit.
The 6X shaft provided a solid carry distance of 250–260 yards for my swing speed and launch conditions. The high launch trajectory allowed the ball to stay in the air longer, increasing carry and overall distance.
The dispersion pattern with the 6X shaft was tight in terms of accuracy. The stability of the shaft helped me consistently find the fairway, reducing the number of shots that veered off course. The confidence gained from this accuracy allowed me to focus on setting up my approach shots more precisely.
Performance of the Fujikura Ventus Black 7X
The first notable difference I observed with the 7X shaft was a slight reduction in distance compared to the 6X. While the ball still traveled impressively, it lacked the same explosive force off the face.
However, what it lacked in distance, it made up for in accuracy. The lower launch and tighter dispersion helped me shape my shots more precisely, increasing fairway hits.
In terms of feel, the 7X shaft had a more pronounced sense of stability throughout the swing. It felt robust, providing a solid connection between my swing and the club head. On average, my drives with the 7X shaft carried slightly shorter, with a reduction of around 5–10 yards compared to the 6X.
In all fairness, I prefer the Fujikura Ventus Black 6X shaft. While the 7X shaft delivered exceptional accuracy and a solid feel, I found the explosive distance and overall performance of the 6X to be more suited to my game.
The 6X shaft’s stability, mid-launch characteristics, and great distance gave my drives an extra boost and allowed me to gain significant yardage.
The accuracy was also impressive, as the shaft’s stability minimized dispersion and helped me hit more fairways.
The choice between the Fujikura Ventus Black 6X and 7X ultimately depends on your playing style. If you prioritize accuracy and shot shaping, you may find the 7X shaft your ideal companion. At the same time, those seeking maximum distance with reasonable control might lean toward the explosive performance of the 6X.
It’s a wrap.
In my chat with a few colleagues who have played with both shafts, I noticed they often liken the Fujikura Ventus Black to the Ventus Blue shaft. It makes sense because both lineups have a similar feel.
But if you’re torn explicitly between the 6X and 7X flex options of the Ventus Black, you must pay attention to your playing style and what you want. Then see how each of these shafts measures up.
I hope you found this helpful. Remember to share with a fellow player looking for insights on the Fujikura Ventus Black 6X versus 7X shafts.
While the Titleist TSi2 prioritizes forgiveness and distance, featuring a deeper face and larger sweet spot, the TSi3, on the other hand, offers more adjustability and workability with a slightly smaller head and a SureFit CG track. It all comes down to your skill level, swing characteristics, and desired shot-shaping capabilities to decide which to use.
Since the release of the 975s two decades ago, I’ve not been excited about Titleist drivers. The brand is not famous for being a driver’s company. When golfers hear ‘Titleist,’ they think of irons, Vokey wedges, and Scotty Cameron putters.
However, the releases of the TSi2 and TSi3 have gotten my attention. The hype about the contradictions of these two drivers (and the respective value offered) was convincing enough, so I decided to purchase both drivers, test them, and compare them head-to-head on various relevant levels.
In this article, I’ll walk you through how the TSi2 and TSi3 stand apart in design and construction, performance, adjustability, forgiveness, feedback, delivery, price, and overall value. These should help you decide if you’re torn between these two drivers.
Titleist TSi2
$549
The TSi2 offers a higher launch
Offers more forgiveness
With the ATI 425 face material you get more ball speed
From a distance, the appearance of TSi2 and TSi3 is identical. My initial thoughts were a fair judgment and leaned towards categorizing them as having equal value with SIM and Maverick.
However, I’ve owned the TS2 for a long time, and during research on these recent versions, I discovered that the TSi series gives a little more ball speed. With this in mind, I already thought they would be as forgiving as the old series.
I tested these two drivers in a simulator this past weekend. Both felt pretty good with several shaft options, but it was hard to ignore some critical differences, which I will discuss in length in the rest of this article.
Design and Construction
According to Titleist, the TSi drivers are generally expected to deliver incredible distance, and that is the big selling point of this lineup, especially considering that they all use aerospace titanium (made in Pittsburgh in a single foundry to retain the American-made narrative) and this would be the first time such materials are used in a driver of its kind.
The TSi series also moves faster through the air, which hints at faster club head speeds and ball speeds. Both drivers, the TSi2 and TS2, also feature multi-dimensional stability.
Now, the brand markets the TSi2 to golfers who need extra distance and forgiveness and the TSi3 to players who create more consistent contact and want more control over their ball flight.
This explains why the TSi3 featured a perimeter weighting system, allowing you to adjust ball movement right and left.
The TSi2 driver offers forgiveness and distance, featuring a high moment of inertia (MOI) and a low center of gravity (CG). According to Titleist, the TSi2’s MOI is 12% higher than its predecessor, the TS2, resulting in increased stability and forgiveness on off-center hits. The TSi2 has a moderate spin rate and a slightly higher launch angle.
On the other hand, the TSi3 driver prioritizes precision and workability. It features a lower MOI, allowing for excellent shot-shaping control. The CG can be adjusted through the SureFit CG track, enabling customization of shot shape and launch conditions. The TSi3 has a lower spin rate and a slightly lower launch angle than the TSi2.
With the TSi2, you get an adjustable weight system to move a 9-gram weight to three positions within the club head. I like the square face angle at the address. It hints at a neutral ball flight. The driver also comes with a Golf Pride Tour Velvet 360 grip.
With the TSi3, you could move the clubhead’s weight into five spots on the back, but not entirely throughout the clubhead’s back. According to Titleist, the extension of this weighting system, as seen in the Callaway Epic Flash, can influence the center of gravity and change your hitting zone.
Imagine putting the weight on the toe or heel; you kick open or shut.
So with the TSi3, Titleist adjusted a much smaller track (the SurFit CG track system), offering you the five spots but still behind the club head. This allows you to influence the driver slightly on its rotation without taking away the forgiveness.
I tested the TSi2 and TSi3 using several different shaft options. The TSI2 gave a slightly higher launch, while the TSTSI3 offered more adjustability.
My first setup for this testing was the TSi3 with HZRDUS, the shafts for my Callaway Epic driver, and 10 degrees. After a few shots, I achieved 224 carries and 264 total. On another show, I gained 220 yards and rolled out to 250.
Also, I did not quite enjoy the sound of the TSi3 compared to how it was hyped, especially by the brand. But that should be the least of the issues. But the distance lived up to expectations.
Analyzing the results, I noticed that the TSi3, on average, has a 92 mph swing speed, and I was 0.2 degrees off. His side speed was 108 left, and the backspin was 240, which is a relatively high spin for the TSi3.
For the TSI2 range, my swing speed was generally a little faster (94.1), and I was leaving at 136 mph, but it didn’t result in much yardage. I only achieved a total yardage of 213 over 208.
So from my testing, there wasn’t any massive difference in performance or feel, except for the launch and speeds.
Price and Value
One strange thing about these two drivers is that they cost the same price. The TSi2 and TSi3 sell for $549 on the official Titleist website. But you can get better deals from retail platforms, many of which are often pre-owned.
If you look at other manufacturers, they drive premium prices into options with more customization. But I suppose the features of a bit more forgiveness in ball flight will attract people to spend the same amount of money for less flexibility.
Pros And Cons
Titleist TSi2 Driver
PROS
CONS
offers a higher launch
Less adjustability compared to TSi3.
Offers more forgiveness
It’s a versatile driver that is suitable for different golfers and their playing levels.
You get more ball speed thanks to the ATI 425 face material.
Titleist TSi3 Driver
PROS
CONS
The SureFit CG track system gives more adjustability.
Not as forgiving as the TSi2.
The best option for low handicappers and faster-swinging golfers
Not suitable for higher handicappers.
You get more ball speed thanks to the ATI 425 face material.
Wrapping up
Justin Thomas hit with one of the most popular Titleist TSi drivers on the market. If you watch more PGA Tour events, you’ll likely see more pro golfers use drivers from the TSi lineup. What does this mean? The TSi2 and TSi3 have no strange names in the golf game. You may never go wrong, no matter the choice you make.
However, these two drivers truly differ in their launch capabilities. If you’re an average golfer, the TSi2 has more to offer you because it produces a higher launch than the TSi3, so getting your ball in the air consistently and carrying it further will be easier.
I strongly recommend the TSi2 driver if you’re a slow-swinging golfer who struggles to achieve generally sufficient clubhead and ball speed or any significant carry. On the other hand, the TSi3 is your best shot if you’re a fast-swinging golfer looking for moderate ball flight. TSi3, in short, favors lower handicappers more.
What are your thoughts? Let me know in the comments.
FAQs
Is TSi2 more forgiving than TSi3?
The TSi2 driver is considered to be more forgiving than the TSi3. The TSi2 features a deeper CG (center of gravity) location, promoting a higher launch and excellent stability on off-center hits.
The TSi3, on the other hand, has a more compact profile and a slightly forward CG, which provides excellent workability but may be less forgiving on mishits. But it can vary depending on your personal swing characteristics.
Can a mid-handicapper use the TSi3?
Yes, a mid-handicapper can use the TSi3 driver. Its adjustable features allow you to optimize the club for your swing and maximize your performance on the course.
Should I get the TSi2 or 3?
When deciding between the Titleist TSi2 and TSi3, it ultimately comes down to personal preference and your specific playing style. The TSi2 is known for its forgiveness and high launch, making it the best option for maximum distance and accuracy. On the other hand, the TSi3 offers more adjustability and workability, catering to players who prefer shot shaping and customization.
What is the difference between TSi1, TSi2, and TSi3?
TSi1, TSi2, and TSi3 are all products under the Titleist TSi driver model lineup. However, the unique selling point of the TSi1 is its lightweight and slightly draw-based profile, while the TSi2 is for players whose priority is forgiveness. Conversely, the TSi3 driver will best suit players looking for playability and shotmaking.
But you will get more design freedom for extra off-center-hit stability in the TSi2 due to the lighter and faster-flexing alloy (ATI 425), while the TSi3 offers movable weight in the more pear-shaped
The Titleist TS2 and TSi2 drivers are both exceptional options with distinct features. The TS2 offers high launch and forgiveness, while the TSi2 provides improved adjustability and speed. After testing both drivers, I realized that the TS2 driver is more beginner-friendly, while the TSi2 has more features that appeal to golfers with more advanced skills.
Many players torn between both options usually try to determine if the TSi2 is worth the extra couple hundred dollars. I tried both before this season, and here’s the shocker: I experienced no massive difference. Predictably, someone in my situation (9 handicaps and an average drive of 250) would instead go for a used TS2 and save themselves almost $300.
But I won’t be in haste to say you should make this choice too. There are several factors to look out for before making the ultimate decision. In the rest of this article, I’ll place the TS2 and TSi2 drivers side-by-side to help you decide which is truly worth your money.
Titleist TSi2
$449
The TSi2 is one of the muted drivers in the market.
The TS2 offers loft options between 8 and 11.5 degrees, features Surefit hosel technology, and costs $170. Conversely, TSi2 only has loft options between 9 and 11 degrees, features the ATI 425 Aerospace Titanium and Face technology, and sells for $499.
here are the factors I noted while comparing these two drivers
Design and Construction
The adjustable loft options are a notable difference between the TSi2 and TS2 drivers in design and construction. With the TS2, you get a flexible loft that can adjust +/- 3 degrees, while the TSi2 can be modified up to +/- 2 degrees.
Also, the imagined path of the traveling golf ball, the horizontal oval, is longer in the TSi2 driver. This hints that you can hit the golf ball further with the TSi2 than with the TS2.
Now, on overall appearance and aesthetics, both drivers share similarities. But when you pay closer attention, you’ll realize that TSi2 appears a bit bigger and has a modern look compared to TS2’s traditional appearance.
Here’s my observation of the differences between both drivers in terms of construction and how these differences can potentially influence your game:
From the design specifications, It wasn’t surprising to discover that the TSi2 produced marginally higher clubhead and ball speeds after multiple hits. I achieved an average of 250 yards using the TSi2, compared to the aggregated average of 243 yards that the TS2 flew.
I also noticed that the TSi2 offered more forgiveness than the TS2 driver, even on toe mishits. This, coupled with the better ball speed, was all I needed to be convinced that I had made a good investment in spending that extra money. But it’s worth mentioning that the TS2 produced a better roll than the TSi2.
But if you’re meticulous about your purchase decision, it won’t end with a performance comparison. This is where the consideration of customization and adjustability comes in.
Adjustability and Customization
You can adjust the loft of the TS2 up to +/- 3 degrees, while that of the TSi2 is adjustable up to +/- 2 degrees.
With these adjustability differences, you can see that the Titleist TSi2 and TS2 drivers are still ideal for moderate to slow swing speeds and high handicappers. So there’s not so much contradiction going on in this aspect.
“TSi2 is still a fairly traditional shape for a high MOI (moment of inertia) driver,” says Titleist’s Director of Player Promotion and expert metal wood fitter, Van Wezenbeeck, “but the increased launch angle for certain players and increased forgiveness are really helpful when you’re not always hitting it on center.”
Wezenbeeck explained in an interview with Golf.com in 2021 how American professional golfer Justin Thomas, who plays on the PGA Tour, was seeing more forgiveness and launch from the TSi2, even while it produced a bit too much spin.
The sound is the first thing that sets these two drivers apart regarding feedback. TSi2 seemed to be more muted than even my current driver. Although both drivers have a pleasant feel, the increased ball speeds from the TSi2 are juicy, but the TS2 spins lower than many “forgiving” or rearward CG drivers I’ve used.
If you’re getting a fitting to manage spin rate and similar issues, you may find the TSi2 more appealing. It’s more forgiving while maintaining a lower spin rate for its capabilities.
I wouldn’t dare compare these two with Titleist’s recent TSR2, which stormed the market in 2022 with its incredible low spin, high launch, and improved accuracy and distance. But even being the brand’s older versions, the TSi2 and TS2 drivers still do a pretty good job with optimal feel, speed, launch, and distance.
Price and Value
There’s a wide gap between the TS2 and TSi2 in terms of price point, and that’s the bone of contention, seeing that both drivers are identical on various grounds.
The TSi2 design is relatively pricey, costing $449, about $150, shy of Titleist’s recent $599 TSR2. On the other hand, you can buy a TS2 for around $170 to $200.
I have observed that many golfers torn between these two options are usually more concerned about whether spending an extra $200 for the TSi2 is worth it since it’s a newer version. Another bone of contention is that it’s hard to find a brand-new TS2. So, you will most likely see pre-owned models.
Pros And Cons
Titleist TS2 Driver
PROS
CONS
The stretched head is better than the TSi2
The design is bulky when compared with the TSi2
It favors beginner players
The traditional appearance will not appeal to players with modern taste
Admirable spinning capability
Excellent stability and speed
Titleist TSi2 Driver
PROS
CONS
An excellent driver to achieve increased ball flight
The price can discourage buyers on a budget
You have more shaft options
The consistency is not as good as the TS2
The forgiveness and long-distance shots are better
So Which Should You Go For? My Recommendation
Here’s the catch: The Titleist TSi2 offers aerospace-grade titanium, Vertical MOI enhancements, an adjustable hosel, a 460-cc head, and an aerodynamic head shape as its key selling points.
On the other hand, what truly sets the Titleist TS2 apart is the adjustable swing weight port, SureFit adjustable hosel, elongated head shape, 5” stock shaft length, and the 460cc head.
So if you’re a beginner or a novice in this beloved sport, the TS2 is a great option. Plus, you get to save money. On the other hand, TSi2 will serve you better if you are a professional golfer.
I am confident that the TSi2 will become more potent in the right hands. So while both drivers are decent, the TSi2 is better for those with improved playing skills because the aerodynamics are a little harder to handle if you don’t have the skills and experience.
But if you’re a beginner, it will be hard to find reasons to justify paying extra for a driver that shares many similarities with a less expensive option.
I hope this helps you in your decision-making. Let me know what you think in the comments.
The main difference between a 3-wood and a 3 hybrid is their design and functionality. A 3-wood offers greater distance and trajectory, making it suitable for long shots from the fairway or tee. On the other hand, a 3-hybrid provides versatility, easier control, and better performance from various angles. The ultimate decision rests on the balance of your playing style.
A 3 hybrid combines the characteristics of an iron and a wood, offering the versatility of an iron with the forgiveness and ease of hitting of a wood. At the same time, a 3-wood is designed for maximum distance, thanks to its oversized clubhead and lower loft. But it takes more than knowing these differences to determine the best option. Many golfers find it hard to make a sound choice today, so you’re not alone.
I’ve owned the PXG Proto 3-wood (0341X Fairway) and hybrid (0317 X) for a while, but I usually only carry one of them for each play: if conditions are wet and the course is tight or rough-infested, I go with the hybrid; if they are dry and very windy, I take the 3-wood. I’ve been able to compare and contrast the nuances of these clubs and have done additional research on mastering their respective techniques.
I’ll explain my findings in this article, hoping you make an informed decision and elevate your game to new heights.
What Is The Difference Between a 3 Hybrid and a 3-Wood?
A 3-iron hybrid, also known as a rescue club, is designed to replace long irons and provide more forgiveness and ease of use.
It typically has a smaller clubhead size than a 3-wood, a rounded shape, and a deeper face.
The loft of a 3-hybrid is usually between 18 and 21 degrees, making it ideal for shots from the fairway or rough.
A hybrid’s shorter shaft and higher loft allow for better control and accuracy, especially in challenging situations.
On the other hand, a 3-wood is a fairway wood primarily used for long shots from the fairway. It has a larger clubhead size and a shallower face than a 3-hybrid.
The loft of a 3-wood is typically between 15 and 18 degrees, which enables it to produce more distance off the tee or fairway. The longer shaft of a 3-wood generates incredible clubhead speed, resulting in higher ball speed and longer shots.
Ease of Hitting: Wood vs. Hybrid: Is It Easier To Hit A Wood Or Hybrid?
Many beginning golfers don’t realize early enough that the ease of hitting a golf club, whether a wood or a hybrid, depends on your skill level and swing mechanics.
But, accurately, some general characteristics of woods and hybrids can be compared to understand their differences in ease of hitting.
Clubhead Size and Shape: Woods typically have larger clubheads compared to hybrids. The more oversized clubhead provides a more prominent sweet spot, making it slightly easier to make solid contact with the ball.
Loft and Launch: The Proto 3-wood has a more oversized clubhead, providing a more prominent sweet spot but less forgiveness on mishits. It has a lower loft, offering a lower ball flight and more significant distance potential. I found this a benefit because I only wanted distance and control off the tee or from the fairway. But if you have slower swing speeds or struggle with getting the ball airborne, the higher lofts of hybrids will benefit you more.
Forgiveness and Playability: Hybrids are generally designed to be more forgiving. Combining a more prominent sweet spot and a lower center of gravity can help mitigate the adverse effects of off-center hits and provide more consistent results. A mishit with wood, especially with a smaller sweet spot, can result in more significant distance loss and a less desirable ball flight.
Pros and Cons Of 3 wood or 3 Hybrid
3-wood
Advantages
Disadvantages
Potential for greater distance, especially off the tee. The preferred choice for experienced golfers with higher swing speeds. It can provide lower ball flight for better control in certain situations.
The smaller sweet spot, less forgiving on mishits. Challenging to hit difficult lies. Requires a more consistent and precise swing to achieve optimal results.
3 Hybrids
Advantages
Disadvantages
They increased forgiveness and playability. More accessible to hit from various lies, including rough and tight fairway lies. It can help golfers get the ball airborne more easily, particularly with slower swing speeds.
Generally shorter distances than woods—limited versatility for specific situations, such as hitting from the tee on longer par 4s or 5s.
With all these in mind, I recommend that you attempt both types of clubs and consider factors such as distance requirements, swing characteristics, and playing conditions to determine which club is more accessible and more suitable for your game. But when you try to do that, you may realize that one is harder to hit than the other.
Why Is A 3-wood So Hard To Hit?
Hitting a 3-wood can be challenging due to its longer club length than an iron. It requires a different swing and timing, making it harder to control. The larger clubhead size also increases the margin for error, making it more challenging to make consistent contact with the ball.
Also, the lower loft of a 3-wood requires a more sweeping and shallow angle of attack. I still sometimes find this tricky to execute, so I imagine any player (beginner or intermediate) faces such a challenge.
So you’ll have to focus on a smooth and controlled swing tempo to maintain balance and timing. But to improve 3-wood shots, you have to practice sweeping the ball off the turf rather than trying to hit down on it like an iron.
“Most players have hit many more drivers in their practice sessions than 3-woods off the tee,” says Golf Top 100 coach Joe Plecker, “so making a tentative swing with a rarely used club is a recipe for disaster.”
Teeing the ball up slightly higher can also help achieve better contact. Adjust your setup by positioning the ball slightly forward and widening your stance for stability.
Similarities and Differences in Hitting a 3-wood and a 3 Hybrid: Do you hit a 3-wood the same as a hybrid?
There’s a widespread misconception that hitting a 3-wood and a hybrid are the same. If you have this idea, it’s forgivable because many golfers unconsciously believe it. While both clubs are designed for longer shots, they have distinct characteristics that affect their usage and swing mechanics.
The similarity between the 3-wood and the hybrid is that they are made for long shots, typically off the fairway or rough, to cover a considerable distance.
Also, both clubs have relatively low lofts compared to irons, allowing for increased distance.
But when it comes to hitting them, there’s a vast difference in approach.
Aspect
3-wood
3 Hybrid
Clubhead Design
More oversized club head with a shallow face and a low center of gravity
Smaller clubhead with a deeper face and a low center of gravity
Ball Position
Generally positioned slightly forward in the stance
Positioned slightly back in the stance
Swing Mechanics
A sweeping motion, similar to hitting a long iron
A more descending motion, similar to hitting a mid-iron
Shot Trajectory
Typically produces a lower, penetrating ball flight
Generally offers a higher, more forgiving ball flight
Forgiveness
Offers less forgiveness on mishits
Provides more forgiveness on mishits
Distance Control
Requires consistent swing tempo and precise contact
It offers better distance control due to the shorter shaft length
Shot Shape Control
Allows for shaping shots with proper technique and skill
Generally easier to shape shots due to a more forgiving design
Why Is A Hybrid So Hard To Hit?
Hybrid golf clubs’ design combines features of both irons and woods, which can take some adjustment in terms of swing mechanics. So this can pose a hitting challenge.
But the most significant factor has to be their larger clubhead size and higher loft, which can affect how the ball interacts with the clubface, making it more challenging to achieve consistent contact.
Also, you could struggle with the club’s versatility and finding the proper distance and trajectory for each shot.
Whatever the actual issue is, start by practicing proper swing mechanics with hybrids, focusing on a smooth and shallow approach.
Players who have gotten better at hitting hybrids have also experimented with different ball positions and stances to find the optimal contact point.
“Your hybrid club should be located in about the same place that you’d normally hit your iron from,” says Golf Expert Adam Ditcher. “So, for example, a 3-hybrid would be played closer to the front foot than a 5-hybrid just because of the loft of the club and the distance the club is meant to travel.”
What Is The Correct Way To Hit A 3-Wood and 3-Hybrid?
While the positioning of the 3-wood and hybrid is different for the perfect hit, there’s a generally correct way to handle this kind of club. You have to focus on your grip, stance, and setup.
Grip
Grip the club with a relaxed but firm hold, allowing for control and flexibility.
Position your hands slightly lower on the grip for increased loft and launch.
Stance and Setup
Position the ball slightly forward in your stance, closer to your front foot.
Adopt a slightly wider stance for stability and balance.
Align your body parallel to the target line.
Avoid gripping too tightly, which can restrict clubhead speed and control. Also, if you place the ball too far back in your stance, you may have low and inconsistent shots.
But at the same time, don’t take a narrow stance that will lead to losing balance and stability.
Also, when handling 3-woods, over-swinging or trying to hit the ball too hard is always a precursor to loss of control.
Distance Comparison: 3-wood vs. 3-hybrid
Generally, a 3-wood is designed for longer shots off the tee or fairway and features a more oversized clubhead and longer shaft. For example, the TaylorMade SIM2 Max Fairway Wood provides an impressive distance, averaging around 240–260 yards for many golfers, compared to Callaway Apex 21 3 hybrids, with an average length ranging between 210–230 yards.
Remember that a 3-hybrid has a smaller clubhead and a shorter shaft. So it’s more particular about offering better control and versatility, so much so that it sacrifices some distance compared to a 3-wood.
A 3-iron hybrid combines iron and wood characteristics, offering versatility and easier ball control.
However, a 3-wood provides more distance due to its oversized clubhead and lower loft.
Knowing the correct technique for each club and its strengths and weaknesses will help you make an informed decision to enhance your performance on the course.
If I had to pick a side, I would lean toward the 3-hybrids. The 3-hybrid offers me more versatility and forgiveness compared to the 3-wood.
It is also easier to control the 3-hybrids and performs well from different lies, making it a reliable choice for various situations on the golf course.
Even professional golfer Padraig Harrington favors the hybrids, as he says they give him “extra height and so can stop it on the green as opposed to a three iron.
Usually, the best way to know which of the two options is best for you is to test both options with multiple shots. But now that you’ve seen this guide, I hope you have enough heads up.
I’ll be in the comment section. Let me know what you think about these two options.
The 3-wood and 5-wood have advantages depending on your preference and skill level. However, the 3-wood offers more distance and a lower trajectory, making it ideal for long fairway shots and off the tee. On the other hand, the 5 wood provides slightly more loft and an easier launch, making it better for approach shots and shots from the rough.
The 3-wood and 5-wood belong to the same family of large, long-shaft golf clubs designed for generating distance early on in the hole. The debate on which options to go for between these two is never-ending. I made a new friend on the golf course recently who has been working on correcting swing faults this year. He struggled to hit his 3-wood consistently off the deck and wondered if a 5-wood would be easier to hit and get a similar distance or if he would still have the same issues.
I offered my advice to him, but I went on to do more research and found out many golfers (beginners and intermediates alike) are in a similar situation: they carry a three wood but never really get on with it. Should they be changing it for a 5-wood?
I conducted an extensive comparison test using the Talylormade Sim2 Max 3 wood and Callaway Mavrik 5 wood Test. I will show you my findings in this article, with the conclusion to help you decide on which is best for you.
3 Wood Vs. 5 Wood: The Comparison At A Glance
Factors
3-Wood
5-Wood
Loft
Lower loft (around 15-18 degrees)
Slightly higher loft (around 20-22 degrees)
Distance
Typically hits the ball farther
Slightly shorter distance
Control
More difficult to control
Easier to control
Launch Angle
Lower launch angle
Slightly higher launch angle
Ball Flight
Lower ball flight
Slightly higher ball flight
Versatility
Better for tee shots and longer fairway shots
Easier for fairway shots
Accuracy
Requires more precision for accuracy
More forgiving and easier to hit accurately
Playability from Rough
More challenging from thicker rough
Better playability from rough
Club Length
Slightly longer club length (43 inches)
Slightly shorter club length (41-42 inches)
Shot Trajectory Control
Allows for better trajectory control
It offers a more consistent trajectory
Shot Shape Adjustment
Easier to shape shots with a control
Limited shot shape adjustment
Loft and Distance
The 3-wood typically has a lower loft angle, usually around 15 degrees, while the 5-wood has a slightly higher loft angle, around 18 degrees. The difference in the loft can affect the trajectory and distance of your shots.
Due to its lower loft and longer shaft length, the 3-wood would offer more distance, so it’s preferable for long fairway shots and the tee since this allows you to achieve greater distance than the 5-wood.
For instance, a well-struck shot with a 3-wood might cover around 230–250 yards, while a 5-wood might reach about 210–230 yards.
If distance is a priority and you have the skill to control a lower trajectory, the 3-wood is a better option. On the other hand, if you seek more loft and an easier launch, the 5 wood can be a valuable club for approach shots and shots from the rough.
Club Length and Shaft
The length of the club plays a crucial role in swing mechanics. The 3-wood is typically shorter than the 5-wood. This is a sign of better control and accuracy because the shorter length of the three wood makes it easier to generate clubhead speed and achieve a more consistent swing tempo.
But we have to shift our focus to flex and material when it comes to shaft suitability.
My TaylorMade SIM 3 wood with a shorter length—a Fujikura Pro 56 shaft—offered better accuracy and control.
But playing with the Callaway Mavrik 5 wood with a longer length and a Mitsubishi Tensei CK Blue shaft gave me more distance and stability for higher swing speeds.
On the other hand, if you have a faster swing speed, a stiffer shaft like the Mitsubishi Tensei CK Blue or the Aldila Rogue Silver may be preferable to control the ball’s flight and reduce unwanted side spin.
Ball Flight and Trajectory
A 3-wood has a lower loft and a longer shaft than a 5-wood, resulting in a lower ball flight and potentially more roll.
This is good news if you seek distance off the tee or a penetrating trajectory. On the other hand, a 5-wood typically has a higher loft, which gives us a higher ball flight and potentially more carry, which is a green light for players looking to hit higher shots with softer landings, especially from fairway lies.
So if you anchor your decision based on ball flight and trajectory, the choice between two clubs depends on your preference and shot requirements.
Versatility and Shot Shape
The three wood can shape shots by adjusting the swing path and clubface angle. But the five wood excels when a higher trajectory is required to clear obstacles or hold greens.
The 5-wood is better for shaping shots with a slight draw or fade, although not as much as the 3-wood.
Now, I’m slightly biased in favor of the 3-wood regarding versatility. The lower loft makes it incredibly suitable for hitting from various lies and challenging course conditions, such as thick rough or firm fairways.
In all fairness, the five wood’s higher loft can help with shots from tight lies or softer conditions, preventing the club from digging into the ground. Still, your skill level, personal preference, and specific course conditions will determine which is for the greater good.
Control and Accuracy
Upon close inspection, I noticed that the 5-wood generally offers greater forgiveness due to the larger head size. This makes it more forgiving on off-center hits and helps maintain stability through impact.
If you’re trying to make a choice solely based on accuracy and consistency on approach shots, it depends on the specific club models.
Distance Gaps and Club Selection
Distance gapping is the variance between how far you hit each club in your bag. On average, the 3-wood is designed to travel farther than the 5-wood.
A well-struck 3-wood can cover distances between 220 and 240 yards, while a 5-wood usually reaches 200 to 220 yards. This gap of around 20 yards guarantees yardage coverage in different situations.
Still, the distance gaps between a 3-wood and a 5-wood typically vary depending on your swing and club specifications.
The 3-wood and 5-wood bridge the gap between the driver and long irons or hybrids. Their loft and distance characteristics provide versatility for fairway shots, tee shots on shorter holes, and long approach shots.
On multiple shots, I noted the high forgiveness and distance from the SIM2 Max 3 wood, while the Mavrik Max 5 wood did not give much space but was easy to use and launch.
Player Skill Level
It is common for beginner-level golfers to struggle with consistent driver hits, so they often get wide-shot dispersion due to imparting too much spin. Now a 3-wood is substantially smaller than a driver, ensuring increased control and much tighter hit distribution. With this in mind, a beginner golfer is better off with a 3-wood.
But if you’re starting with the game, I recommend you go for a 5-wood because, at this skill level, you want to get the ball airborne with substantial forward progress.
Trial and Personal Experience
After testing the 3-wood and 5-wood, I analyzed the results on club speed, head speed, dynamic loft, dynamic lie, path, and attack.
The club speed swung the firewood the fastest, which again is a bit odd, to be fair, but it was only one mile an hour. It did a bit of a drop off the five wood, and efficiency lowered as I gained more loft, which makes sense.
I delivered a two-and-a-half-degree dynamic loft difference between the 3-wood and 5-wood, which statistically are three degrees. (Let me mention that this would even pop up massively compared to a 7-wood because a high launch will be created.
For peak height, the 5-wood average was 130 feet in the air and a decent angle of 46 and a half. The 3-wood was 125 feet in the air with a 45-degree descent, which was only 4 feet lower than the 5-wood and had a margin difference in the angle of descent.
For the angle attack, both clubs did pretty much the same. The path was all around three degrees, so there was little difference.
The whole point of my observation is that you shouldn’t buy a 3 or 5 because you think they’d be right for you.
Now that we’ve looked into the comparison between the three and five woods, it becomes more realistic that your ultimate decision depends on what you want from a club.
A 3-wood is likely to favor you more if you’re looking for an alternative to hitting the driver off the tee. But if your needs are centered around an easy-to-launch and confidence-inspiring club for attacking long shots, the 5-wood is the right call.
Players who are shorter hitters and struggle with long irons will be satisfied with a five-wood because it’s a fantastic alternative and easier to hit than a three-iron.
But above all, don’t forget to consider the distance.
Adding five woods to my collection was a sure bet because I’m not a beginner, and I’m looking to plug the gap between the longest iron in my bag and three woods.
I hope you found this helpful.
FAQs
Does a 5-wood go as far as a 3-wood?
No, a 5-wood typically does not go as far as a 3-wood. The lower the number, the lower the loft and longer the shaft, resulting in more significant distance potential. A 3-wood has a lower loft and a longer shaft than a 5-wood, allowing for more distance off the tee or fairway.
Is it better to have a 3 or a 5?
The three wood offers more distance and a lower trajectory, making it ideal for long shots from the fairway or off the tee. The five wood, however, provides more loft and control, making it suitable for approach shots or hitting from the rough. So it depends on which club suits your game, but I recommend having both.
How much farther does a 3-wood go than a 5-wood?
A 3-wood tends to go approximately 10–15 yards farther than a 5-wood. However, these figures can vary depending on the specific clubs and your ability to strike the ball consistently.
Why can I hit my 5-wood but not my 3-wood?
Hitting a 5-wood successfully but struggling with a 3-wood could be due to a few factors. The three wood has a lower loft and a longer shaft, making it more challenging to control. Also, differences in swing mechanics, confidence, and club weight can affect the consistency of your shots.