Construct a DIY retractable golf impact screen by assembling a PVC frame and a roll-up projector screen. Attach the screen using hooks and nylon cord to make a winding mechanism. Create a portable practice space that’s easily stored when not in use. This is a space-saving and cost-effective solution for honing golf swings at home.
For many of us starting our indoor golf simulator journey in our car garage or anywhere with limited space, there are many things we need to deal with. One of them is the space for the impact screen. My 2-car garage has an 11-foot ceiling, so I already knew that whatever golf simulator setup I use must be removable to park my cars.
I thought of a retractable impact screen hung from the ceiling, so when I want to use it, I pull it down and pull another over that can be strung across the back. After extensive research, I realized little information is out there detailing how to DIY a retractable impact screen.
So I have created this article to walk you through the step-by-step process of making a retractable golf impact screen from scratch. As a bonus, I’ll also review a few ideal retractable screens you can consider if you are not confident in doing the work yourself.
Materials You Need For A DIY Retractable Golf Impact Screen
The first step to a successful installation is gathering the necessary materials. The approach I deploy here is the winding mechanism that allows us to manually roll down the impact screen when in use and retract it back when done playing. To make this happen, we need the following materials:
DIY Retractable Golf Impact Screen: Step-by-Step Process
I already have some of these materials in my garage, so you may not have to buy every material. But with these at your disposal, you can follow these steps closely:
Step 1: Frame construction
Build a rectangular frame using PVC pipes and connectors. This will serve as the support structure for the screen. Use T-joints for corners and secure them with PVC cement for added stability.
P.S.: You may need a second ceiling rail at the back of the main one. The purpose of this one is for the netting, while the front has the impact screen.
Step 2: Attach end caps
Cap the open ends of the PVC frame with end caps. These caps will prevent the pipes from sliding out and give the structure a finished look.
Step 3: Mounting points
Attach eye screws to the frame’s top and bottom horizontal PVC pipes. These will serve as the anchor points for the nylon cord that will retract and extend the screen.
Step 4: Prepare the screen
Unroll the roll-up projector screen and cut it to fit the dimensions of the PVC frame. Make sure the screen is evenly tensioned across its width. Use hooks to secure the top edge of the screen to the eye screws-anchored nylon cord. Ensure the screen hangs straight and even.
Step 5: Nylon cord setup
Thread the nylon cord through the eye screws on the top horizontal PVC pipe. Run the line over a pulley mounted at the top end of the frame and down to the eye screws on the bottom horizontal PVC pipe. Tie the rope securely.
Step 6: Retractable Mechanism
Create a simple winding mechanism for the nylon cord using a handle or a crank. Attach the handle to one end of the bottom PVC pipe. This will allow you to retract and extend the screen manually.
Step 7: Test and make an adjustment
Test the retractable mechanism to ensure the screen rolls up and down smoothly without any snags or tangles. Make any necessary adjustments to the tension and alignment.
With that out, secure the frame to a stable structure, such as a wall. Now you have your DIY retractable golf impact screen! You can pull the screen down to practice your golf swing and retract it for storage when not in use.
Alternative: Buy an actual retractable golf screen.
If you’re not confident in doing the rough work, you can go the easy route by buying a retractable golf screen. They are like projector screens that you see in colleges.
The typical retractable golf screen will have a housing that can be installed vertically in your ceiling, and then it will roll out the screen material at the click of a button.
Fortunately, many options range from $1,500 to $2,500, depending on the brand and model.
I recommend the Stealth Golf Impact Screen, available at GolfTechSystems. Look at how it works in the video below:
Retractable golf screens like this come with a mounting kit and instructions. From my experience, this kind of golf screen uses standard ceiling mounts.
You also need to be careful of the dimension specifications of these retractable golf screens because they require precision mounting.
For example, if you use models like the HomeCourse Pro Retractable Golf Simulator Screen, you must have a minimum of 6″ mounting distance from the ceiling and 8″ total height.
The HomeCourse Pro Retractable Golf Simulator Screen costs $2,299 on ShopIndoorGolf.
Wrapping up
Many DIY solutions I’ve seen online for retractable golf impact screens always point to hanging nets on the wall. But someone with too many items in a limited space may not have the accommodations.
If your screen must be hung from the ceiling and 4-5′ from the wall due to existing shelving, I recommend you go with the PVC frame and a roll-up projector screen combo approach.
However, if it’s too much work, you can use the standard retractable projector screen as long as you have the budget.
Don’t also forget that you need good netting behind your impact screen. So you can do two PVC frames and ceiling rails and have the back be the net and the front be the impact screen.
With a few bungee cords to stretch the net out when in use, you’re good to go.
Do you have any other ideas for a DIY retractable golf impact screen? Feel free to share in the comment section.
The Fiberbuilt Hitting Strip is a quality hitting mat. The bristles are stiff enough and work better for shock absorption than many other premium mats. However, the price can discourage budget-conscious buyers. It also has compatibility issues with other cheap golf mats. There are also mixed reviews about the color fading of this hitting strip from Fiberbuilt.
Fiberbuilt is no new name in the golf mat industry. To put things into perspective, there’s a 99.9% chance that if you go to any online golf community today to seek advice on which hitting strip to buy, someone will point to Fiberbuilt.
This shows that the brand has built a reputation for quality. When I was hunting for a hitting strip a few months ago, I understood that there are plenty of good mats out there. I tried to steer away from models like the Country Club Elite because I am older, care about my elbows, and hit other things than pure irons.
The priority for me was to feel comfort on my wrists naturally. Many recommendations pointed to the 3 ft. Fiberbuilt Grass Panel with 3 Tee Holes while comparing it with alternatives like Sig Softee, EZTee, and Holy Grail.
I purchased and tested the 3 ft. Fiberbuilt Grass Panel with 3 Tee Holes. In the rest of this review, I’ll walk you through all you need to know about this hit strip to help you decide if it’s worth considering.
Here is the specification for the Fiberbuilt Grass Panel with 3 Tee Holes.
Note that this review solely focuses on the hitting strip, a replaceable Performance Turf Mat System panel. The entire mat is sold as the Fiberbuilt Grass Series Studio, which measures.
The fiber-built, replaceable hitting strip component has three different tee holes for the perfect ball positioning for your swing. However, the replaceable strip with the GRASS SERIES STUDIO mat has four holes.
There’s also the option to purchase the Fiberbuilt Grass Series Adjustable Tee and the hitting mat.
The hitting strip is designed with the Fiberbuilt Grass Hitting Surface. The unique thing about this surface is that it features the brand’s signature Pure Impact Turf hitting panels that are launch monitor tested.
The surface also has a proprietary Vibration Absorption Layer to help provide the feedback in feel and sound that better players prefer.
The grass works best with the Fiberbult rubber foundation because that will give it extra shock absorption and stability that will be sent to the mat.
It has been built as a replacement part for the brand’s Hourglass Pro system and old Performance Fiberbuilt Grass systems.
My review
The grass-hitting strip is the most essential part of any Fiberbuilt mat. I have tested the hitting strips from Holy Grail and Sig Softee. Indeed, this one is unique, especially in the bristle area.
The bristles are installed on a metal plate that fits within the rubber base of the hitting strip. The hitting mat has three holes along the side. With that, I can insert one of the Fiberbuilt rubber tees.
When I took a closer look at the bristles, they had the shape and elements of an upside-down broom head. The bristles are stiff enough that the golf ball sits firmly on top. This gives me a good lie.
But at the same time, it’s not so stiff because it allows my club head to slide through seamlessly. In all honesty, I had assumed these bristles would not stand the test of time, but this is five months and counting, and the hitting strip hasn’t failed, even in the spot where I mostly hit my golf balls from.
According to Fiberbuilt, you won’t need to replace this hitting strip until after 300,000 swings. This guarantee means the strip is not expected to wear until you hit that benchmark. I can’t remember when a golf mat company made such a guarantee.
This goes to say that the item is of high quality and worth its price. It has received praise on various review platforms for how it helps prevent injury and save the joints.
Does the Fiberbuilt Hitting Strip Punish Fat Shots Enough?
During my research, I discovered that there had been debates about how well the Fiberbuilt punishes fat shots compared to rival models.
The shot goes shorter than a clean hit when I hit behind the ball on this mat. This, of course, recreates the feeling of playing real golf.
Add-on cone-shaped tees do an excellent job of hitting drivers and fairway woods.
If you have an arthritic elbow, this hitting strip will reduce your wear and tear when hitting balls.
The sturdy base that won’t move or slide.
What I don’t like about this hit strip
The ad for the fiber-built hitting strip about injury prevention is exaggerated. In my experience, it doesn’t perform as well as the Divot Action Strip, which creates a 12″x46″ strip with two matching panels.
It’s not so great hooking up with mats from other brands. If you have an existing Fiberbuilt Putting Green, it can be expanded into a Fiberbuilt Combo Mat.
Worthy alternatives for Fiberbuilt’s hitting strip
If the Fiberbuilt hitting strip doesn’t match your preference, the good news is that there are many good hitting mats out there. However, I strongly recommend alternatives such as:
The Holy Grail Hitting Strip is very soft, and I recommend it for beginner golfers who are just getting familiar with simulators. The hitting mat comes in multiple sizes and is the perfect fit. One of those sizes can fit into the fiber-built grass sections. So you can replace the grass bristles without changing the entire mat.
The EZ Tee Hybrid is only a strip of turf. It has no foam or rubber to form the layer, so you can get it in any size you need. I like this realism and flexibility because it makes hitting super great.
Final Thoughts
When I use the Fiberbuilt hitting trip, my club has room to dig into the mat each time I hit a fat shot instead of bouncing off like on many other mats I’ve tried.
In this review, we have focused on the features, benefits, and drawbacks of just the strip of the Fiberbuilt hitting mat.
Remember that if you’re getting this hitting strip, you need a stance mat elevated to the same height to work well. Eventually, you must buy a Fiberbuilt mat, either the Player Preferred Series or the Grass Series.
Still, many people think this hit strip is overhyped. With the information you have now, what do you think? Would you spend close to $300 for the Fiberbuilt replaceable hitting strip? Share your thoughts in the comment section.
The Fiberbuilt golf mat is offered in three series. It is a fantastic option for a realistic and forgiving surface for practicing golf shots, reducing the risk of club shock and promoting proper divot action. However, its premium quality comes at a higher price point than other mats, which might be a drawback for budget-conscious buyers.
In the market for high-quality hitting mats in the golf mat industry, Fiberbuilt needs no introduction. The company focuses on realistic feel and flexibility, joint safety, and using rubber bases for stability. However, there have been consistently mixed reviews about the actual value of the Fiberbuilt golf mats.
A few months ago, I was on a hunt for the best mat. My priority, as I would have with many golfers, was avoiding the bouncing fat shot that comes off OK while protecting my old wrists and elbows.
Unfortunately, there isn’t a golf mat showroom out there for me to make a comparison before dropping over a thousand dollars. Still, I had to buy the Firberbuilt Player Prefered series golf mat to try things for myself.
Having purchased and tasted this golf-playing simulator aid, I have written this article to shed light on the things to consider when investing in a quality hitting mat like the Fiberbuilt studio mat.
Before we go on, it’s important to state here that, in addition to putting mats, the company offers its premium golf mats in three variations: Player Preferred, Fiberbuilt Grass, and Performance Turf.
This article will focus on my experience testing the Player Preferred series. Still, I encourage you to stick to the end because I will compare it with the two other series and list relevant factors you should consider before picking any of them.
My Fiberbuilt Player Preferred Series Review
Fiberbuilt Player Mat
$1549
Oversized Pure Impact Turf Section (2’x4′).
Two Rubber-Backed Stance Mats (4’x4′).
Shock-absorbing rubber foundation 94.7% absorbtion.
Models: Available in Fiberbuilt Preferred Combo (comes with a hitting strip and a putting green) and Fiberbuilt Preferred Mat (Includes only the mat)
My Remark: Pricey but excellent. In other words, worth the money
The Player Preferred Series from Fiberbuilt has the company’s signature Pure Impact Turf hitting panels that provide accurate launch conditions and a realistic fairway grass feel. Having tested this out, it lives true to the hype.
Fiberbuilt builds the Player Preferred Series on sturdy, tool-free rubber bases for easy assembly. The products ship in three boxes – one contains the 2’x4’ Player Preferred hitting strip, the other includes the six 2’x2’ rubber base pieces, and the last has the stance turf for both sides of the hitting strip.
After much studying, I discovered that these panels have a Vibration Absorption Layer that absorbs 94.7% of the clubhead vibration. This replicates the feedback and sound of hitting on natural turf.
The feature also provides premium protection from injury. However, words through the grapevine show that the Fiberbuilt Grass has the best injury protection of all other series.
But one thing I loved about the Player Preferred Series of Fiberbuilt mat is the authentic hitting experience. It met my expectations regarding eliminating the bouncy “mat effect.” I’ve had to deal with this issue on many artificial turf products.
I also like the Friction-Fit Tee Holder that fits in the base holes. This gives us the platform to use our respective natural tees.
Fiberbuilt Player Mat vs. Other Fiberbuilt Models
If you want to get a mat from the Fiberbuilt brand, there are three categories to choose from:
The Player Preferred
The Fiberbuilt Grass
The Performance Turf
Here are the factors that make each of these series stand out:
Meanwhile, if you purchase the Fiberbuilt Preferred Combo with a hitting strip and a putting green, you will see that the putting turf has an embossed rubber backing.
I like this feature because it helps prevent creasing or curling. The putting green can receive chip shots with realistic check and roll. It also runs a nine on the Stimpmeter.
What Kind Of Golfers Need The Fiberbuilt Player Preferred Mat
I chose the Fiberbuilt Player Preferred Mat becuase it was among the top recommendations for realistic hitting surfaces. If you have this factor in mind while shopping, you won’t be disappointed with this premium mat.
Also, Fiberbuilt goal is to make the best mat, and it requires premium materials. So they are focused on quality than affordability. This is why the Fiberbuilt Player Preferred Mat (and other series) will best appeal to golfers without tight budgets.
If you will spend over a thousand dollars for the best feel and sound, the Fiberbuilt Player Preferred Mat is an excellent option.
What I like about this golf mat
It is the most realistic mat for feel and sound I’ve ever tried since I’ve played on Sims for the past two years.
I like the premium injury protection features
The performance is perfect, especially with punishing fat shots
It is a Launch monitor that has been tested, which guarantees new buyers that it will provide actual launch metrics for accurate reading and overall game improvement.
What I don’t like about this golf mat
It’s expensive (but for a good reason)
It has mixed reviews about the feedback living up to the advertisement.
As someone who tried the Carl’s Place Divot Action Strip and True Strike mat, I expected something ‘hats-off’ unique. But it’s a decent mat, all the same.
Worthy Alternatives to Fiberbuilt Mats
For you to have shown interest in Fiberbuilt mats, it means you want nothing short of premium. If the models of Fiberbuilt don’t match your preference, you can consider a few modest brands.
TrueStrike Golf Mats: This is a worthy alternative to Fiberbuilt; many even argue it’s a much better mat. The Truestrike mat is modular, allowing you to add on or replace carpet sections quickly. The company uses silicone gel on top of a foam base so that you get a realistic feel. It also does an excellent job of absorbing vibration.
SIGPRO Golf Mats: The golf mats made by the SIGPRO brand remain one of the best options I’ve tested since I started sims indoors. In my honest opinion, there’s only a little gap between the performance of Sigpro and Fiberbuilt. It even has more cushion. This is a perfect alternative if you want a natural feel and more injury prevention. It also costs a little less than the Fiberbuilt mat.
While many people find putting challenging, it’s one of the most important aspects of golf. Fortunately, there are a number of golf putting aids out there to help you improve your technique and stroke.
A putting mirror is a useful golf training aid that helps you monitor your stroke and make the necessary changes.
In this review, we’ll look at the best putting mirrors and how they can take your game to the next level.
What Is the Best Putting Mirror?
If you’re looking for the best putting mirrors on the market, be sure to check out these seven options:
The PAR Perfect golf mirror is the ultimate training aid that will allow you to perfect your putting stroke. This mirror was specifically designed for junior and beginner golfers and aims to teach them the correct stroke using the “Path and Release” technique.
From our PAR Perfect Mirror review, we discovered that this is the only arc path mirror on the market that helps you develop a consistent putting stroke. It’s the best option if you want to learn the proper path and release of your putter head.
Many people have used this mirror and experienced incredible results in a short period of time because it teaches you the arc motion that many professional players use.
This putting training aid by the renowned brand Eyeline Golf has all the features you could look for. It is designed to help you improve your putter face alignment and stroke.
Furthermore, it’s a good size that’s easy to carry around, and the carry bag it comes with helps to reduce mirror scratches. You won’t have any problems taking your mirror to an indoor putting mat or putting green.
This is more of an affordable option but still has all the features you could need. One of the best features of the PuttOut mirror is that it has various rubber spikes, so you don’t have to worry about tee slots to keep it in place. If you are looking for the best priced putting mirror, this is the one for you.
The objective of this putting mirror is to teach people the correct putter path, eye alignment, and face angle. It’s 12 x 6 inches, making it easy to fit in your golf bag.
However, this mirror is prone to scratches which negatively impacts the accuracy over time.
Pro Path Putting Mirror
If you’re looking for a simple and convenient golf putting mirror, the Pro Path Putting Mirror is worth considering.
You can perfectly position your golf ball for the perfect stroke because of the various green guidelines in place to assist with alignment.
Additionally, the mirror comes with four different-sized gates that you’re free to adjust and place according to your preferences.
It also comes with a high-quality microfiber cloth bag, so you don’t have to worry about your mirror getting damaged.
Odyssey Golf Putting Mirror
The Odyssey is one of the most affordable training aids but still feels like a luxury. Its compact and light design also makes it easier for you to transport.
One of the standout features of this putting mirror is that it’s made for right and left-handed putters. Plus, you can create your own putting gates to improve your aim because of its alignment pegs.
However, the cutout on this mirror is too long, meaning it always puts the golfer on target regardless of how off-center they hit. This makes the golfer too reliant on the training aid and prevents them from correcting inaccuracies.
GoSports Golf Putting Alignment Mirror
This is a great option for anyone looking for an affordable and easy-to-use option. You are also free to choose the mirror that best suits your needs and is available in different sizes.
The guidelines on this mirror will help you hit the golf ball in a straight line, and the reflective surface allows you to adjust your shoulders and stance appropriately.
On the downside, this mirror doesn’t come with a bag or casing, meaning it’s more prone to scratches and damage.
The Final Verdict
These are some of the best putting mirrors worth your money. However, if you’re looking for a high-quality putting mirror training aid, you can’t go wrong with the PAR Perfect Mirror.
In our PAR Perfect review, we discovered that this putting mirror is unmatched and has all the necessary tools to improve your technique and more. This is an affordable but reliable golf putting aid that will help you clearly identify your errors and improve your pace, putting stroke, alignment, and stance. When you use the PAR Perfect Mirror, you’re guaranteed to see results!
The fantastic benefit of a divot action mat is that it mimics natural turf, enhances practice, and teaches proper divot-taking techniques. These kinds of mats are also durable and portable. However, there’s limited terrain variety, and it may not replicate all course conditions. You have to consider your training needs and preferences when choosing the mat.
For several months, I was hitting off of the Parto Pro Auto-Tee mat and experiencing decent performance. However, having spent a few moments on various online communities, I observed that many other players struggle with this mat because it reduces ball speed for fat shots. At this point, I decided to try the divot action simulator mat from FairwayPro.
In the last two weeks, I’ve experimented with different hitting configurations. My biggest realization was that my shot accuracy dramatically increased whenever I placed a 1/2-inch-thick carpet pad in the gap below the divot action. I had read about this technique on a forum and decided to try it with my divot mat.
It dawned on me that the performance of your shots also depends on the “give” of the hitting surface. In the rest of this article, I’ll walk you through a review of using a divot action mat and what you should know before using one.
What Is Special About Divot Action?
Many companies that make divot mats do not reveal much about what makes these mats perform the way they do. But with some extra research, I can understand the fundamental idea that makes these mats stand out.
The typical divot mat is made with Lexan material, a solid yet flexible polycarbonate or Perspex sheet (that is used in making riot shields and bullet-proof windows).
But in the case of the mat, they stick a piece of artificial turf on top and suspend it 10mm above ground using foam ‘risers.’
That way, you have a hitting surface that allows you to hit down and through with no bounce.
Divot Action Mat
$259.95
Dimensions: 22.99 x 17.01 x 1.02 inches
Weight: 11.2 pounds
Divot Design: Down-and-through simulates fairway hit with a divot
Installation Method: Stabilization panel folds under the stance mat
When a golf club impacts the FairwayPro golf mat system, it responds by sliding forward and giving way, just like natural grass does. The patented design with a sliding turf surface makes it stand out from many other divot mats. It allows you to hit down-and-through and compress the ball.
A lot has been said on various forums about the forgiving surface of this mat, which means it reduces the punishment of fat shots. But what I love most about it after using it for two weeks is the actual feedback, especially when I do my short game practice.
It’s also reversible for left-handed golfers, and the premium turf is replaceable.
Dimensions LxWxH
22.99 x 17.01 x 1.02 inches
Weight
11.2 Pounds
Divot design
Down-and-through simulates the feeling of hitting off the fairway and taking a divot.
Installation method
The stabilization panel folds under the stance mat.
The FairwayPro divot mat is made with aircraft-grade aluminum and stainless-steel springs rated to 1 million cycles, and it’s also reversible for left-handed golfers.
The design has a briefcase-style handle that flips out of the way when practicing. The nylon turf accepts a regular tee and has a sliding motion, which is good for longevity and is entirely replaceable.
Performance
The hitting action of the mat is decent, but there is a lot of inertia. If you expect soft turf that whips out on those well-watered courses you see on TV, you may be disappointed with the FairwayPro mat.
However, I’d choose this product over those challenging courses. It would have been better if both ends of this map had a built-in ramp to make scooping balls onto the surface easier. Also, if you’re used to slowing the unbending of grass or something to indicate a ball strike on the surface, this mat might be disappointing.
As with most divot mats, there’s limited terrain with the Fairway Pro. If you’re a tall golfer, the part you stand on isn’t long enough, so expect your feet to be off it, which may not hold down the mat. But thanks to the stabilization panel that folds under the stance mat,
Feedback
The fairway divot simulator golf mat has impressive feedback. When you use conventional mats, the club head may still bounce off the mat’s hard surface whenever you hit behind the ball. It would then slide into the ball. That way, you don’t get the correct feedback from the ball’s flight.
But while using the FairwayPro, it becomes obvious whenever you hit a fat shot because the impact will cause the turf surface to start sliding forward, and the club head will hit the ball with much less force.
This is a genuine feedback feeling that every golfer will appreciate, especially when you are dealing with fat shots. It also allows you to practice shaping different images.
The feedback mechanism you gain from the divot mat can improve your short and long games.
Pros And Cons of the FairwayPro Divot Mat
Generalizing the pros and cons of the single divot mat brand with other products is a long shot. But since they all share similar characteristics that make them divot mats, it’s not far-fetched to say these benefits and disadvantages apply to many divot mat models like the TrueStrike and Carl’s Place HotShot Golf Hitting Mat.
The frame of the FairwayPro Divot mat is made of plastic, which means it can get damaged if you hit it accidentally. While this has not happened to me yet,, I recommend you put your club in the middle to reduce the chances of this happening.
Final Thoughts On Using Divot Action Mats
Overall, hitting off the divot action mat simulator lets you feel the ball hit the club. It also allows you to quickly notice when you hit fat, given that the hitting surface is “floating” above the floor. Unlike regular mats, you can get additional protection and give, especially with steep swings.
I recommend a divot action mat for any beginner trying to sharpen their short and long games indoors, particularly concise shots below 100 yards.
I’m happy that my first experience with a divot action mat using the FairwayPro was good. This particular product can teach you how to hit the ball first with great feedback, dramatically reducing any pain you may have after each practice.
On conventional mats, you feel a bounce when you hit the ball, and if you suffer from elbow issues, you can injure yourself. But with a divot-action mat, the elbow has no jolt.
What do you think about divot-action mats? Would you consider the Fairway Pro? I’d love to hear your thoughts in the comment section below.
To create a DIY divot action mat, you must first gather materials like artificial turf, foam padding, Lexan polycarbonate sheet, and adhesive. Cut the Lexan polycarbonate sheet to the desired size, attach foam padding, and then cover it with artificial turf. I’ll walk you through the entire process in this article.
If you’re setting out to work through a Simulator installation in your space and have a flair for DIY, making a divot action mat will pique your interest. In my case, I started with a 10′ x 7′ net and needed a mat.
Apart from the cost savings that come with this attempt, I enjoy DIY work and decided to try my hand at a hitting strip. I have created this elaborate article to walk you through the entire process, from collecting supplies to the construction procedures, and then an analysis of my total cost for the project.
At the end of this article, you should be able to make a divot action mat in your home. Before we dive into the steps, let me share all the materials I used for the project.
During my research, I also realized that many golfers find it hard to locate these supplies, so I’ve included links to where you can buy them to save you the hassle of multiple clicks over the internet.
The supplies you need for a DIY Divot Action Mat
Image
Product
Detail
Price
Lexan polycarbonate sheet with 0.093 thickness
Clear protective film on both sides of the sheet. One side has printing. The other side is clear/frosted and hard to see.
faux grass made of high-quality synthetic material, Constructed of the highest quality polyethylene and polypropylene yarn, to ensure an extremely High-Density artificial grass.
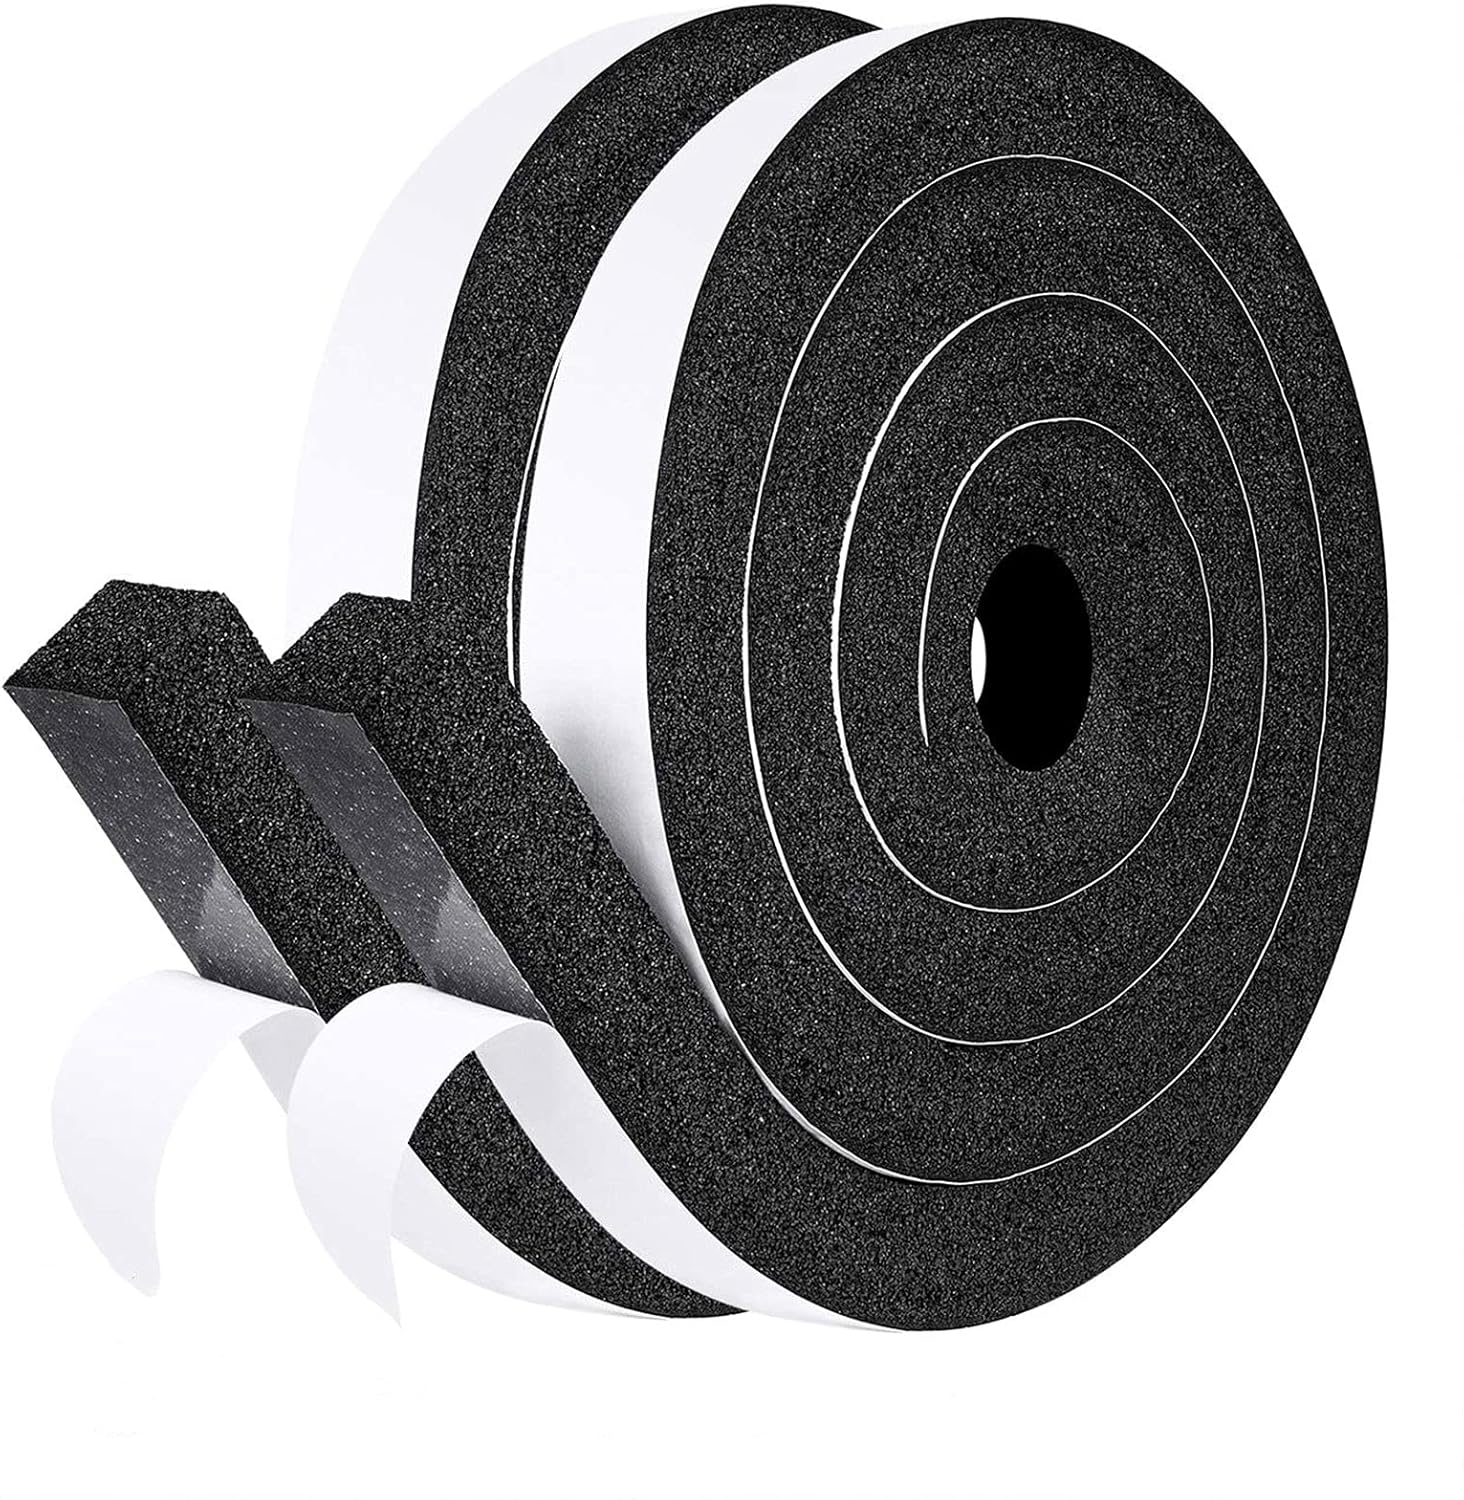
Low-density foam tape made of high elasticity and durability is flexible enough to be easily compressed flat to form a seal with any shape and can return to its former shape shortly
Caulking gun (optional, but I recommend it for easy application of adhesive)
The WORKPRO caulking gun allows for switching between high and low flow rates. Pull the trigger handle downwards; the high-setting thrust ratio is 18:1 for use with adhesive materials.
Meanwhile, you need a heavy-duty utility knife to cut the turf into shape. I also recommend you get this LitKiwi acrylic knife. I got it for $9. It would be helpful if your Lexan polycarbonate sheet weren’t precut to your preferred dimension. You can still use a box cutter as an alternative, especially if you’re in a pinch. But the idea is to use something sharp enough.
Total Investment: Based on these necessities, the ballpark amount I spent for this project is $183 (excluding delivery fees). After creating the mat, I had extra materials remaining to accommodate the creation of up to three others. Now, let’s proceed to the construction process.
Construction of a Divot Action Mat: A Step-by-Step Guide
Heads up: I cut the acrylic to the size I wanted (11’ by 32’). This dimension can vary depending on your preference, but during the step-by-step guide, I’ll show you how to cut the acrylic board in case you don’t get a pre-ordered size.
Now, the installation procedures:
Step 1
Take your piece of acrylic and peel off the first layer. In this case, we’re using a Lexan polycarbonate sheet with a thickness of 0.093. I chose this acrylic because it seems popular with many golfers and is more rigid than most other versions I’ve tried.
Note: Don’t take off the layer too early so that it stays clean. If it remains clean, the glue can stick better.
Step 2
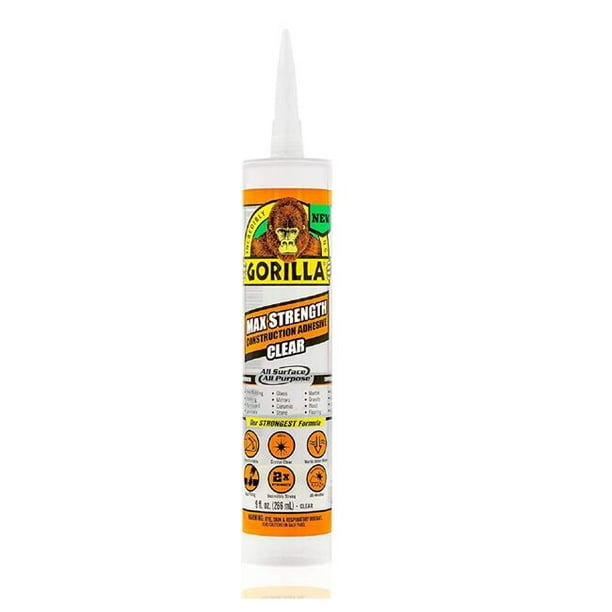
Apply the Adhesive to the exposed layer of the acrylic. Use the Gorilla Glue Max Strength Construction Adhesive in this case. I chose this model because it comes in a compact size, which offers more accessible applications than the handheld sizes. I recommend you use a caulking gun for easy application.
Note: As you apply the adhesive to the surface, you don’t have to spew it all over. Be generous with the glue. You don’t have to apply too much glue because this will only make it difficult when you want to change the turf after a few months of usage. I recommend using the spiral style as illustrated in the image below.:
Step 3
Attach the surface of the acrylic with glue to the turf. I like to make a piece of turf exceed the acrylic dimensions so I can easily trim the sides for a perfect fit using a box cutter.
First, lay the turf down, line up the edge with the sheet, and ensure it sits firmly. Use both hands to press the sheet against the turf. Better still, place something weighted and flat on top of the mat overnight to glue it firmly.
Step 4
Once it’s cured, it’s time to glue on the risers. In this case, use a cut-out piece of dense Gym matte foam, which is 1″ thick. Cut out two horizontal cubes of the material, one for each breathing edge of the mat.
When they are in position, before gluing with the adhesives, position the low-density foam on the surface. I recommend creating three strips, one at the center and the other two running along the sides.
When the risers are mocked up, you can lift each gym mat material and apply the glue. Fortunately, the flowing open-cell foam seal tape conveniently has a sticky side. So you can peel the backing off partially as you attach them to the mat.
Another great thing I love about this foam from the Fowong brand is that it also acts as a support. So when you strike each ball, you’ll get that nice give. It doesn’t spring back fast, allowing you to take that divot action.
Step 5
At this point, your custom-made DIY divot action mat is ready. But before usage, allow the glue to cure for a few hours. Flip the board over as you would when on the simulator floor so that the board’s weight can make the glue cure faster.
Practicing A Divot On A Mat
Practicing divots on a mat helps refine your iron shots and ball-striking skills. First, position the golf ball on the mat and set it up as you would for a regular trial, with proper stance and grip. Now follow these steps:
Take a controlled swing, focusing on hitting down on the ball.
Aim to contact the mat after striking the ball, simulating the divot action.
Your hands should lead the clubhead for a downward strike.
Bottom line
A divot action mat simulates the experience of taking a divot while hitting iron shots. A typical already-made model will consist of artificial turf layered over foam padding and sometimes even plywood.
When you hit down on the ball while using this mat, the turf mimics the sensation of taking a divot, helping you practice proper ball-striking technique and accuracy as you would on an actual golf course.
Attempting to create a DIY version of this mat was a fun project. It is worth doing, especially if you want to save money and have a knack for making things.
Of course, spending nearly $200 for all the necessary supplies was significant, but we must agree that it’s still an excellent saving over any manufactured mat worth using.
The best part is that you still have materials to make two to three more after completing the project.
If you are stuck in any of the procedures for making a divot action mat using the guidelines I provided above, feel free to indicate it in the comment section. I’ll be glad to help.
SkyTrak Launch Monitor and Flightscope Mevo are some of the best budget golf simulators due to their accuracy and versatility. SkyTrak’s advanced technology offers precise shot data, while Flightscope Mevo’s portability suits indoor and outdoor use. You can opt for options like OptiShot 2 (the Golf in a Box series) if you’re a casual player and need a complete simulator experience.
Affordability often stands between many golfers and their desire to have a personal golf simulator setup. Some players wish to enjoy a virtual golf experience but do not want to spend more than a thousand dollars.
If this is you, then this is the article for you. I have tested and conducted in-depth research into some of the most recommended simulators by golf coaches. I noticed that many of these budget-friendly options offer fewer features than the high-end units, but I’ve streamlined by ranking only the ones that provide an excellent experience for the cost.
Based on my testing, research, and experience, here are my top selections for affordable golf simulators:
Golf Simulators
Why I Recommend
Price*
Buy This Golf Simulator
SkyTrak Launch Monitor
Best Overall – great value for an affordable price
In the rest of this article, I will walk you through detailed information on these golf simulators and the value they offer for their price. However, before we dive in, I have to tell you that there are some essential features you won’t find in these budget-friendly options.
What You Will Miss Out On By Going For Budget-Friendly Simulators
Using a Golf simulator is primarily to sharpen our game and get better at our swing. All golf simulators are manufactured with this value in mind, but you need to understand that cheap golf simulators offer limited experience.
These affordable options can provide you with some shot and club data, access to simulation software, and maybe a net or mat, but not much more.
If you’re particular about spending only a few hundred dollars on golf simulators, then it’s impossible to have complete enclosures, projectors, and impact screens.
Sometimes, you must settle for a launch monitor and hook it up with a projector.
In this guide, I’ve tried to include golf simulators at a range of prices under the $1000 mark and a little higher. But nothing as expensive as the $7,000 to $20,000 options.
While picking these affordable options, I prioritized affordability, accuracy, versatility, and ease of use. Each option is guaranteed to improve your game and provide entertainment value.
1. SkyTrak Launch Monitor
SkyTrak Launch Monitor
$1995
SkyTrak Personal Launch Monitor and Golf Simulator offers an innovative and portable system for accurate golf training and improvement.
Provides immediate shot launch data and 3D ball flight visual feedback through high-speed photography, including key metrics like ball speed, launch angle, and spin rates.
Integrates seamlessly with top Golf Course Simulation Partners such as the World Golf Tour, TruGolf E6, and The Golf Club Game, allowing virtual play on renowned courses (Additional fees apply).
The compact unit connects wirelessly to compatible devices, making it ideal for indoor training or practice away from the course. It includes a built-in rechargeable battery with up to 4 hours of continuous use.
Purchase includes a 30-day trial of the SkyTrak Game Improvement Software Package, offering enhanced practice options and engaging play for game improvement.
If you want a low-cost virtual experience for your swings, I recommend the SkyTrak Launch Monitor. For less than $2,000, you get an accurate reading of your ball speed, distance (carry and total), launch angle, club speed, spin rates, and more.
It’s a fantastic option, particularly if you’re an avid golfer more interested in your game improvement than entertainment. You can connect the high-quality launch monitor wirelessly to any compatible mobile device and instantly receive data and 3D visualization of the ball flight.
It works with the World Golf Tour, TruGolf E6, and The Golf Club Game software. I also like that the battery lasts up to 4 hours of continuous use. It’s also rechargeable.
It is compact and works well for smaller spaces. For a whole simulation experience, you can pair it with accessories like a net, mat, and projector if you already have them.
What I like about this device
Real-time shot launch data
It comes with a 30-day trial of game improvement software
You can pair it with accessories like a mat, net, and projector for a complete simulator experience
The setup for Flightscope Mevo is so straightforward. I’m recommending it for new golfers experiencing virtual golf play for the first time.
Although it doesn’t include lateral data like the Mevo+ Portable Golf Launch Monitor and doesn’t have up to 17 practice ranges, it’s a decent option that works just fine.
You only have to pull out the stand, power on the monitor, connect it to the Mevo app, and then start stroking. Flightscope recommends placing the device 6 feet behind the area where you take the shots for optimal performance.
The device allows you to control the length of your video clips by setting pre- and post-trigger durations.
Flightscope Mevo is another affordable SIM option if you’re on a budget. It has eight data parameters and is portable enough to make it easy to practice anywhere.
What I like about this device
Impressive appearance
Works with the FS Golf app tracking
You can record slow-motion videos
Extremely easy to use. Ideal for first-time sim users.
What I don’t like about this device
It only works with a compatible phone for stats display and video recording.
Unlike other options, the TruGolf Mini simulates play with a shortened swing stick with an attached sensor. To my surprise, this unit was super accurate for the provided data. There isn’t much of a gap between its performance and that of severe golf simulators and launch monitors.
However, there are limitations in analyzing ball metrics since there’s no actual ball striking with these options.
Also, I don’t recommend pairing this with hitting a driver because generating as much speed through the swing is difficult.
The TrueGolf pairs with the E6 Connect software, which delivers high-quality graphics. Hook this device up with your projector, or watch your performance from your Tablet or phone.
What I like about this sim
It’s easy and quick to set up, incredibly mobile
Audible simulated impact sound
High-quality E6 graphics
What I don’t like about this Sims
No actual ball striking for spin accessibility
Essential E6 subscription that is limited to 5 golf courses
4. OptiShot 2 Golf Simulator: Golf In A Box Series
OptiShot 2 Golf Simulator: Golf In A Box Series
Sub Title
Get everything you need with the OptiShot2 simulator, software, USB cable, adjustable rubber tees, practice golf balls, a golf mat, a net return simulator screen, and a short-throw HD projector.
The infrared sensor tracks club speed, carry distance, face angle, path, face contact, and tempo for accurate feedback on 15 premium real-world golf courses.
Enjoy indoor golf simulation with online/offline gameplay on a 7’6”x 8’x 3’6” net return simulator screen for immersive visuals.
Compatible with Windows 8, 10, or 11, featuring 3 GB of HDD storage, 4 GB of RAM, and a USB 2.0 Port. Not compatible with MacOS.
It comes with a 1-year warranty on the OptiShot2 Simulator (base, electronics, housing), and a 30-day warranty on accessories like golf mat, net, USB cable, tees, foam balls, and turf.
I love the OptiShot 2 because it comes with every accessory you need for a complete simulation experience, making it an excellent value for the price. However, it doesn’t deliver accurate data, so I recommend it for casual players, family, or any purpose outside of serious training.
OptiShot 2 has been a top-selling low-cost golf simulator system for a long time. It comes with an 8.5-foot-tall net and hitting mat for a more fairway feel. It’s also easy to set up; you only need to unpack the hitting mat and the net, install the software, and start striking.
For optimal performance, your ceiling distance has to be at least 9 feet.
What I like about this device
It comes with everything you need for a complete simulator experience
It is ideal for casual players and entertainment purposes with family.
Smart Control: Seamlessly operate the device using both intuitive app controls and voice commands for a hassle-free experience.
Unwavering Precision: Experience unparalleled accuracy with club head speed precision within plus/- 3 mph, ball speed accuracy within plus/- 1 mph, launch angle accuracy within plus/- 1 degree, and launch direction accuracy within plus/minus 1 degree.
Progressive Training: Engage training mode to closely monitor club-specific statistics and view shot dispersion graphs, aiding you in identifying areas for improvement.
Visual Swing Analysis: Capture your swings in auto-recorded video clips enriched with integrated metrics when linked with the Garmin Golf app.
Extended Battery Life: Stay on top of your game with an impressive battery life of up to 10 hours, ensuring ample practice time without interruptions.
Instead of splurging multiple thousand dollars on a Skytrack Full Enclosure high-end simulator, you only need the Garmin app and an impact screen.
It is one of the most accurate simulators for the meager cost I’ve experienced in my testing. The best part is that it can function as a launch monitor or a simulator to provide a broad range of data, such as ball speed, club head speed, launch angle, launch direction, and more.
It has a waterproof rating of IPX7, which means you can also use it outdoors. You also have access to 42,000 virtual courses if you subscribe to the app’s premium version.
What I like about this device
Works with E6 CONNECT Software like TruGolf
It comes with a tripod stand, phone mount, and carry case with a charger
The SLX MicroSim on this SwingLogic is impressively accurate compared to most other options in its price range. I also like the ultra-realistic (4K) graphics, which are entertaining.
Like the TruGolf Mini, you don’t work with a club or golf ball using the SwingLogic SLC MicroSim.
It comes with a stick that picks up your swing path, face position, ball speed, and more. If you’re struggling with an over-the-top golf swing, this golf simulator can help you correct your path.
It’s an amazingly affordable option and will work just fine.
What I like about this device
Ideal for training and improving swing path, speed, and more.
Works anywhere, highly mobile
What I don’t like about this device
No actual ball striking, so you sacrifice that feel.
It’s not always easy to find an absolute Golf simulator that fills in the space for all your desires at a low cost. However, for basic shot tracking, reliable data, and high performance, there are a few models you can rely on.
If you’re looking for a more accurate performance analysis and are not playing courses, I recommend you stick with a launch monitor and pair it with accessories like a projector, net, and mat for indoor use. The Skytrack Launch Monitor is an excellent choice.
However, casual players prefer the simplicity and relatively low price range of options like TruGolf Mini and Optishot 2. Many golfers report that they eventually dump Optishot as it is considered a toy. So I won’t recommend it for training purposes.
My two top recommendations for budget-conscious golfers looking for golf simulators remain the Skytrak launch monitor and Flightscope Mevo+.
The Trugolf Mini and FlightScope Mevo+ Retractable Golf Simulator Package stand out for small spaces due to their compact design, accurate ball tracking, and comprehensive simulation software. The Trugolf Mini offers precise analytics and a fast, portable setup. Meanwhile, the FlightScope Mevo+ boasts accurate data collection and a retractable screen, making it an ideal choice for realistic golf simulation in limited areas.
However, the best option for you will depend on whether you’re interested in playing simulated courses or want a place to practice your swing and see an accurate ball flight.
The extra room of the apartment I recently moved into measures 10’ x 12’ with 10’ high ceilings. It’s enough to swing most clubs comfortably, but I would be hitting about 6-7 feet from the impact screen. With this in mind, the TruGolf Mini answered my prayer. While there’s no actual ball striking, the portability, precise shot tracking, and immersive graphics were huge pluses.
Over time, I tested a few other compact SIMs and was able to compare their functionality thus far. I’ve been helping indoor players match with great golf sims over the last few years on online communities, and some of the common questions I’m often asked are:
Will launch monitors read the ball’s flight accurately in small spaces?
Most sims recommend a bigger space than my room, but are any better-suited products for small spaces?
What features do you look for in picking a golf simulator for a small space?
I have prepared this article to review and recommend five of the best golf simulators I’ve used for small spaces. So if you’re in such a situation, these options will match your preferences effortlessly. Here is my top recommendation:
The SIG8 package is another viable option for players with indoor space limitations. It is the same as the celebrated SIG10 package, only that SIG8 has an 8-foot-wide enclosure (as opposed to 10 feet), and there’s no 4×10 hitting mat option since the width is reduced.
You can already see that it’s a smaller option without sacrificing the quality of data tracking and performance you would get from the SIG10.
If your small space can accommodate a screen and hitting area, the SkyTrak Launch Monitor and a premium SIG8 simulator screen and enclosure (designed by The Indoor Golf Shop) are fantastic options.
The product comes with a golf simulator projector and landing pad turf. 5’x5′, 4’x7′, or complete flooring hitting mat (your choice), a ceiling projector mount Side barrier netting, and a SkyTrak metal protective case
What I like about this sim
Indoor Golf Shop’s smallest & most compact SkyTrak package
Voted Best Value by Golf Digest
Photometric launch monitor, which translates to higher resolution and dynamic range
Measures ball data: speed, launch angle, spin, and more.
Price: $7,499 for the introductory price (with an FSX 2020 software license with ten courses).
SPACE REQUIREMENT: at least 9’W x 9’H x 10’D for the swing, not the device.
The GC3 tracking device from Foresight Sport is another excellent indoor sim that works in small spaces. According to Foresight Sports, you should have at least 7’W x 7’H x 10’D as the absolute minimum, which is only related to how much space it takes to swing a driver and not how much space the GC3 needs to read shots.
The company calls the GC3 “the personal launch monitor you’ve been waiting for.” It filled the gap where the old stereoscopic GC2 system couldn’t and ushered in the revolutionary GCQuad model.
Beyond providing ball and club data measurements, you can hook up the GC3 to full golf simulation with Foresight Sports’ in-house FSX 2020 and the world-class E6 CONNECT.
The GC3 launch monitor exists in the GC3 pricing form or the Bushnell Launch Pro integration pricing system. The base price of the GC3 launch monitor is $7000, including an FSX 2020 software license with ten courses.
What I like about this sim
Practically the same accuracy and reliability as the GCQuad
Fantastic value for money
Sleek design
Works for both indoors and outdoors.
Easy to use
What I don’t like about this Sims
Depending on your location, it may not be available
It doesn’t come with a creative Golf 3D integration
You can’t measure quite as much club data as when using GCQuad (or GC2 with an HMT)
Space REQUIREMENT: Space enough to swing the stick comfortably.
The Trugolf Mini is an updated version of the Trugolf Home Swing Studio. It’s a 2-foot-long golf club (with no actual clubhead) with a sensor. This is your option if you’re more particular about compatibility and affordability. Another cool thing about these SIMs is that you can have the display on your iPad or phone or present it on a large screen by connecting to a projector.
I wrote a separate review of my experience with the TruGolf Mini Sims, mentioning that it’s the best option for players with limited space working on tempo or swing path.
The 2-foot-long golf club runs on the E6 platform. You can plug it into the grip. The club has a Bluetooth sensor that captures four crucial swing details. It calculates and measures the simulated clubhead path, face angle at impact, speed, and angle of attack.
I won’t recommend this option if you’re interested in ball-striking improvement since it may not give you the information you want for each shot you take.
What I like about this sim
It’s easy and quick to set up
It’s the most affordable option on this list
It’s super mobile and works well for spaces like a studio, garage, room, and toilet.
Audible simulated impact sound
High-quality E6 graphics
What I don’t like about this Sims
No simulated face to be sure if the club is facing the square before making a swing
No actual ball striking for spin accessibility
Essential E6 subscription that is limited to 5 golf courses
Space REQUIREMENT: 15′-16′ depth, 7-8′ behind the ball (straight down the target line).
Mevo+ has rapidly become one of the most popular launch monitors. Since it was announced at the 2020 PGA Show, it has welcomed different hardware updates for new ball tracking data. It is accurate, portable, and provides beneficial data.
If you have the Mevo+, you only need a 7-8′ space behind the ball (straight down the target line). The simulator also requires 8 feet of ball flight to function correctly. You can hook this device up with a projector to have it on a bigger screen and save space that you would have used for an actual launch monitor.
One thing I love about this option is that there are no width or height requirements. So no matter the limited space you have, this will work. But ideally, you want enough room to swing all your clubs comfortably. Around 10′ in width and 9′ in height is okay.
What I like about this simulator
Despite the compatibility, it provides super accurate and reliable performance
User-friendly interface and app
Wide range of data and metrics beyond the essential carry and total distance, ball speed & club speed, and spin rate & axis.
Excellent simulation options.
What I don’t like about this Sims
If you’re a casual player, this unit can come off as overwhelming.
Many reviews have pointed out that the Flightscope Mevo + is slightly less accurate with drivers.
Space REQUIREMENT: 18 feet long by 15 feet wide and 10 feet high for optimal performance
The GC quad requires no specific space dimension, only one that will allow a comfortable swing. As long as GC Quad has a good view of the ball and the ‘viewing window’ just after impact, you have enough space to use it indoors.
It has to view the ball at rest and the first few inches of its flight. It uses high-speed cameras like SkyTrack to take numerous images of the ball’s impact on the club and the initial flight.
The onboard computer then analyzes the images to calculate ball flight parameters. You can magnify the view with your projector or on your phone.
The only factors that will determine the space of your room are your intended aim and bounce back.
What I like about this sim
You only need to place it on the ground in line with your ball and start striking.
If your apartment doesn’t have room to set up a net and hit balls, I recommend the Trugolf Mini. In a situation like that, the idea is to get a simulator that allows you to play using only a swing stick. There may be limitations on feel since there’s no ball striking, but the compatibility and affordability are huge pluses.
However, if you’re more interested in systems that can pick up contact quality when a ball should be involved, consider the FlightScope Mevo+ Retractable Golf Simulator Package or the SkyTrak Plus SIG8 Golf Simulator Package.
When shopping for golf simulations for my limited space, I wanted something to help me improve my game. That’s the priority for any golfer who has to play indoors.
There are a lot of simulators out there that can help you accomplish that. But you must give up a few aspects, like broader data tracking and add-on physical simulation apparatus.
Let me know in the comments which golf simulators appeal more to you in a small space and if other options can make this list that I did not include.
The Vice Pro golf ball has a three-piece construction, a cast urethane cover, and a low-compression core; it is thus designed for golfers with swing speeds between 80 and 100 mph. The Vice Pro Plus offers a four-piece ball and a cast urethane cover with a high Energy Speed Core and best suits golfers with swing speeds above 100 mph.
While the Vice Golf Ball has gained popularity in recent years, it hasn’t convinced me to abandon my loyalty to the Titleist Pro V1. Initially, I switched to the Vice Pro and later the Pro Plus primarily due to cost considerations. However, I must admit that these two golf balls have greatly enhanced my overall golfing experience.
I have prepared this article to place the Vice Pro and Pro Plus side by side, distinguishing their specific offerings and how they performed individually in my launch monitor testing compared to other Tour-style balls on various relevant factors such as feel, distance, and spin.
The first observation of distinction that caught my attention between the Vice Pro and Vice Pro Plus is that the former keeps up with premium brands of the tee. They feel great and do spin, but pitching, and chipping spin is about 10–15% lower than my previous Pro V1x.
On the other hand, the Vice Pro Plus does a better job of offering great tee-to-green distance for high-swing speed players. It is the better option for those who want to reduce spin throughout the game, just like the Pro v1x Left Dash.
Here’s an overview of the comparison between the Vice Pro and Pro Plus golf balls:
The design of the Vice Pro is a 3-piece construction with 318 dimples. This is already a hint of its stable trajectory. Its counterpart, Vice Pro Plus, has a 4-Piece construction with 336 dimples, making it a perfect choice for speed and a lowered trajectory.
But in construction and design, both balls share the same soft and durable cast urethane cover. They are also offered in various colors beyond the standard white and yellow.
Compression and Feel
I did not expect any massive gap between both balls in terms of compression or feel, given that they share similar features that would have set them apart in this category. However, I noticed they had a slightly lower pitch and were quieter upon impact.
The ‘tock’ impact of the Vice Pro Plus is also pleasant, but the Pro does it better. Meanwhile, I felt more firmness and responsiveness while handling the Pro Plus. The feedback on strike quality was better than the Pro.
But both models feel similar to other Tour-style balls, and none are clicky or hard off the clubface.
Spin and Control
The Vice Pro is designed to offer low spin for the driver, providing more distance and a piercing trajectory. However, it still generates enough spin on iron shots to give control and stopping power to the greens.
On the other hand, the Vice Pro Plus generates a slightly higher spin off the driver, which can lead to a lower launch angle and more spin on iron shots. This extra spin is a bonus if you need more stopping power on approach shots.
Another thing I noticed while testing these two balls is that the Vice Pro provides a good balance of distance and control. I’m a player who values a penetrating ball flight with a controlled spin, so this was a good sell for me.
However, the higher spin rates of the Vice Pro Plus will appeal more to players who want precise shot shaping and stopping power on the greens.
As you know, spin is crucial for distance and shot-shaping abilities. With the Vice Pro, the low spin off the driver can significantly reduce unwanted side spin, which translates to a straighter ball flight and potentially more distance.
Distance and Flight
How these balls fly based on your swing speed is the principal factor that sets them apart. The Vice Golf brand recommends that you go with the Vice Pro Plus if you have a swing speed over 110 mph because it means you can compress the ball for a longer drive properly.
But if your swing speed is between 95 and 100 mph, stick with the Vice Pro golf ball. Let me mention here that I did not notice any significant difference in speed or spin between these models in this regard, but it’s worth noting that the Pro Plus tends to fly a little lower on the course.
For some players, it may be a different experience. So it all depends on your playing style. But one thing is sure: both models are solid off the driver for speed and spin, and they will perform pretty well when compared with regular tour balls.
Pricing and Availability
On the Vice Golf website, The Vive Pro sells for $39 per dozen and is available in white, Neon Red, Neon Lime, Pro ice blue, and pro shade red plus orange.
Meanwhile, the Vice Pro Plus sells for $32 per dozen, but it’s only available in white, neon lime, neon red, and shade of yellow or orange.
Final Remarks
After testing the Vice Pro and Vice Pro Plus, these four things stood out:
You will enjoy the Vice Pro more if you value more feel and control around the greens
The Vice Pro Plus will appeal more to players who want distance and more penetrating ball flight
Your swing speed and playing styles will ultimately determine which is best for you
They are both budget-friendly options compared to most competitors offering similar value.
While you’re here, I recommend you use the Vice brand golf ball fitting tool on their website. It can help you pick the one that fits your game better.
The Bombtech Golf 3.0 Driver is not a winner on all levels, but golfers who don’t want to spend a ton of money on a driver but want something that can hit the ball far down the fairway will find this product satisfactory. This is not for you if you wish for an adjustable name-brand golf club. After testing, I realized that the BombTech 3.0 Driver is a moderately priced iron for game improvement—nothing more, nothing less.
In 2019, I first stumbled on PGA Golf professional Andrew Ainsworth’s video about the Bombtech 3.0 driver. My first impression about this driver was that it’s not for everyone. Any player would easily get attracted by the neon/lime green and matte black design, but there’s more than meets the eye.
We spend thousands of dollars (if not more) to use golf clubs produced by the big brands. But with a $397 (now $157) price point, BombTech stormed the market with its premium driver and wood offering. But the real question is: does it compete with the powerful golf driver brands? You’ll find out in this review.
Bombtech 3.0
$186
The Bombtech is evenly distributed and allows you to take huge swings without exerting power.
Key Specifications of the BombTech 3.0 Driver Club Head
Face Material
Titanium
Head Weight
200 grams
Face Angle
1* closed
Hosel Depth
38mm
Hosel Diameter
0.335”
Size
450cc
Lie
59 degrees
Dexterity
Right Handed
The Design
Head-wise, the driver has three non-adjustable weights: one in the heel, one in the toe, and one in the back, which, according to the manufacturer, increase forgiveness, reduce off-center hits, and lower spin.
The unsupported face design increases COR (coefficient of restitution) across the entire face, and there’s a more prominent sweet spot resulting from a deeper CG and higher MOI.
It also features a generous sole radius that allows the club head to ease through versatile turf conditions.
Bombtech 3.0 uses a premium shaft. The manufacturer doesn’t specify who makes it, but it’s offered in only two models: a 9-degree stiff and a 10.5-degree regular.
The shaft has a torn velvet-style grip that is low-girdled with the Bombtech logos. Here are the shaft specifications:
Torque
3.8
Launch
Mid-High
Kick point
Mid
Weight
Regular 54 G, Stiff 56
Driver Length
45.75 inches
The Appearance
Regarding golf club design, I’ve always leaned towards a more minimalist approach, and that’s exactly what BombTech has embraced.
The face of the driver shares the same black color as the crown and features lime green paint in the grooves. This combination effectively frames the ball, providing a visually pleasing setup, which is ultimately what matters most.
The crown of the 3.0 Grenade driver sports an intriguing choice of matte black, in contrast to the reflective black finish on the club’s sole. Opting for matte black has advantages; it significantly reduces glare compared to the matte white and reflective black crowns I’ve tested.
Surprisingly, the crown has no alignment aid, and I’m fine with that. I’ve always preferred subtle alignment aids like TaylorMade’s discreet “T” logo.
Switching to a driver without an alignment aid posed no challenges for me. If anything, it compelled me to focus even more on ensuring the face was square and adequately aligned, but I can say this for other players.
I also appreciate that BombTech doesn’t copy TaylorMade or Adams by incorporating significant, ostentatious markings and shapes to assist with alignment.
Frankly, I’m not convinced that such embellishments serve any purpose besides appearing garish.
The Performance
The grip of the Bombtech 3.0 driver is solid. I also like the light and balanced feel. Unlike quite a few drivers from big names I’ve tested in the past, the weight of the Bombtech feels very evenly distributed, allowing me to take big swings without exerting power.
I mainly compared my performance with the Bombtech 3.0 and TaylorMade drivers. The result of my few shots summarizes that the Bombtech driver gave me the highest ball flight, and the margin differences were apparent.
However, the lack of adjustment proved to be a hitch in my game.
Since there were no hosel adjustments, no weights to move around, and no sole plate to tinker with, it was hard to get precise shot preferences.
The sound was also a problem. I used to think my Cally Epic Flash SZ had a loud sound upon impact, but the Bombtech 3.0 driver does worse.
Nevertheless, the unique selling point of this driver, in terms of performance and Playability, has to be consistency.
You will enjoy the straightness of your shots. And considering the affordable price points, this is easily among the best starter sets for any player. You could replace them quickly.
The 60-day on-course guarantee
Speaking of replacement, another notable aspect of considering this driver is that the manufacturer not only gives you a golf driver and a free three wood for less than the price of a retail driver, but a 60-day guarantee also backs it.
I have realized that not all golfers will be comfortable throwing money into golf equipment made by a new brand name, no matter how “affordable” the items may be.
But Bombtech has been on the market for a long time, and its 3.0 golf driver has attracted colorful reviews.
Overall, the Bombtech Golf 3.0 driver is a decent option if you’re looking for a great club without any gadgetry that will get the job done and deliver distance. This “game improvement driver” is also a fantastic option for budget-conscious players.
The aesthetic and purchase guarantee is appealing and live up to the hype of their advertisement. However, after repeatedly testing this driver, I find it difficult to pinpoint where Bombtech Grenade 3.0 outperforms the significant brand drivers in the market.
The Jones Trouper R golf bag has a lightweight design. Its durable construction and ample storage space have attracted the praise of many golfers. However, the lack of full-length dividers and X-harness carry straps are areas to frown at. Still, Trouper R remains an excellent choice for golfers prioritizing portability, functionality, and a minimalist aesthetic.
I’ve been a fan of the Jones Sports Company even before they rolled out the Utility Trouper 2.0 golf bag two years ago. Unlike Sun Mountain or Callaway, the Jones Golf Bag brand has constantly introduced something fresh with new products, which has interested me in every newly released bag.
In this article, I will walk you through the features of the Utility Trouper R golf bag, how it performs on golf courses, its significant pros and cons, and other relevant areas to help you decide if it’s worth your consideration.
Jones Trouper R Golf Bag Specifications Summary
Water-resistant, recycled F35-R ripstop fabric
11″ x 7″, 5-way top (fits 14 clubs even with oversized grips)
7 Pockets
Large insulated front cooler pocket
2 Fleece-lined valuable compartments
It comes with a Rain Hood
36” in length
Double shoulder straps are longer to allow maximum comfort
Weight: 5 lbs
Available in 12 color options: Clay Green, Moon Gray, Greyson, Sienna. White, Olive, Navy Pink, Sonoma, Le Creme, Fern, Black, and Charcoal.
The Trouper R is an improvement from the previous version in many ways. However, the prominent areas of advancement that make the golf bag stand out are the dividers, pockets, carry straps, and built-in features that are not present in most other competitors or even Jone’s previous models.
1. The Dividers
The Jones Trouper R golf bag features five dividers: one for the wedges at the bottom, two in the middle for your irons, and one above the irons compartment for woods. The manufacturer also included one divider for the putter well, which, in my opinion, is wide enough. At least I don’t get to mash my headcover each time, as I do in my Sun Mountain Sync Golf Cart Bag.
2. The Pockets
One exciting thing about the Jones Trouper R golf bag is the storage space in the large side pocket.
You can put a rain cover, jacket, or pullover in this side pocket. I also love the secret zipper that allows you access to the bottom of the bag. Sometimes, you can mistakenly drop stuff into the top, and this pocket is functional.
Also, on the side, you have two softly lined pockets allowing you to store other valuables, such as your wallet, keys, rangefinder, and so on, while on the golf course.
First side pocket
A pretty large area outside the cooler pocket as well, so there is no shortage of room
The idea for putting golf balls but can also accommodate other items
Second side pocket
Features a small mesh stretchy piece at the bottom to prevent items from sliding out. However, it’s not an open spot in the bag.
The main pocket for versatile storage functionality
Items like your extra gloves, sunscreen, and practice items can fit into the medium-side pocket of the Jones Trouper R.
Cooler pocket
This is an insulation-lined pocket where you can prevent items from melting on a hot day at the golf course, but it also doubles as a shared storage space.
I find it the perfect place to store various snacks and drinks that I’ll later eat after a few games.
3. The Carry Straps
If you’re familiar with Jones, you’ll agree that they have repeated the left-arm design of the carry strap on all variant bags. However, they did something different with the Trouper R model.
The right one is shaped differently so that you can use it as a one-strap carry or a backpack style.
I prefer the backpack style, and I also like that the straps on the Trouper are satisfactorily padded. But they did too much on the thickness, giving a little away for comfort. But it does a better job than most other golf bags (whispers: Ping 4 Series). The Adjustment of the strap is also seamless. No complaints.
Unlike previous versions, the Jones Trouper R model also allows another small bag to be clipped on externally, allowing external storage for items.
4. The built-in carabiner
The Jones Trouper R comes with a built-in carabiner. This presents a place for storing items like a range finder, towel, brush, divot tool, or an extra ball when riding. But it’s also another testament that the brand was intent on solving the storage space issue many golf bags have failed to address in the last few years.
5. The legs
When picking a golf bag, one of the features that makes it a 10 is the legs. They must be stable, solid, durable, and easy to snap in and out of. Fortunately, these are the attributes of the Jones Trouper R golf bag legs.
The bag also has an umbrella slide-in compartment, and the other handles are well-placed.
6. The Appearance
The Trouper R has the typical Jones fashion: a minimal approach to design and not a screaming billboard (which is good for players who do not like extravagant flaunting or advertising of the brand). The logo is also minimal.
They also offer affordable customization options to personalize the bag’s look to your preferences.
The new “R” bags are also made with recycled material, which makes them easier to sell.
It is available in twelve excellent colors with little to no branding.
Clay Green
Moon Gray
Greyson
Sienna
White
Olive
Navy Pink
Sonoma
Le Creme
Fern
Black
Charcoal.
Jones R Trouper Pros and Cons
Pros
Cons
Lightweight and easy to carry
Limited storage space compared to larger bags
Sleek and stylish design
Single strap design may not suit everyone’s taste
Durable construction
Limited color options
Comfortable shoulder strap
Lack of full-length dividers for club organization
What are golfers saying about the Jones Trouper R?
Jones has earned the high-quality title with their Utility golf bags, so the Trouper R is no surprise other than a fantastic alternative to the other big names currently dominating the market.
After combing several review metrics and customer ratings, I observed that most players who use the Trouper R are raving about the many pocket combinations and the practicality of the drawstring or magnetic pouch.
However, I did notice that the carry straps appeared to be the most talked-about issue with the Trouper R. While it has two straps, some players don’t find it as comfortable as some carry-on bags.
But the praise outweighs the criticism. On Amazon alone, about 80 percent of golfers who have purchased the Jones Trouper R are satisfied with the material, construction, functionality, and performance. Meanwhile, reservations about carry straps are expressed in the cross-section of golf bag communities.
Comparison of Jones Trouper R With Alternatives
On many occasions, the Jones Trouper R has been placed head-to-head with the PING New Hoofer Stand Golf Bag, chiefly because the latter compensates for where the Trouper R lags. But we should remind ourselves that there’s no perfect product out there.
I have used so many golf bags over the years that I’ve lost count. But the top three bags I can say serve as worthy alternatives are:
Vessel Player IV Pro
PING New Hoofer Stand Golf Bag
Stitch Golf SL2 Bag
Vessel Player IV Pro
Vessel Player IV Pro
Product Specs
SPECS: Material: Premium Synthetic Leather
Top Diameter: 10.5″
Weight: Approximately 5.5 lbs
Divider System: 6-way top with full-length dividers
Regarding the luxury feel and premium materials, the Vessel Player IV Pro gets mentioned a lot. However, the Trouper R outshines it when it comes to a lightweight bag.
The golf bag features a nylon rain hood, which packs much smaller and is lighter than the standard ones but still lands on the heavier side of the divide.
PING New Hoofer Stand Golf Bag
PING New Hoofer Stand Golf Bag
Stand Type: 4-way top with anti-flex walls
Number of Dividers: 4
Weight: Approximately 5.5 pounds
Strap System: Dual shoulder straps with cushioned pads
Pockets: 12 total pockets, including an apparel pocket, water bottle pocket, range finder pocket, and valuables pocket
The PING New Hoofer Stand Golf Bag is infamous for its divider issues. I also have reservations about the ease of getting the clubs in and out of the bag. But the bag has practical features that make life on the golf course easier.
It has very comfortable shoulder straps, sturdy build quality, looks and feels premium, and even plenty of thoughtful touches you may not find in the Trouper R. However, the 2.5-gram weight of the Ping Hoofer is too heavy for a stand bag, and it’s not waterproof.
The Stitch Golf SL2 Bag boasts premium materials, excellent craftsmanship, and a sleek design. It offers abundant storage space, including multiple pockets and compartments. The bag also features a comfortable, ergonomic strap system and full-length dividers to protect your clubs. However, it is a bit heavier compared to the Trouper R.
On the other hand, the Jones Trouper R golf bag stands out for its lightweight construction and minimalist aesthetic. It is straightforward to carry and features comfortable shoulder straps. The Trouper R may have fewer pockets compared to the SL2 Bag, but it compensates with its durability and simplicity.
The Jones Trouper R will be an excellent choice if you prioritize lightweight portability and a minimalist design. However, if you value premium materials, extensive storage, and organizational features, the Stitch Golf SL2 Bag might be your better option.
My Final Opinion
Overall, I love what Jones did in Trouper R. They have redefined what it means to have a golf bag with ‘enough’ storage space for golf essentials and other valuables.
It’s a great blend of clean looks and a perfect utilitarian style, just like the name of its lineup. Also, not every player wants to be a walking golf bag advertisement. So I love the minimal design of this bag.
Would I repurchase one?
Yes, and I can recommend someone hunting for the best golf bag to buy this Trouper R. However, deep down, I frown at the carry straps because they are tricky to use as X-harnesses. But if you’re okay slinging it over one shoulder, there’s no issue.
I also see no reason why this product shouldn’t be ranked in the top ten.
Black Level golf balls are made in South Korea by the BLACK LEVEL brand. This brand also produces other golf products, especially artistic golf gloves. The Black Level golf balls come in different colors and models, but the brand does not have a known online footprint, thus making their product nearly impossible to find online.
Black Level is not a popular name for golf balls or equipment. However, in recent times, people have been asking questions about these spooky, mysterious balls. Some golfers have narrated how they randomly find them on golf courses and wonder why they are unpopular online or in stores.
I purchased a set of used golf clubs last year, and a bunch of white and pink Black Level balls came with it. After losing all the balls on the golf course a couple of months later, I realized that it’s a rare product, and I was even lucky to have them.
I was curious about this brand and whether it’s a rarity or an exclusivity. Do they sell to a specific group of people? I contacted several Korean golf suppliers and walked into local golf retailers to ask questions.
Unfortunately, I wasn’t able to meet enough players and sellers who keep these brands on hand, but the good news is that I was able to gather as much information on the Black Level brand, their golf ball products, why they seem hard to find, and how you can get them. Remember to stick to the end of this article, as I’ll share essential details you might need.
The Company Behind Black Level Golf Balls
Black Level golf balls are made by the brand “BLACK LEVEL” in South Korea. I could not find them on the registered list of Korean golf companies, but word of mouth says they are an established golf equipment brand in Asia offering a wide array of golf equipment solutions, including golf balls and gloves.
I have come across a plethora of their artistic golf gloves on several retail platforms. But these are suppliers (mostly Indonesian and Korean suppliers) who have access to purchase them in batches and sell them online. As such, if you’re in the U.S. or other parts of the world, you’ll have a lot at stake when making purchases.
Meanwhile, Black Level golf balls are relatively new to the market. The balls look, feel, and play differently, piquing the interest of many golfers looking to take a break from the usual Callaway, Titleist, and Ping trifecta usage.
The Appearance
Contrary to their name, Black Level golf balls aren’t necessarily black. So if you’ve been researching this product to purchase a black-colored golf ball, you may be in for a surprise. Instead, you can consider options like the Vice Pro PLUS, Deadspin Golf DS Tour, or the Nitro Blank.
The Black Level golf balls come in white, yellow, and pink colors. However, there could be other color variants, which would be uncertain to conclude since the brand is not public about its offerings.
The ball’s surface reads “Black Level 1” in an attractive font and “Typhoon Eye” in the other phase. In some different variations, the letter “B” is inscribed on the side of the ball with a typhoon swirl design around it.
The Unique Design
These Korean golf balls are unique because they have a design, unlike other golf balls on the open market. Unlike the standard white golf balls, black golf balls come in various colors.
But this ball is much more complex in the bite test beyond the colors. Many testimonies have also underscored the ball’s advantage of a few yards of increased distance compared to traditional golf balls and a good spin rate courtesy of the dimples on the ball.
The unique dimple arrangement on the ball also fosters better grip. Also, it presents a fun and unique option: a colored golf ball.
Do black-level golf balls glow in the dark?
Another interesting observation that has been made about this rare line of golf balls is that they create a little glow-in-the-dark. While I’ve not witnessed this, it is also hard to ignore the testimonies of users who have used the ball.
My Black Level balls came pre-used. So there was no manual or product detail pamphlet to confirm whether the manufacturer designed these balls to glow in dim environments.
However, when we consider the bright color variations of black-level golf balls, the pink and yellow ones may be more visible in the dark.
So they are not necessarily glowing. The bright color of these balls makes them visible and shiny in a dim environment, compared to conventional white and black balls.
Why Are black-level golf balls hard to find?
Rarity is one of the significant downsides that has discouraged many players from using Black Level brand products, especially in other parts of the world. It’s hard to find them online. This is primarily because this golf equipment is produced by a South Korean company with no online presence.
Where And How Can I Get black-level golf Balls?
So the most feasible way to get a Black Level Golf ball today is to rely on golf ball suppliers with access to Black Level products.
I attempted to reach out to one of the prominent black level retailers in Indonesia, AsiaGolf, on Instagram to inquire about purchasing Black Level Golf balls, and it appears they were out of stock as well.
So, it’s even harder to find Korean suppliers where you can buy batches of these golf balls. It is hit-or-miss when it comes to getting these golf balls.
So if you’re looking for an immediate golf ball, Black Level is not the right option because it may take a long time to find one.
Alternatives to Black-Level Golf Balls
After a futile attempt to get the Black Level Golf balls, you can opt for worthy alternatives that are readily available and will still deliver similar performance and feel.
The Titleist Pro V1 features high-performance multi-layer construction for maximum distance and control, and the soft urethane cover provides an exceptional feel and greenside spin. It offers consistent ball flight and trajectory control.
Relatively higher price compared to other golf balls.
Some players might find it less forgiving on off-center hits.
Callaway Chrome Soft
Callaway Chrome Soft
The dual SoftFast core in the Callaway Chrome ball enhances distance and minimizes the spin of the tee.
I like the graphene-infused Dual SoftFast cover. It offers a soft feel and increased control, plus the HEX Aerodynamics that promote a stable, penetrating ball flight.
Some players may find it less suitable for high swing speeds.
Durability might be slightly lower compared to other options.
TaylorMade TP5
TaylorMade TP5
The Taylormade TP5 is a popular golf ball, and many people like it for its Five-layer construction for optimized performance in each aspect of the game.
This ball stands out because its Tri-Fast Core delivers maximum energy transfer and speed. The Dual-Spin cover is also there to provide excellent control and greenside spin.
Ralph Maltby developed the Maltby Playability Factor (MPF). It is a collection of measurement metrics to evaluate and differentiate the playability of golf iron designs. Located on GolfWorks online platform, the data rates iron heads of all manufacturers and versions based on six levels, represented by numbers, from Ultra Game Improvement to Player Classic.
One of the common questions golfers ask about the MPF is how accurate or helpful these ratings are. Some people have little to no faith in these ratings. If you’re new to golfing, the listings can appear like several headscratchers that make no sense.
While the Maltby Playability Factor was put together to help golfers determine the golf club and shaft that best suit their playing levels, the accuracy of these ratings has been questioned more than once over the years.
My current Muzino MP-20 MBs are rated on the MPF as slightly more forgiving than the JPX-900 Tours (my previous iron), which is not the case in my experience. So I do have my reservations about this rating. But there’s more to it.
I have carefully prepared this article and walked you through the concept of MPF rating, how it evaluates the playability of golf iron designs, and how you can interpret the data to pick a befitting iron for your game.
We will also examine the reservations many players have about this rating system to determine whether it genuinely helps or is not worth your time and consideration.
What Does the Maltby Playability Factor Mean?
The Maltby playability Factor (MPF) system evaluates and categorizes golf club designs based on their playability characteristics. It provides golfers with a standardized method to compare and assess the performance potential of different club designs.
The MPF considers factors such as clubhead size, sole width, center of gravity (CG) location, the moment of inertia (MOI), and other design elements that influence how forgiving and playable a golf club is.
The MPF concept was developed by Ralph Maltby, a renowned golf club designer, club fitter, and author. He introduced the idea to the golf industry in 2002 as a response to the lack of standardized criteria for evaluating golf club performance. Maltby wanted to give golfers a more objective and scientific approach to understanding and selecting golf clubs.
The MPF concept has evolved as golf club technology has advanced and new design elements have been introduced.
PS: The initial MPF calculations focused primarily on the CG location and MOI, critical factors determining a club’s forgiveness and stability on off-center hits. However, the MPF system has been expanded to include other design characteristics influencing playability, such as clubhead size, sole width, and perimeter weighting or adjustable hosels.
By considering these factors and assigning numerical values to each, the MPF system provides a way to categorize and compare golf clubs based on their playability characteristics, allowing you to make more informed choices when selecting equipment.
What Is An MPF Score?
MPF scores provide a numerical value that represents the overall clubhead forgiveness of a specific golf club model.
The higher the MPF score, the more forgiving the club is considered to be. A forgiving club is less likely to twist or rotate upon impact with the ball, resulting in straighter shots and increased distance on off-center hits.
To interpret and utilize MPF scores for golf club selection, follow these steps:
1. Understand the MPF scoring system
MPF scores range from negative to positive. Negative scores indicate less forgiving clubs, while positive scores indicate more forgiving clubs. The higher the absolute value of the score, the more forgiving the club.
2. What is your skill level and playing style?
If you’re a beginner or a higher handicapper who frequently hits shots off-center, you may benefit from clubs with higher MPF scores. Skilled players who consistently hit the ball on the center of the clubface may prefer clubs with lower MPF scores for better workability and shot shaping.
3. Consider your needs and priorities
Decide on the specific characteristics you prioritize in your golf clubs. Higher MPF scores are more suitable if you value forgiveness and consistency. If you prioritize shot control and workability, lower MPF scores could be preferable.
4. Demo and test clubs
Try different clubs on a driving range or during a fitting session. Hit shots with clubs featuring other MPF scores and evaluate each club’s feel, performance, and consistency. Pay attention to the forgiveness on off-center hits and how well you can control the ball’s flight.
6. Professional advice will save you time
If you’re unsure about interpreting MPF scores or selecting the right clubs for your game, consult a professional club fitter or a golf instructor. They can provide personalized guidance based on your swing characteristics and help you make an informed decision.
What Is Shaft MPF?
GolfWork’s MPF Shaft Ratings remove much of the guesswork by recommending a range of shaft choices for each specific swing speed and shotmaking need.
The catalog has grouped shafts based on flex, weight, torque, bend point, and tip stiffness to provide players and club fitters with a standardized method to understand and compare golf shafts.
Many people use the information on Shaft MPF to make informed decisions about which shaft will suit their swing characteristics and playing style, even though the final decision of shaft selection will ultimately depend on them.
To calculate and interpret the Shaft MPF score, you would need access to the Shaft MPF database. You can access the MPF for Iron, wedge, Hybrid, and Wood shafts HERE. It provides information on various shafts and their respective MPF scores.
The MPF score is determined based on four primary factors: shaft frequency (measured in CPM, or cycles per minute), shaft weight (in grams), bend point, and tip stiffness.
These factors are measured and compared against a reference shaft to determine the MPF score.
Again, remember that the Shaft MPF score is just one factor to consider when selecting a shaft. Your preference, feel, and working with a professional club fitter can also play a significant role in finding the right shaft for your game.
Golf Clubs With The Highest And Lowest MPF Ratings
MPF is broken down into six categories. The categories range from the easiest, most forgiving clubs made today (Ultra Game Improvement) to extremely difficult-to-hit clubs that only accomplished players should attempt to use (Player Classic).
The six categories are explained in a chart that is easy to use and allows you to look at your game and decide honestly.
Here’s a pictorial illustration of these six categories :
The technical team at Golfwork tests and updates this rating at any time. So it’s hard to pinpoint the actual club with the highest or lowest MPF rating. However, you can view or download updated iron head MPF ratings listed by manufacturers here.
What’s The Ideal Maltby Playability Factor Range?
There isn’t a single “ideal” range of MPF scores for optimal playability that applies universally to all golfers. But there are some general considerations to keep in mind:
1. Forgiveness: Higher MPF scores generally indicate more forgiving clubs. This means they are designed to be more forgiving on off-center hits, helping to minimize the loss of distance and accuracy. If you prioritize forgiveness and want more forgiving clubs, look for higher MPF scores.
2. Workability: Lower MPF scores are associated with clubs that offer more workability or shot-shaping capability. These clubs typically have smaller clubheads, less offset, and different center of gravity placements. If you prefer to shape your shots and have more control over trajectory and shot shape, lower MPF scores may be more suitable.
So you should be more concerned about aligning your golf skill level and playing style with the proper MPF range of an iron to choose.
For example, beginners and high-handicap golfers often benefit from clubs with higher MPF scores, as they offer more forgiveness and help compensate for inconsistent ball striking.
Also, If you tend to prioritize forgiveness and consistency over shot-shaping ability, clubs with higher MPF scores may be more suitable. Conversely, if you enjoy shaping your shots and value shot-making versatility, clubs with lower MPF scores might be a better fit.
So Is The MPF Rating Helpful?
MPF scores may not be a big deal for some golfers, but they are a valuable tool because they exist so we can look at the numbers of past irons played and see the characteristics of the ones we like and the ones we don’t.
I particularly like paying attention to the C-dimension (the distance the COG is away from the hosel) and VCOG (vertical center of gravity) numbers on the catalog for each iron.
While I’m not a big supporter of what Golfwork does with the MPF measurements—it’s not an easy one to decipher, especially for beginners—there’s no doubt that it’s the only source in the golf industry that publishes accurate measurements of our favorite manufacturers’ clubs and shafts. The MPF scores may not be entirely helpful to all, but the sizes are resourceful.
What do you think about the MPF ratings? Have they been helpful to you with club selection? Let me know in the comment section below.
The Fujikura Ventus Black 6X and 7X are popular golf shaft options but differ in key aspects. The Ventus Black 7X is stiffer and generally preferred by players with faster swing speeds seeking a lower ball flight and less spin. However, the Ventus Black 6X offers a more balanced profile and is suitable for a broader range of golfers.
Last week, I had a few range sessions with the Ventus 6X shaft, pairing it with a Callaway Epic Speed Triple Diamond, and what stuck out for me was the stability at the bottom of the swing. I tweeted about it, and some of my followers argued that 7X has a place to improve my dispersion. I went on to get the Ventus Black 7X and used the opportunity to test, compare, and review both shafts to observe how they performed respectively.
Now, Ventus Black is one of the lowest-launching and fastest-spinning shafts on the market because, generally, this shaft lineup combines the stability of a heavy shaft with a lightweight that enables you to swing it faster naturally.
In this article, I’m going to walk you through my findings. You will learn which of these shafts best suits your playing style, the pros and cons of using the Ventus 6X and 7X, and the significant factors that set them apart.
Ventus Black 6X Or 7X: What’s The Difference, And Why Does It Matter?
Ventus Black 6X and Ventus Black 7X refer to two different models of golf shafts manufactured by Fujikura, a well-known golf shaft company.
The significant difference between the Ventus Black 6X and 7X shafts primarily lies in the flex and how they suit different swing characteristics and player preferences. Choosing the proper shaft flex is important because it can affect the golf shot’s trajectory, accuracy, and overall performance.
You can optimize your launch conditions and achieve the desired ball flight by selecting the appropriate flex.
The Ventus Black 6X and Ventus Black 7X are high-performance graphite shafts for golf drivers. The numbers “6X” and “7X” indicate the flex and stiffness of the shafts. In general, the higher the number, the stiffer the stick.
The Ventus Black 6X is considered to have a stiffer flex than the Ventus Black 7X. The 6X shaft is designed for players with a faster swing speed and a more aggressive swing tempo. It offers a lower launch and spin, which can be beneficial to reduce spin and achieving a more penetrating ball flight.
On the other hand, the Ventus Black 7X is slightly less stiff than the 6X version. It is designed for players with a moderate to fast swing speed and offers a slightly higher launch and spin than the 6X.
So, you’ll find the Black 7X more appealing if you need more help generating distance and achieving an optimal ball flight.
Design and Construction
I have always loved the 6X because it gave me more feel and lighter overall weight, especially since I want control and responsiveness. But after placing the 6X and 7X side-by-side, the critical specification differences (and how they influence performance) became apparent.
Flex
The Ventus Black 6X has a slightly softer flex compared to the 7X. This means it will have a bit more flex and bend during the swing, potentially providing a little more feel and control.
The Ventus Black 7X is stiffer, which can lead to a more stable and consistent trajectory, especially at faster swing speeds.
Weight
As you can see in the chart, the Ventus Black 6X is generally lighter than the 7X. A softer shaft like the Ventus Black 6X may help increase swing speed, potentially leading to more distance. It can also provide a more responsive feel.
The Ventus Black 7X, being slightly heavier, can provide more stability during the swing, potentially resulting in better control and accuracy. But again, this is just a marginal difference of one point (85 and 86, respectively).
Performance Characteristics
The 6X shaft is designed to promotea low launch trajectory. It balances a penetrating ball flight with some added carry distance. The 7X shaft also aims to produce a more downward launch trajectory than the 6X. It is ideal for players who desire a more penetrating ball flight with reduced spin.
In terms of spin, both shaft flex options are engineered to provide a low spin rate, but the 7X shaft offers a more reduced spin compared to the 6X variant.
The shot dispersion pattern for the 6X shaft is tight, offering stability and control throughout the swing, just like the 7X shaft.
Swing Profile Suitability
Generally, the Fujikura Ventus Black shaft is known for its stability, low spin, and mid-launch characteristics. But when it comes down to choosing between the 6X and 7X flex options, your swing characteristics will be the ultimate determinant.
After testing the Ventus Black 6X shaft, I discovered that it best serves players with a smooth tempo, a slightly slower swing speed, and a more controlled transition from the backswing to the downswing.
This is because it offers a bit more flex. So It explains why experts recommend it a lot for players with a swing speed of 90–105 mph. If you have a smoother swing and want more feel and control, you won’t go wrong with the 6X flex.
On the other hand, the Ventus Black 7X shaft is stiffer and better suited for players with a faster swing speed and a more aggressive transition.
On some of my shots, the 7X handled higher swing speeds that ranged from 105 to even 120 mph. So, if you have a quick transition, a more aggressive downswing, and a higher swing speed, the 7X flex can provide stability and control you need to optimize your ball flight.
Ventus Black 6X vs. 7X: Pros And Cons
You should have at the back of your mind that the 6X and 7X belong to the same family of Ventus Black among the Fujikura shaft series. So, they will, in many cases, have similar advantages and disadvantages. The central contradiction is their flexible offerings, which spell out the differences.
Ventus Black 6X
PROS
CONS
Lowlaunchh and low spin characteristics
It doesn’t provide as much distance compared to high-launching shafts
I felt stable and consistent feel throughout my swing
Not an ideal option if you have slower swing speeds.
The control and accuracy are decent
Ventus Black 7X Shaft
PROS
CONS
It offered a higher launch and lower spin compared to the 6X
The 7X flex option of the Ventus Black, for some players, would require more precise timing and swing mechanics
Players with higher swing speeds will like the increased distance
Potentially less forgiving on off-center hits, but thanks to the Velcro technology.
Solid and stable feel at impact
Testing Both Shafts’ Performance
To measure the performance of the Ventus Black 6X and 7X, I headed to my favorite golf course armed with two drivers—a Taylormade SIM2 and a Callaway Epic Max. The first contender, the Fujikura Ventus Black 6X, was the initial shaft I chose to test. Its reputation for stability and mid-launch characteristics piqued my interest.
Performance of the Fujikura Ventus Black 6X:
With the 6X shaft, I consistently experienced impressive distance gains. On average, my drives with the 6X shaft carried approximately 10–15 yards farther than my previous shaft. This extra distance was noticeable on well-struck shots and those with a slight mishit.
The 6X shaft provided a solid carry distance of 250–260 yards for my swing speed and launch conditions. The high launch trajectory allowed the ball to stay in the air longer, increasing carry and overall distance.
The dispersion pattern with the 6X shaft was tight in terms of accuracy. The stability of the shaft helped me consistently find the fairway, reducing the number of shots that veered off course. The confidence gained from this accuracy allowed me to focus on setting up my approach shots more precisely.
Performance of the Fujikura Ventus Black 7X
The first notable difference I observed with the 7X shaft was a slight reduction in distance compared to the 6X. While the ball still traveled impressively, it lacked the same explosive force off the face.
However, what it lacked in distance, it made up for in accuracy. The lower launch and tighter dispersion helped me shape my shots more precisely, increasing fairway hits.
In terms of feel, the 7X shaft had a more pronounced sense of stability throughout the swing. It felt robust, providing a solid connection between my swing and the club head. On average, my drives with the 7X shaft carried slightly shorter, with a reduction of around 5–10 yards compared to the 6X.
In all fairness, I prefer the Fujikura Ventus Black 6X shaft. While the 7X shaft delivered exceptional accuracy and a solid feel, I found the explosive distance and overall performance of the 6X to be more suited to my game.
The 6X shaft’s stability, mid-launch characteristics, and great distance gave my drives an extra boost and allowed me to gain significant yardage.
The accuracy was also impressive, as the shaft’s stability minimized dispersion and helped me hit more fairways.
The choice between the Fujikura Ventus Black 6X and 7X ultimately depends on your playing style. If you prioritize accuracy and shot shaping, you may find the 7X shaft your ideal companion. At the same time, those seeking maximum distance with reasonable control might lean toward the explosive performance of the 6X.
It’s a wrap.
In my chat with a few colleagues who have played with both shafts, I noticed they often liken the Fujikura Ventus Black to the Ventus Blue shaft. It makes sense because both lineups have a similar feel.
But if you’re torn explicitly between the 6X and 7X flex options of the Ventus Black, you must pay attention to your playing style and what you want. Then see how each of these shafts measures up.
I hope you found this helpful. Remember to share with a fellow player looking for insights on the Fujikura Ventus Black 6X versus 7X shafts.
Fujikura’s Ventus Red and Aldila’s Ascent Red are two of the best custom shafts that can come with the TaylorMade Stealth Driver. These shafts have proven to be the best to use for stealth drivers. Still, you can also fit the Stealth driver with the Project X HZRDUS, Mitsubishi Diamana ZF60, and Graphite Design Tour AD 12 for optimized performance based on your swing speed and adjustability preference.
If you want to enjoy the functionality of the stealth driver fully, you need the right shaft for the job. Fortunately, TaylorMade offers a wide range of custom shafts. The most talked-about post for Stealth drivers is Fujikura’s Ventus Red because of its increased ball speed, particularly off-center shots, tightened shot dispersion, and mid-high ball flight.
However, Fujikura’s Ventus isn’t without flaws. It’s not the best option for players who prefer lower-ball flights. Also, as players, we all have unique swing characteristics, speeds, and preferences.
So I did more extensive research and testing and have streamlined the best-performing shaft for my TaylorMade Stealth driver into seven top options based on cost, ball speed, dispersion, launch angle, spin, and feel.
6 Best Shafts For Stealth Drivers
These are my personal recommendations for the best shafts for stealth drivers
The Ventus shaft is the newest premium shaft line from Fujikura. Aside from the fact that TaylorMade Stealth Drivers include this shaft option as part of their customization selections, I love using Ventus Red for my Stealth, mainly for three reasons.
First, the VeloCore technology in this shaft infuses a full-length pitch of 70-ton carbon fiber with high-modulus 40-ton carbon fiber. This minimizes shaft twisting at impact.
Also, the Maximum Carbon Fiber Content is maintained throughout the shaft and prepreg. That way, I get the best performance through high-quality material matrixes.
People also talk about the straight taper design of this shaft. It propels the energy during the swing by improving loading and feels.
What I like about this shaft on Stealth drivers
With the stealth at high speeds, you get more forgiveness using this shaft because of its full-length pitch 70 Ton carbon fiber.
I love the smooth feel of the softer shaft that the weave of lighter 40 Ton fibers offers
The mid-launch, low-spin design complements the Stealth driver for delivering more distance and accuracy.
What I don’t like about this shaft on Stealth drivers
The softer feedback of Fujikura Ventus can feel odd for players who are used to a firmer feeling.
The $350 could be a turn-off for players on a budget.
Not the best choice if you want an ultra-low launch and spin combination.
2. Mitsubishi Diamana ZF60
Mitsubishi Diamana ZF60
$355
Thanks to this cutting-edge innovation, experience an impressive mid-to-low launch and enjoy the advantage of low spin
Its advanced MR70 carbon fiber technology makes it easy to achieve a precise mid-to-low launch while maintaining optimal control with reduced spin.
Its groundbreaking design ensures a consistent mid-to-low launch, keeping spin to a minimum and allowing you to dominate the game with control and precision.
Mitsubishi Chemical has done a fantastic job with the Diamana line of golf shafts, raising the bar higher for what it means to have a high-performance driver and fairway wood graphite shaft.
So it’s no surprise that top players like Tiger Woods, Justin Rose, and Justin Thomas use the Diamana.
The hybrid style ZF is among the newest lines of Diamana shafts. It features MR70 carbon fiber technology, Boron fibers, and a particular ion plating to create stability, stiffness, and sophistication.
It’s excellent for those seeking mid-to-low launch and low spin. I also like the stable butt and tip sections.
It has a slightly softer midsection, giving you that optimized feel and energy transfer at various swing speeds using the Taylormade Stealth Driver.
What I like about this shaft on Stealth drivers
Extreme stability and enhanced feel of the Diamana ZF shaft.
Effortless power at impact from increased swing speed acceleration.
Super versatile and can work with a range of drivers and fairway wood models
You can tailor it to almost any swing style.
What I don’t like about this shaft on Stealth drivers
Not great for players looking for a low or high launch. You’ll need a narrower category.
3. Project X HZRDUS Smoke Black
Project X HZRDUS Smoke Black
$60-$100
Reduced unwanted spin for longer and more accurate drives
Enhanced control and consistency due to the shaft’s solid feel
Ideal for golfers with quick transitions on Stealth drivers
Helps decrease launch and achieve longer shots with low spin
The Project X HZRDUS Smoke Black shaft is a popular choice for many golfers using the Taylormade Stealth Driver.
It offers several features that contribute to its reputation. Firstly, its low-spin design helps reduce unwanted spin, resulting in longer and more accurate drives.
The shaft’s carbon fiber construction will give you stability and a solid feel during the swing, enhancing control and consistency. I also like the HZRDUS Smoke Black shaft for its mid-weight profile.
What I like about this shaft on Stealth drivers
Super stable, thanks to the thicker midsection.
This is the one if you’re specifically looking for a golf shaft that meets up with your quick transitions on Stealth.
Thanks to its high kick point, you can reduce launch and achieve longer shots from low spin.
What I don’t like about this shaft on Stealth drivers
If you’re not swinging at a very high speed, this shaft may not perform impressively
I’d you need extra light or extra heavy post, this may not suit your taste because the weight range is limited to within 60 to 70 gram
4. UST Mamiya Recoil Shaft
UST Mamiya Recoil Shaft
$60–350
The UST Mamiya shaft offers longer and more accurate drives
Provides improved control and shot consistency
Offers decreased launch angle for longer shots with lower spin
SPEC: Flex: L, A, R, S | Weight: 45g, 50g, 55g | Torque: 6.8°, 6.6°, 6.4° | Launch: Mid-high
After multiple shots with the UST Mamiya Recoil shaft on the Taylormade Stealth Driver, I instantly noticed the exceptional stability, consistency, and enhanced feel.
This is due to the innovative designs and materials, such as graphite and a unique filament winding process, which provide a lightweight yet powerful and responsive performance.
This shaft offers excellent energy transfer, resulting in increased distance and accuracy.
What I like about this shaft on Stealth drivers
I got more distance and accuracy compared to most other shafts tested with the Taylormade Stealth Driver
The spring effect in the walls of each Recoil shaft gives more ball speed and more accessible launches.
It can fit more golfers with ideal specifications since it has a tighter manufacturing tolerance of graphite.
What I don’t like about this shaft on Stealth drivers
The UST Recoil felt softer than traditional steel shaft offerings, so it was a learning adjustment curve.
The shaft often comes with an additional upcharge to make wedge sets pricey.
5. Graphite Tour AD 12
Graphite Tour AD 12
$379
Advanced technologies such as TORAYCA T1100G carbon fiber and NANOALLOY resin systems optimize stiffness, stability, and responsiveness for enhanced performance.
Provides middle launch and mid-to-low spin conditions, resulting in increased driving distances off the tee for stealth drivers.
Offers a smooth shaft that maintains club head speed, ensuring a balanced and controlled swing.
The Graphite Tour AD 12 shaft often incorporates advanced technologies such as TORAYCA T1100G carbon fiber and NANOALLOY resin systems. These technologies enhance the shaft’s performance by optimizing its stiffness, stability, and responsiveness.
The Graphite Tour AD 12 speaks of high performance, and the brand markets it as the best solution for players looking for middle launch and mid-to-low spin conditions.
The Tour AD 12 uses the same aerospace-grade materials as all the premium Graphite Design shafts and comes in an elegant matte white and blue finish.
What I like about this shaft on Stealth drivers
It combines middle launch and mid to low spin for increased driving distances off the tee for stealth drivers.
It’s an incredibly smooth shaft without sacrificing club head speed.
What I don’t like about this shaft on Stealth drivers
The price can discourage budget-conscious golfers who only want to upgrade their current Stealth Driver Shaft.
6. Aldila Rogue Silver
Aldila Rogue Silver
$250
The Aldila Rogue Silver shaft for the Taylormade Stealth Driver offers low-launch and low-spin performance.
It features a higher balance point, resulting in improved club head speed and distance.
The shaft’s Graphitic Carbon Fiber construction provides stability and a premium look and feel.
One thing that stood out for me while using the Aldila Rogue Silver shaft for the Taylormade Stealth Driver was the low-launch and low-spin performance.
The Rogue Silver 130 MSI combines DIALEAD pitch fiber, ion plating, and NexGen Micro Laminate Technology (MLT), which equally guarantees consistency.
I mainly fell in love with the higher balance point, but it’s not a surprise as I’ve seen it in many high-end premium golf shafts. But this means you won’t have to struggle for clubhead speed and accuracy with the stealth driver once you have this shaft in your hand.
What I like about this shaft on Stealth drivers
I gained better club head speed and distance due to the higher balance point
The strength-to-weight ratios from the Graphitic Carbon Fiber hint at its stability
Outstanding look and feel
What I don’t like about this shaft on Stealth drivers
No weight options below 60 grams mean it may be too heavy for some players.
How I Chose The Best Shafts For Stealth Drivers (Things To Consider)
Several specific factors must be considered when selecting the best shaft for a stealth driver. Here are the key aspects to keep in mind:
1. Shaft length
The shaft length affects the golfer’s posture, swing mechanics, and overall comfort.
“[The Fujikura Ventus Black 6 X] is nice; it’s a bit more of a lively feel,” TaylorMade staff golfer Rory McIlroy, whose 2023 bag is mainly made up of the brand’s latest clubs, told GolfWRX in an interview. “I like playing the driver shorter these days, and that black shaft just got so bored. (The TR Blue) It still has that stable feel in the handle. I hate looking at the loft, so if I’m not playing a driver with more loft, I must get the spin from somewhere.”
If you have McIlroy’s speed, the focus will always be on dispersion and accuracy. This will prompt you to desire a shorter shaft length for added control. And McLroy didn’t even lose anything on the distance front.
So, longer shafts can generate more distance but may sacrifice control.
2. Flexibility/Stiffness
The shaft’s flexibility or stiffness significantly affects the feel and control of your TaylorMade Stealth Driver. If you have higher swing speeds, go for stiffer shafts for better accuracy and power, but if you have slower swing speeds, you will benefit from a more flexible post to generate more distance.
3. Weight
The weight of the shaft influences the driver’s overall balance and swing speed. Lighter beams can enhance swing speed, making them suitable for players with slower swings. Heavier rods offer more stability and control, which is better if you have faster swings.
4. Torque
Torque refers to the twisting of the shaft during the swing. A low torque shaft minimizes twisting, providing better accuracy and control.
If you have a smooth swing, a lower torque shaft will be ideal for you, while those with a more aggressive swing may benefit from a slightly higher torque to assist with squaring the clubface.
5. Kick point
The kick point, or bend point, is the point on the shaft where it flexes the most during the swing.
The kick point influences the trajectory and launch angle of the ball. Higher kick points promote a lower ball flight, while lower kick points result in a higher one.
6. Material
The choice of material plays a crucial role in a shaft’s performance.
Carbon fiber is popular due to its lightweight nature, high strength, and excellent vibration-dampening properties.
Parting Thoughts
TaylorMade Stealth Drivers have a 60X carbon twist face, an asymmetric inertia generator, and a 4° loft sleeve, all integrated for optimal launch, spin, forgiveness, sound, and speed. However, it also comes with a custom shaft and grip.
Fujikura’s Ventus Red remains the best-recommended shaft option for a TaylorMade Stealth Driver. But you’re not limited to these options, especially when you have a different preference for ball flight and adjustment options.
Finding the optimal shaft for a stealth driver involves a combination of technical specifications and your unique preferences as a player.
This is why working with a knowledgeable club fitter can greatly assist in the selection process, ensuring that the chosen shaft maximizes your performance and enjoyment on the course.
But with the shaft options provided in this article, you won’t make a regrettable decision.
In the comment section below, let me know your thoughts on these shaft options.
While the Titleist TSi2 prioritizes forgiveness and distance, featuring a deeper face and larger sweet spot, the TSi3, on the other hand, offers more adjustability and workability with a slightly smaller head and a SureFit CG track. It all comes down to your skill level, swing characteristics, and desired shot-shaping capabilities to decide which to use.
Since the release of the 975s two decades ago, I’ve not been excited about Titleist drivers. The brand is not famous for being a driver’s company. When golfers hear ‘Titleist,’ they think of irons, Vokey wedges, and Scotty Cameron putters.
However, the releases of the TSi2 and TSi3 have gotten my attention. The hype about the contradictions of these two drivers (and the respective value offered) was convincing enough, so I decided to purchase both drivers, test them, and compare them head-to-head on various relevant levels.
In this article, I’ll walk you through how the TSi2 and TSi3 stand apart in design and construction, performance, adjustability, forgiveness, feedback, delivery, price, and overall value. These should help you decide if you’re torn between these two drivers.
Titleist TSi2
$549
The TSi2 offers a higher launch
Offers more forgiveness
With the ATI 425 face material you get more ball speed
From a distance, the appearance of TSi2 and TSi3 is identical. My initial thoughts were a fair judgment and leaned towards categorizing them as having equal value with SIM and Maverick.
However, I’ve owned the TS2 for a long time, and during research on these recent versions, I discovered that the TSi series gives a little more ball speed. With this in mind, I already thought they would be as forgiving as the old series.
I tested these two drivers in a simulator this past weekend. Both felt pretty good with several shaft options, but it was hard to ignore some critical differences, which I will discuss in length in the rest of this article.
Design and Construction
According to Titleist, the TSi drivers are generally expected to deliver incredible distance, and that is the big selling point of this lineup, especially considering that they all use aerospace titanium (made in Pittsburgh in a single foundry to retain the American-made narrative) and this would be the first time such materials are used in a driver of its kind.
The TSi series also moves faster through the air, which hints at faster club head speeds and ball speeds. Both drivers, the TSi2 and TS2, also feature multi-dimensional stability.
Now, the brand markets the TSi2 to golfers who need extra distance and forgiveness and the TSi3 to players who create more consistent contact and want more control over their ball flight.
This explains why the TSi3 featured a perimeter weighting system, allowing you to adjust ball movement right and left.
The TSi2 driver offers forgiveness and distance, featuring a high moment of inertia (MOI) and a low center of gravity (CG). According to Titleist, the TSi2’s MOI is 12% higher than its predecessor, the TS2, resulting in increased stability and forgiveness on off-center hits. The TSi2 has a moderate spin rate and a slightly higher launch angle.
On the other hand, the TSi3 driver prioritizes precision and workability. It features a lower MOI, allowing for excellent shot-shaping control. The CG can be adjusted through the SureFit CG track, enabling customization of shot shape and launch conditions. The TSi3 has a lower spin rate and a slightly lower launch angle than the TSi2.
With the TSi2, you get an adjustable weight system to move a 9-gram weight to three positions within the club head. I like the square face angle at the address. It hints at a neutral ball flight. The driver also comes with a Golf Pride Tour Velvet 360 grip.
With the TSi3, you could move the clubhead’s weight into five spots on the back, but not entirely throughout the clubhead’s back. According to Titleist, the extension of this weighting system, as seen in the Callaway Epic Flash, can influence the center of gravity and change your hitting zone.
Imagine putting the weight on the toe or heel; you kick open or shut.
So with the TSi3, Titleist adjusted a much smaller track (the SurFit CG track system), offering you the five spots but still behind the club head. This allows you to influence the driver slightly on its rotation without taking away the forgiveness.
I tested the TSi2 and TSi3 using several different shaft options. The TSI2 gave a slightly higher launch, while the TSTSI3 offered more adjustability.
My first setup for this testing was the TSi3 with HZRDUS, the shafts for my Callaway Epic driver, and 10 degrees. After a few shots, I achieved 224 carries and 264 total. On another show, I gained 220 yards and rolled out to 250.
Also, I did not quite enjoy the sound of the TSi3 compared to how it was hyped, especially by the brand. But that should be the least of the issues. But the distance lived up to expectations.
Analyzing the results, I noticed that the TSi3, on average, has a 92 mph swing speed, and I was 0.2 degrees off. His side speed was 108 left, and the backspin was 240, which is a relatively high spin for the TSi3.
For the TSI2 range, my swing speed was generally a little faster (94.1), and I was leaving at 136 mph, but it didn’t result in much yardage. I only achieved a total yardage of 213 over 208.
So from my testing, there wasn’t any massive difference in performance or feel, except for the launch and speeds.
Price and Value
One strange thing about these two drivers is that they cost the same price. The TSi2 and TSi3 sell for $549 on the official Titleist website. But you can get better deals from retail platforms, many of which are often pre-owned.
If you look at other manufacturers, they drive premium prices into options with more customization. But I suppose the features of a bit more forgiveness in ball flight will attract people to spend the same amount of money for less flexibility.
Pros And Cons
Titleist TSi2 Driver
PROS
CONS
offers a higher launch
Less adjustability compared to TSi3.
Offers more forgiveness
It’s a versatile driver that is suitable for different golfers and their playing levels.
You get more ball speed thanks to the ATI 425 face material.
Titleist TSi3 Driver
PROS
CONS
The SureFit CG track system gives more adjustability.
Not as forgiving as the TSi2.
The best option for low handicappers and faster-swinging golfers
Not suitable for higher handicappers.
You get more ball speed thanks to the ATI 425 face material.
Wrapping up
Justin Thomas hit with one of the most popular Titleist TSi drivers on the market. If you watch more PGA Tour events, you’ll likely see more pro golfers use drivers from the TSi lineup. What does this mean? The TSi2 and TSi3 have no strange names in the golf game. You may never go wrong, no matter the choice you make.
However, these two drivers truly differ in their launch capabilities. If you’re an average golfer, the TSi2 has more to offer you because it produces a higher launch than the TSi3, so getting your ball in the air consistently and carrying it further will be easier.
I strongly recommend the TSi2 driver if you’re a slow-swinging golfer who struggles to achieve generally sufficient clubhead and ball speed or any significant carry. On the other hand, the TSi3 is your best shot if you’re a fast-swinging golfer looking for moderate ball flight. TSi3, in short, favors lower handicappers more.
What are your thoughts? Let me know in the comments.
FAQs
Is TSi2 more forgiving than TSi3?
The TSi2 driver is considered to be more forgiving than the TSi3. The TSi2 features a deeper CG (center of gravity) location, promoting a higher launch and excellent stability on off-center hits.
The TSi3, on the other hand, has a more compact profile and a slightly forward CG, which provides excellent workability but may be less forgiving on mishits. But it can vary depending on your personal swing characteristics.
Can a mid-handicapper use the TSi3?
Yes, a mid-handicapper can use the TSi3 driver. Its adjustable features allow you to optimize the club for your swing and maximize your performance on the course.
Should I get the TSi2 or 3?
When deciding between the Titleist TSi2 and TSi3, it ultimately comes down to personal preference and your specific playing style. The TSi2 is known for its forgiveness and high launch, making it the best option for maximum distance and accuracy. On the other hand, the TSi3 offers more adjustability and workability, catering to players who prefer shot shaping and customization.
What is the difference between TSi1, TSi2, and TSi3?
TSi1, TSi2, and TSi3 are all products under the Titleist TSi driver model lineup. However, the unique selling point of the TSi1 is its lightweight and slightly draw-based profile, while the TSi2 is for players whose priority is forgiveness. Conversely, the TSi3 driver will best suit players looking for playability and shotmaking.
But you will get more design freedom for extra off-center-hit stability in the TSi2 due to the lighter and faster-flexing alloy (ATI 425), while the TSi3 offers movable weight in the more pear-shaped
The Titleist TS2 and TSi2 drivers are both exceptional options with distinct features. The TS2 offers high launch and forgiveness, while the TSi2 provides improved adjustability and speed. After testing both drivers, I realized that the TS2 driver is more beginner-friendly, while the TSi2 has more features that appeal to golfers with more advanced skills.
Many players torn between both options usually try to determine if the TSi2 is worth the extra couple hundred dollars. I tried both before this season, and here’s the shocker: I experienced no massive difference. Predictably, someone in my situation (9 handicaps and an average drive of 250) would instead go for a used TS2 and save themselves almost $300.
But I won’t be in haste to say you should make this choice too. There are several factors to look out for before making the ultimate decision. In the rest of this article, I’ll place the TS2 and TSi2 drivers side-by-side to help you decide which is truly worth your money.
Titleist TSi2
$449
The TSi2 is one of the muted drivers in the market.
The TS2 offers loft options between 8 and 11.5 degrees, features Surefit hosel technology, and costs $170. Conversely, TSi2 only has loft options between 9 and 11 degrees, features the ATI 425 Aerospace Titanium and Face technology, and sells for $499.
here are the factors I noted while comparing these two drivers
Design and Construction
The adjustable loft options are a notable difference between the TSi2 and TS2 drivers in design and construction. With the TS2, you get a flexible loft that can adjust +/- 3 degrees, while the TSi2 can be modified up to +/- 2 degrees.
Also, the imagined path of the traveling golf ball, the horizontal oval, is longer in the TSi2 driver. This hints that you can hit the golf ball further with the TSi2 than with the TS2.
Now, on overall appearance and aesthetics, both drivers share similarities. But when you pay closer attention, you’ll realize that TSi2 appears a bit bigger and has a modern look compared to TS2’s traditional appearance.
Here’s my observation of the differences between both drivers in terms of construction and how these differences can potentially influence your game:
From the design specifications, It wasn’t surprising to discover that the TSi2 produced marginally higher clubhead and ball speeds after multiple hits. I achieved an average of 250 yards using the TSi2, compared to the aggregated average of 243 yards that the TS2 flew.
I also noticed that the TSi2 offered more forgiveness than the TS2 driver, even on toe mishits. This, coupled with the better ball speed, was all I needed to be convinced that I had made a good investment in spending that extra money. But it’s worth mentioning that the TS2 produced a better roll than the TSi2.
But if you’re meticulous about your purchase decision, it won’t end with a performance comparison. This is where the consideration of customization and adjustability comes in.
Adjustability and Customization
You can adjust the loft of the TS2 up to +/- 3 degrees, while that of the TSi2 is adjustable up to +/- 2 degrees.
With these adjustability differences, you can see that the Titleist TSi2 and TS2 drivers are still ideal for moderate to slow swing speeds and high handicappers. So there’s not so much contradiction going on in this aspect.
“TSi2 is still a fairly traditional shape for a high MOI (moment of inertia) driver,” says Titleist’s Director of Player Promotion and expert metal wood fitter, Van Wezenbeeck, “but the increased launch angle for certain players and increased forgiveness are really helpful when you’re not always hitting it on center.”
Wezenbeeck explained in an interview with Golf.com in 2021 how American professional golfer Justin Thomas, who plays on the PGA Tour, was seeing more forgiveness and launch from the TSi2, even while it produced a bit too much spin.
The sound is the first thing that sets these two drivers apart regarding feedback. TSi2 seemed to be more muted than even my current driver. Although both drivers have a pleasant feel, the increased ball speeds from the TSi2 are juicy, but the TS2 spins lower than many “forgiving” or rearward CG drivers I’ve used.
If you’re getting a fitting to manage spin rate and similar issues, you may find the TSi2 more appealing. It’s more forgiving while maintaining a lower spin rate for its capabilities.
I wouldn’t dare compare these two with Titleist’s recent TSR2, which stormed the market in 2022 with its incredible low spin, high launch, and improved accuracy and distance. But even being the brand’s older versions, the TSi2 and TS2 drivers still do a pretty good job with optimal feel, speed, launch, and distance.
Price and Value
There’s a wide gap between the TS2 and TSi2 in terms of price point, and that’s the bone of contention, seeing that both drivers are identical on various grounds.
The TSi2 design is relatively pricey, costing $449, about $150, shy of Titleist’s recent $599 TSR2. On the other hand, you can buy a TS2 for around $170 to $200.
I have observed that many golfers torn between these two options are usually more concerned about whether spending an extra $200 for the TSi2 is worth it since it’s a newer version. Another bone of contention is that it’s hard to find a brand-new TS2. So, you will most likely see pre-owned models.
Pros And Cons
Titleist TS2 Driver
PROS
CONS
The stretched head is better than the TSi2
The design is bulky when compared with the TSi2
It favors beginner players
The traditional appearance will not appeal to players with modern taste
Admirable spinning capability
Excellent stability and speed
Titleist TSi2 Driver
PROS
CONS
An excellent driver to achieve increased ball flight
The price can discourage buyers on a budget
You have more shaft options
The consistency is not as good as the TS2
The forgiveness and long-distance shots are better
So Which Should You Go For? My Recommendation
Here’s the catch: The Titleist TSi2 offers aerospace-grade titanium, Vertical MOI enhancements, an adjustable hosel, a 460-cc head, and an aerodynamic head shape as its key selling points.
On the other hand, what truly sets the Titleist TS2 apart is the adjustable swing weight port, SureFit adjustable hosel, elongated head shape, 5” stock shaft length, and the 460cc head.
So if you’re a beginner or a novice in this beloved sport, the TS2 is a great option. Plus, you get to save money. On the other hand, TSi2 will serve you better if you are a professional golfer.
I am confident that the TSi2 will become more potent in the right hands. So while both drivers are decent, the TSi2 is better for those with improved playing skills because the aerodynamics are a little harder to handle if you don’t have the skills and experience.
But if you’re a beginner, it will be hard to find reasons to justify paying extra for a driver that shares many similarities with a less expensive option.
I hope this helps you in your decision-making. Let me know what you think in the comments.
The Titleist T100 irons are designed for golfers with a wide range of handicaps, catering to low- and mid-handicap players. With their combination of forgiveness, distance, and control, the T100 irons offer versatility and performance that can benefit golfers with handicaps ranging from single digits to mid-teens.
You want to enjoy your game and the golf sport to its fullest. This is why selecting golf clubs suitable for your handicap is essential. Golf clubs are designed with different characteristics that cater to players of varying skill levels. Choosing clubs that match your handicap ensures that you have the e right tools to maximize your performance on the course.
I’ve been using the Titleist T100 for a while now, and many of my friends on the golf course often wonder if the irons are forgiving enough to do well on bad days. The actual debate is whether T200’s irons are good enough for low handicaps, while T100 is picky about its performance for handicaps.
Many players would prefer the Titleist model with more forgiveness for bad days than better playability for perfect days. I have played with the T100 irons long enough to realize they don’t forgive like a blade.
But it all depends on the handicap you have as a player. This is why I have prepared this article to walk you through the answers to your questions about the T100 handicap range and the relevant factors to consider while using this Titleist iron.
Titleist T100
Product Specs
The cavity back design of the T100 irons ensures forgiveness on off-center hits, reducing the impact of mishits and promoting consistency.
The compact blade shape and design elements of the T100 irons also enhance forgiveness and playability.
The forged construction of the T100 irons enhances feel. This means that it can control shots better than most.
The Titleist T100 irons are generally suitable for golfers with a mid-to-low handicap range, typically ranging from around 5 to 15. However, individual preferences and playing styles may vary, so it’s best to try out the clubs and consult a professional fitter to determine the best fit for your game.
When selecting clubs based on handicap, the first set of things to consider are swing speed, ball flight tendencies, level of consistency, and your preferences for clubhead design and feel. Then you can focus on your physical attributes, such as height, strength, and flexibility because they all impact club selection.
Fortunately, the Titleist T100 irons offer several advantages for different handicap levels. If you’re a low-handicap player, the T100 irons provide precise control, exceptional feel, and workability, allowing you to shape shots and manipulate ball flight.
Mid-handicap players can benefit from the forgiveness and playability of the T100 irons while still enjoying the feedback and performance characteristics of forged irons.
Key Features of the Titleist T100 for Handicap Players
The Titleist T100 irons are often associated with low-handicap players, but they offer features that can benefit you if you have a higher handicap. Here are some key features of the Titleist T100 irons for disabled players:
1. Forgiveness and Playability
The T100 irons have a compact blade shape, which may give the impression that they are designed for better players. However, they incorporate various design elements to enhance forgiveness and playability.
The clubhead features a high-density tungsten weighting D18 that lowers the center of gravity (CG) and increases the moment of inertia (MOI), resulting in improved stability and forgiveness on off-center strikes.
This helps reduce the adverse effects of mishits and provides more consistent distance and accuracy.
2. Technology and Materials
The T100 irons feature a forged construction, which enhances the feel and allows for precise shaping of the club head.
Using high-strength steel in the face insert enhances ball speed and distance, even on shots struck with less-than-perfect contact.
I also like the progressive design of the set, which ensures that each club is specifically engineered for its intended purpose, with the long irons offering more distance and forgiveness and the short irons providing precision and control.
3. Customization Options
Titleist offers a range of customization options for the T100 irons, so you can personalize the clubs to suit your specific needs and preferences.
This includes options for shaft selection, grip choice, and custom fitting. Getting properly fitted for the T100 irons can help optimize performance by ensuring the clubs are tailored to the golfer’s swing characteristics, providing better control and consistency.
My Personal Experience On The Greens With The Titleist T100 Handicap
As an avid golfer, I always seek equipment to take my game to the next level. First of all, my handicap hovers around the 12 range, which puts me in the mid-level skill category.
However, the moment I gripped the Titleist T100 Handicap irons, I could sense their potential. The sleek, classic design instilled confidence and I eagerly attended the course.
Performance-wise, these irons delivered beyond my expectations. With their precise craftsmanship, I experienced enhanced control over my shots, allowing me to hit my desired target consistently. This has remained one of the most talked-about aspects of the T-series iron.
The forged cavity back design provided forgiveness on off-center strikes, minimizing the dreaded “shot dispersion.” It felt like the club was actively working with me to optimize my swing.
Upon impact, I experienced a buttery-smooth sensation that reverberated through my hands. Combining the forged 1025 carbon steel and tungsten weighting resulted in exceptional feedback and a satisfying, crisp sound, further boosting my confidence.
It was as if every swing was perfectly synchronized with the club’s technology, culminating in a harmonious connection between player and club. My ball flight became more consistent, with a slightly higher trajectory that allowed for precise approach shots and increased stopping power on the greens.
While the Titleist T100 Handicap irons left me thoroughly impressed, it’s essential to acknowledge a few pros and cons I observed during my personal experience:
Pros
Unparalleled Control: These irons provide exceptional control over shot shape, distance, and accuracy, allowing golfers complete command over their game.
Forgiveness: The cavity back design ensures forgiveness on off-center hits, reducing the impact of mishits and promoting consistency.
Sensational Feel: The T100 Handicap irons offer an unmatched feel, thanks to the combination of high-quality materials and precise craftsmanship, enhancing the game’s overall enjoyment.
Cons
Price Point: As with any premium golf equipment, the Titleist T100 Handicap irons have a higher price tag. However, the performance and longevity of these clubs make them a worthy investment for serious golfers.
Learning Curve: The enhanced control and feedback of the T100 Handicap irons may require an adjustment period for players transitioning from less forgiving clubs. Patience and practice are key to fully harnessing their potential.
Limited Customization: While Titleist offers various shaft options, the customization choices for grip and other specifications are relatively limited, which may not cater to every player’s preferences.
Comparing the T100 With Alternatives (The T100s Head-to-Head)
Many players compare the Titleist T100 golf club with the T100s, 200, and 300 models. It makes sense because, aside from the fact that they all belong to Titleist’s iron lineup, they offer varying features and performance characteristics.
I placed the T100 and T100s golf clubs side-by-side, and here are their differences:
Now, as for which one is best, it ultimately depends on your personal preferences and playing style.
If you are a highly skilled golfer with a low handicap and prioritize shot control, workability, and feel, the Titleist T100 might be your better choice. Its classic blade design and compact head size provides excellent feedback and shot-shaping ability, allowing you to have precise control over your shots.
On the other hand, if you are a low-handicap player seeking a bit more forgiveness and a slightly higher launch, the Titleist T100s might suit you better. Its marginally more significant cavity-back design and lower center of gravity (CG) offer enhanced forgiveness and help generate more height and distance in your shots.
Parting Thoughts
The Titleist T100 irons are highly regarded in the golf community. Their reputation for delivering consistent results and satisfying feedback has earned them a substantial following in golf. Professionals like Justin Thomas and Jordan Spieth have made giant strides using the T100 irons.
I am biased toward the T100 over the T100s because the handicap is central to the discussion. In all fairness, I did hit the T100s well in the simulator, but I don’t trust my game enough to be consistent with them.
The bottom line is that Handicap is a guide for all club models, so you’ll need to assess your ability to hit the center of the club face consistently.
So if you can make it happen, I strongly recommend you get a professional fitting and see what best fits your game.
The Project X HZRDUS Smoke Black has been gaining accolades from golfers as a fantastic mid-launch low-spin driver shaft, especially considering its mid-stiff profile and advanced materials that promote mid-launch with low spin, optimizing distance, and accuracy. Still, it doesn’t appeal to all players. And there are worthy shaft alternatives for this category.
If you’re looking for a drive shaft that will do the magic for mid-launch and low spin. Shafts don’t spin or launch. In reality, it all comes down to how you deliver the message. So the goal is to seek an ideal shaft from a weight and profile perspective that will give you the ball flight you want.
Project X HZRDUS Smoke Black has a solid reputation in the game for this purpose. But so do its counterparts, HZRDUS Smoke, RDX Blue, and even Lin-Q Purple and Rogue Max (which fit well with Titleist heads). In other words, there are many options for mid-launch, low-spin shafts. I purchased and tested five of the best-recommended options, and I’ll walk you through my findings to help you decide which of them is worth your investment.
5 Best Mid Launch Low Spin Driver Shafts
In case you’re in a hurry, here’s a rundown of the driver shafts I will review in this article and why they’ve been handpicked as your top options.
The Project X HZRDUS Smoke Black is a top-notch choice for those seeking a mid-launch and low-spin driver shaft. Its performance characteristics make it one of the best options available.
Firstly, Smoke Black’s mid-kick point ensures an optimal blend of control and distance. It allows for a penetrating ball flight that maximizes carry and roll while maintaining accuracy. This is particularly beneficial if you want to optimize your launch angle without sacrificing control.
Also, the low spin properties of the Smoke Black provide remarkable stability and control during the swing. You can expect less side spin and tighter shot dispersion with reduced spin, resulting in greater accuracy and more fairway hits.
I also love the build quality and materials contributing to its performance. The shaft’s premium construction ensures efficient energy transfer, leading to increased ball speed and distance off the tee.
What I like about this shaft
Low spin for increased distance.
Stable and consistent performance.
They are designed for high swing speeds.
What I don’t like about this shaft
We have limited customization options.
It may not suit players with slower swing speeds.
2. Fujikura Ventus Black
Fujikura Ventus Black
$350
I love how stable this shaft feels at impact. It doesn’t feel harsh or jarring, even when I hit off-center.
I’ve been able to hit the ball farther and more accurately with the Fujikura Ventus Black shaft. This is probably due to the combination of the stability and the low launch and spin characteristics.
The Velocore technology in the Ventus Black shaft really helps to absorb shock and vibration, which makes it more forgiving on off-center hits
Being the first drive shaft to use Fujikura’s all-new VeloCore Technology in an accelerated taper, the Ventus Black model has been on the lips of many golfers for its ultra-stiff tip profile.
So with this stick, you get maximum energy transfer from the tip section, boosting the clubhead’s performance.
The Fujikura Ventus Black is available in models 6, 7, and 8. These models are classified for high performance, so they may not do this magic for beginners.
Of all Fujikura’s models, the Ventus Black is the lowest launching, the most tip-stiff version, and perhaps the most forgiving, thanks to the Velocore technology.
The shaft features 70-ton carbon fiber and 40-ton fibers integrated for optimal stability and feel.
What I like about this shaft
Superbly stable, yet with no harsh feel.
It gave me higher levels of distance consistency and more accuracy.
The Velocore offers more forgiveness while allowing me to play whatever driver I choose.
What I don’t like about this shaft
The firm butt section may be too rigid for slower-swing-speed golfers.
You can’t find extra stiff flexes in the tour, which is not-so-fantastic news for high-swing speed players.
High price tag compared to many other options
3. Mitsubishi Tensei CK Pro Blue
Mitsubishi Tensei CK Pro Blue
$315
The shaft is very stable at the highest swing speeds, thanks to the multi-material design and the Kevlar reinforcement in the butt section.
The tip-stiff design provides excellent control, even on off-center hits.
The shaft is available in a variety of weights and flexes, so you can find the perfect one to suit your swing.
Mitsubishi used Chemical technology to develop the Tensei CK Pro Blue Hybrid Shafts. It’s a game mid-launch low-spin shaft if you already use the Tensei blue model driver and fairway shafts.
I like the multi-material design, even though it’s not a new thing with CK Pro Hybrid models. I observed that the butt is reinforced using Kevlar. This adds stability, control, and even feel.
Tensei CK Pro Blue also features a low Resin Content prepreg, which creates a higher density without adding additional weight to the shaft.
What I like about this shaft
Clubhead stability at the highest swing speeds
Great control, thanks to the tip-stiff design
Various weights and flexes available to suit your preferences
What I don’t like about this shaft
The counterbalance may seem odd if you’re used to traditionally weighted shafts.
4. Aldila Rogue Silver 130 MSI
Aldila Rogue Silver 130 MSI
$321
The Graphitic Carbon Fiber and NexGen Micro Laminate Technology combine to deliver superb stability, especially for high-swing speed players.
The NexGen Micro Laminate Technology combined with Ion Plating gives the shaft a fantastic appearance.
This shaft is designed to help players gain clubhead speed and accuracy with their drivers and fairway woods.
One thing that stands out with the Aldila Rogue Silver 130 MSI is that the low-torque design delivers stability, especially for high-swing speed players, thanks to the Graphitic carbon fiber and NexGen Micro Laminate Technology.
But on the other end of the spectrum, if you’re struggling with drivers that fly too high or spin too much, the Rogue Silver 130 MSI tip-stiff profile is there for you.
Aldila got a lot of accolades when they rolled out the Rogue Limited Edition 125 MSI. The Rogue Silver 130 MSI has helped them sustain that reputation with its higher balance point, which is gaining popularity with high-end premium golf shafts.
According to the manufacturer, “this is the shaft for players who want to gain clubhead speed and accuracy with their drivers and fairway woods.”
What I like about this shaft
The Graphitic Carbon Fiber hits on superb stability
Fantastic appearance, thanks to the NexGen Micro Laminate Technology combined with Ion Plating
What I don’t like about this shaft
No weight options of 60 grams and below, which can be too heavy for some players.
One of the highest price tags of all premium shaft models.
5. UST Mamiya LIN-Q Purple
UST Mamiya LIN-Q Purple
$53
I find that the golf shaft has a smooth feel. This is due to the combination of the Q-Fiber technology and the smooth butt section of the shaft.
I also like that the golf shaft has a medium launch and spin. This makes it a good choice for me, as I am looking for a shaft that will help me to hit the ball longer and straighter.
Its competitive price point is also a great choice as it provides a high-performance shaft without breaking the bank.
UST Mamiya markets the LIN-Q Purple golf shaft as a mid-kick point golf shaft. After hitting with this shaft, I realized that it would best suit golfers looking for a smoother feel, a medium launch, and a medium spin.
You’ll also fit well into the Lin-Q Purple profile if you want to upgrade your driver or fairway wood shaft on a budget.
This shaft mainly stands out for the Performance it offers at an incredibly competitive price point. The shaft combines UST’s signature feel with additional stability and support.
What I like about this shaft
Best for value and performance as an aftermarket golf shaft.
The brand’s Q-Fiber technology guarantees stability and control.
I like the firmer mid- and tip sections that give explosive distance.
The smooth butt section adds to the feel.
What I don’t like about this shaft
Traditional golfers may not like the gold and purple colorway.
It’s not a stiffer shaft, so it may not appeal to aggressive swingers.
Why Use A Mid Launch Low Spin Driver Shaft?
A mid-launch, low-spin driver shaft is essential in golf because it can significantly affect the performance and results of your drive. Here’s how:
1. Launch Angle: The launch angle refers to the initial trajectory of the golf ball when a driver strikes it. A mid-launch shaft optimizes the launch angle, allowing the ball to achieve an ideal trajectory for maximum distance and carry. It helps ensure that the ball gets airborne quickly and efficiently.
2. Spin Rate: The spin rate is the amount of backspin or topspin generated on the ball during flight. A low spin shaft helps reduce the backspin on the ball, resulting in fewer lift and drag forces. This reduction in spin can lead to a longer carry distance and increased roll upon landing as the ball experiences less air resistance.
3. Distance and Accuracy: A mid-launch, low-spin driver shaft can help you maximize distance and accuracy off the tee by achieving the right balance between launch angle and spin rate. The optimized launch conditions allow for a more efficient transfer of energy from the clubhead to the ball, resulting in increased ball speed and overall distance. Remember, lower spin reduces the chances of the ball veering off course due to excessive side spin, promoting a straighter, more controlled shot.
4. Trajectory Control: A mid-launch low spin shaft allows you to control your trajectory more effectively. If you’re a skilled player, shafts of this kind help to manipulate shot shape and flight pattern, enabling you to adapt to different course conditions or specific shot requirements.
Whether you need a towering high shot to carry over obstacles or a low penetrating ball flight to combat wind, the proper mid-launch low spin shaft provides the versatility to adjust and optimize your shots.
How I Picked The Best Mid-Launch Low Spin Driver Shaft
When buying a mid-launch, low-spin driver shaft, there are several key factors to consider. I had to put these aspects on the checklist to ensure I handpicked the best products to review. Here are the key considerations:
1. Launch Characteristics: The primary goal is to achieve a mid-launch trajectory with reduced spin. So I looked for shafts designed to provide this type of ball flight. If you’re about to make a decision, make sure the shaft offers a balance between launch and spin, promoting optimal distance and control.
2. Flexibility: The five shafts reviewed in this article have shaft flex that suits swing speed and tempo. So it gets a bit personal here, as it depends on your playing metrics. Generally, slower swing speeds benefit from a softer flex, while faster speeds may require a stiffer flex to control spin and optimize launch conditions—so different strokes for different folks.
3. Weight: The weight of the shaft can impact the overall performance. Heavier shafts reduce spin and offer more control, while lighter beams can help increase clubhead speed and generate more distance. I had to consider the average player’s swing speed while considering the weight of each shaft, but your personal preference comes into play here.
4. Torque: Torque refers to the shaft’s resistance to twisting during the swing. A lower torque rating typically results in less spin, while a higher torque can provide more forgiveness and a higher ball flight. Aim for a torque rating that balances stability and feel for a mid-launch, low-spin driver shaft.
5. Kick Point: The kick point, or bend point, determines where the shaft flexes during the swing. A mid-kick point is typically recommended for a mid-launch trajectory. It allows for a combination of power and control, reducing spin while generating enough distance energy.
Above all, It’d help if you get professionally fitted for a driver shaft. A club fitting session will consider factors such as swing speed, launch angle, spin rate, and other characteristics to determine your game’s optimal shaft. This can help maximize performance and achieve the desired mid-launch, low-spin ball flight.
Remember, selecting the right driver shaft involves finding a balance between various factors, so a professional club fitting can significantly assist in identifying the ideal shaft for your specific needs and preferences.
But I’m confident that the driver shaft reviewed in the above article will give you the optimal shot results you want. Is there a particular driver shaft you think should be added to this list? Let me know in the comments.
The New Level 623-CB golf club offers impressive features for golf enthusiasts. Its key highlights include a titanium alloy head for enhanced distance, a precision-milled face for improved accuracy, and an adjustable loft for customizable shots. While these hint at power and control, these clubs’ price tag, feel appearance, and sound are areas of criticism.
The first impression I got from hitting the New Level 623-CB club was that it looks and plays similarly to the ZX7 in many ways, but the 623-CB seems to have a slightly better top line. It boasts impressive technical specifications, including [insert key technical details], ensuring superior application performance. Its user-friendly interface and intuitive controls make it accessible to users of all levels.
In this comprehensive review, I’ll walk you through the detailed features and performance of the New Level 623-CB, providing you with the relevant pros and cons of playing with this iron.
New Level 623-CB
Blade-Style Design
Premium Materials and Construction
Muscle Back Cavity for forgiveness
Precision Forged for exceptional feel
Thin Topline and Compact Shape for a sleek appearance
Custom Fitting Options for personalized specifications
Versatility and Control in shot shaping and trajectory
Attention to Detail in aesthetics and craftsmanship
The New Level 623 CB irons boast superior construction and design that cater to golfers seeking advanced performance on the course. These irons are meticulously crafted with precision and incorporate innovative technology to enhance playability.
The clubhead: The New Level 623 CB irons clubhead is made from a high-grade titanium alloy, providing exceptional strength and durability while minimizing weight. This construction allows for better weight distribution, forgiveness, and increased distance on shots.
The club’s face: One notable feature is the precision-milled face, which enhances accuracy and consistency. The look is engineered with intricate grooves and precise thickness to optimize ball spin and control, enabling golfers to achieve greater shot precision and greenside performance.
Loft system: The New Level 623 CB irons also offer an adjustable loft system, allowing players to fine-tune their shots to suit their preferences and course conditions. This customization option enhances versatility and adaptability, ensuring optimal performance across various playing situations.
Overall design: The design of the New Level 623 CB irons incorporates a progressive cavity back, gradually transitioning from a muscle-back design in the shorter irons to a more forgiving cavity-back design in the longer irons.
This design feature optimizes the center of gravity placement throughout the set, promoting a higher launch, improved control, and an enhanced feel.
The high-quality 1020 carbon steel is a sure hint of a soft and responsive feel, but many users argue this benefit and compare it with alternative clubs like the Ping i59, where the former falls short.
On the bright side, 623-CB’s construction features a compact, forged cavity-back design, which helps to increase forgiveness and consistency.
Most importantly, New Level has incorporated this construction without letting go of control and workability that best serve skilled golfers.
Performance
Two factors echoed when you mentioned the New Level 623 CB Forged Irons performance: Spin and launch.
Since these irons offer medium to low launch angles, they’re an excellent club to penetrate ball flights and optimize distance control.
Another critical performance aspect is forgiveness, which outshines many similar clubs in its class. The award-winning 623-CB boasts consistent carry, ball speed, backspin, and dispersion, even on off-center strikes.
So if you value precision and consistent shots, the New Level 623-CB iron is a worthy consideration.
Insights: Most Wanted Testing
In the 2022 Most Wanted Testing on Golfspy, the New Level 623 CB Forged Irons became number one and were recognized as the “Best Player’s Iron 2022.” The most significant area of outstanding performance was accuracy. It was also complimented for its profile and looks.
But it’s worth noting that this testing recognized poor acoustics as a significant pitfall of the New Level 623-CB. In the testing, the iron had an overall result of 92.7, about six points above its runner-up iron, the Ping i59.
The testing showed that 623-CB iron had accuracy results of 93.7, Forgiveness results of 82.2, and distance results of 78.4.
In the opinion of many players who have played with the iron, the 623-CB competes for spots with clubs like the Srixon ZX7 and PING I59. These three options share a lot of similarities, but here is a detailed comparison of their offerings:
The New Level 623-CB produces a consistent carry, ball speed, backspin, and dispersion. It is the best player’s Iron 2022 and worth your consideration, even though it performs below expectations in areas like looks and sound.
But I believe that as new competitors emerge, the ‘glorified features’ in the New Level 623-CB may become bare in the latest club models, and then the 623-CB won’t be exciting for modern golf players.